1000 Gallon Fish Room Build

OP
OP
Akersta

Akersta

Active Member
View Badges
Joined
Jul 5, 2015
Messages
239
Reaction score
180
Location
Indianapolis
Rating - 0%
0   0   0
Sorry, been rather busy at work lately but I have managed to make decent progress on the aquascaping. I spent numerous hours washing (10) 5 gallon buckets of Marco Rock sand. Ended up using a piece of pvc pipe on the end of my hose and let it run for several minutes while mixing periodically. Hopefully this will reduce the cloudiness after filling the tanks as I have a decent amount of silt to sweep up on my driveway still.

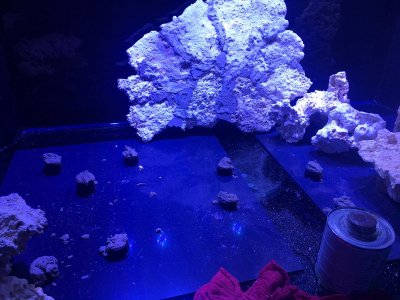
I decided to place 1/4" thick PVC sheets on the bottom of each tank. These were 24" x 24" so they don't cover the entire bottom but do help protect the areas where the majority of rock has been placed. I also used the PVC sheet to glue pipe standoffs to support the base live rock pieces. After glueing these pieces, I filled each piece with Marco cement and placed the rock on top. This should help keep the rock in place along with keeping it slightly elevated off the sand bed.
IMG_6244.JPG

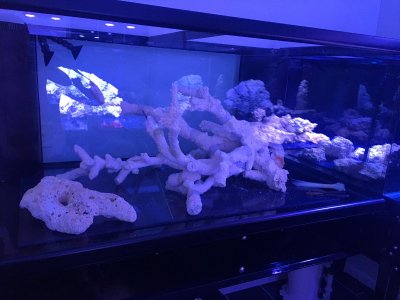
It's hard to make out but that large flat rock above is nearly 30" in length. I had to make these from numerous pieces of shelf rock cemented together. To date, I've gone through 45 lbs of E-Marco cement and 40 sticks of epoxy. For the critical joints, I used epoxy followed by cement. With the exception of the Tonga rock which I used Titanium threaded rod for reinforcement. Not sure this was needed as the epoxy alone seemed to be stronger than the rock itself. I found this out the hard way while trying to disassemble the rock to change out the 316 stainless threaded rid I had installed first. I ended up breaking mist pieces everywhere other than the old joint .
IMG_6243.JPG
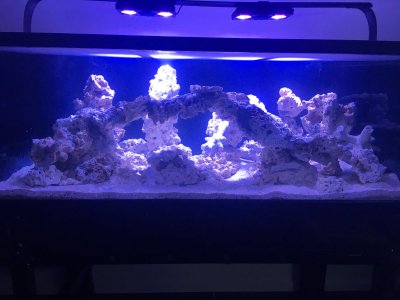
Here is a picture of the 250DD sps tank as of last week. I've nearly finished as if now but cannot decide if I like all of the tonga rock I've glued together. Essentially the left most 2/3's of the tank rock is cantilevered from the other side. I had to add a few pieces every day to slowly build my way out.

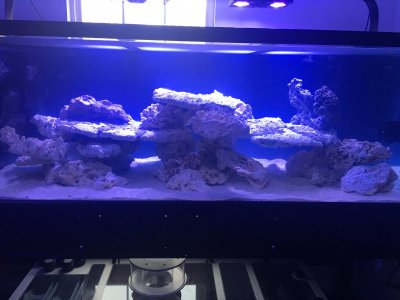
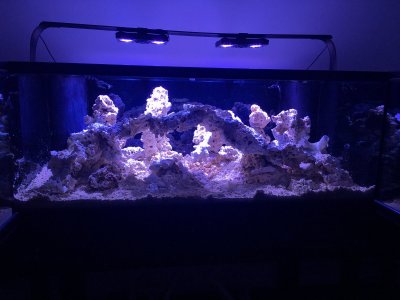
Below is a picture of the middle 30oDD which will be my LPS dominate mixed reef. I'm pretty much done with the aquascaping for it other than a little more cement on the bridge perhaps.
IMG_6330.JPG

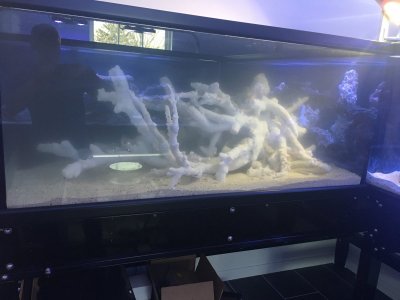
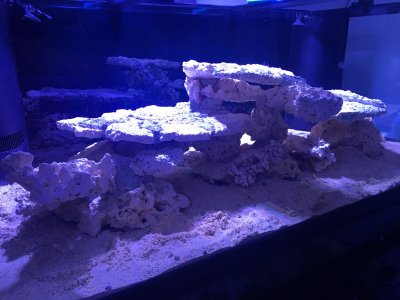
The side 300DD will be another mixed reef along with aggressive fish and my epaulette. I tried to leave as much open space as possible for the shark to swim/walk around. I've still got to add an 8" PVC pipe to the back of the tank for it to hide in during the day.
IMG_6297.JPG

I should have all the live rock completed this week and plan on starting to plumb the 1 1/4" drains this weekend. I'll dry fit all drain and return lines first before glueing in place.

I have made one change in plans in regards to refugiums. I've been concerned that there will only be around 500 lbs of live rock for the 1,000 or so gallons. With that said, I'm going to put a 60 gallon tank in both corners for additional biological filtration. I can then fill with another 300-400 lbs of rubble with cheato growing on top.

Also on my to do list this week is to install the 1/2" thick white starboard underneath each tank on the back along with wire duct. The starboard will allow for easy mounting of various devices and modules along with covering up the electrical wires.
 

jsker

Reefing is all about the adventure
View Badges
Joined
Apr 11, 2015
Messages
24,974
Reaction score
79,736
Location
Saint Louis
Rating - 0%
0   0   0
Pretty cool having the different type of aquascaping.
 
OP
OP
Akersta

Akersta

Active Member
View Badges
Joined
Jul 5, 2015
Messages
239
Reaction score
180
Location
Indianapolis
Rating - 0%
0   0   0
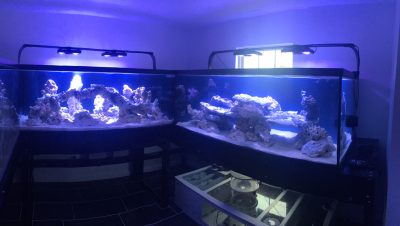
As of last night all (3) tanks are filled and cycling. I've only got a power head running on each tank as I haven't completed the plumbing yet. Hopefully I'll have the plumbing finished next week.

IMG_6415.JPG

300DD LPS tank.

IMG_6414.JPG

300DD predator tank.

IMG_6416.JPG

250DD SPS tank. Just filled it yesterday and don't have any lighting over it as of yet. Still not happy with the rock work but I was sick of working on it.

IMG_6417.PNG


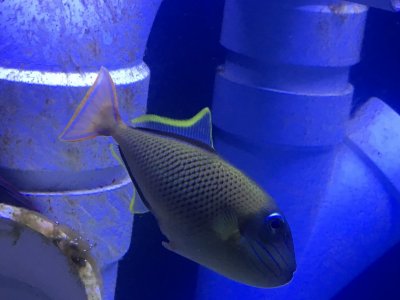
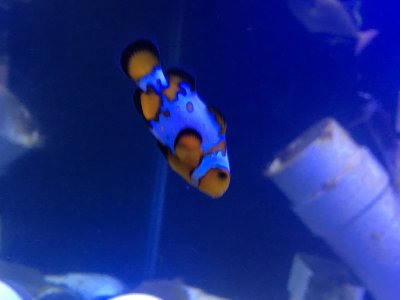
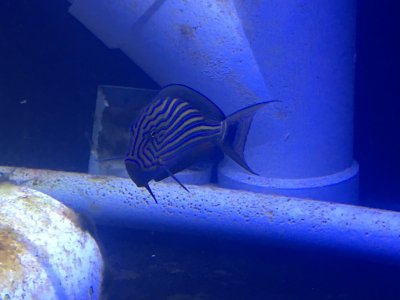
Was also able to pull a few fish from my tanks and put into the 150DD for quarantine. Debating to just do hypo or treat them as well.

IMG_6383.JPG

IMG_6381.JPG

IMG_6382.JPG
 
OP
OP
Akersta

Akersta

Active Member
View Badges
Joined
Jul 5, 2015
Messages
239
Reaction score
180
Location
Indianapolis
Rating - 0%
0   0   0
It's been a while since my last post. The plumbing ended up being very involved despite modeling everything up in 3D before hand. Finally kicked a return pump on over the weekend to get water running through the sump. I figured I would miss glueing a fitting or two but not one of the 3" return line fittings. Of course the 230 watt pump was set on full power when I plugged it in and all the gate valves were dialed in pretty far. Ended up blowing pipe out of the fitting a 15 gallons of water across the room.

IMG_6951.JPG


After several tests, I was able to leave it running. Still have a few drain pipes dripping occasionally. I wouldn't recommend trying to use up all of a can of PVC solvent. It starts getting thicker and doesn't work nearly as well.

Also, I strongly recommend testing as much plumbing as possible with RO water. My first attempt at testing my aquarium bulkheads was by dumping 15 gallons of top off water to the tank only to find out one of the bulkheads was bound up and wouldn't seal no matter how tight. It was a bad night.

IMG_6991.JPG


IMG_6996.JPG


IMG_7001.JPG


IMG_6992.JPG


Currently only running (1) 230 watt Red Dragon @ around 100 watts. I ran it for a few minutes at 200 watts which was almost more flow than the sump could handle. I'm guessing it was supplying 3,000 - 4,000 GPH as it was pushing the limit of my overflows. The pump is dead silent as well. Still working on tuning the overflows but the Radion fans will be significantly louder than the plumbing.

IMG_6965.JPG


Drilling the Dreambox for (6) additional future drains almost made me cry.

IMG_6911.JPG


IMG_6931.JPG


(4) of the drains would be for frag and refigum tanks with the larger ball valve being a return for a chiller.

IMG_6557.JPG


The one con about using steel for the stand is adding holes after it's built. I had to grab a mag drill from work to cut several 2" diameter holes for piping and cables. Thankfully it barely fit between support beams.

IMG_6422.JPG


Here is good example of what not to do when setting up a new tank. It had been running a few months with a fish or two until I decided to add (4) larger fish from another tank. It didn't take long for a terrible algae/bacterial bloom. I ended up adding several filter bags of Siporax along with a 57 watt UV light. This cleared up the water in a few days.


Last edited:

jsker

Reefing is all about the adventure
View Badges
Joined
Apr 11, 2015
Messages
24,974
Reaction score
79,736
Location
Saint Louis
Rating - 0%
0   0   0
Coming along well.
 

Jizu Puentes

Well-Known Member
View Badges
Joined
Jun 2, 2015
Messages
803
Reaction score
469
Location
Middleburg
Rating - 0%
0   0   0
I'm excited to see these tanks full of coral! I was looking at your sps tank scape and have a suggestion. A lot of the rocks are going horizontally and I think they'll look good with sticks on them but I think one area could be changed.
2017-04-11 23.14.16.jpg

I think if this area could be turned somehow to be a little more parallel to the floor that it'd work better for coral placements and growth. Just my opinion of course.
Looking forward to updates
 
OP
OP
Akersta

Akersta

Active Member
View Badges
Joined
Jul 5, 2015
Messages
239
Reaction score
180
Location
Indianapolis
Rating - 0%
0   0   0
I'm excited to see these tanks full of coral! I was looking at your sps tank scape and have a suggestion. A lot of the rocks are going horizontally and I think they'll look good with sticks on them but I think one area could be changed.
2017-04-11 23.14.16.jpg

I think if this area could be turned somehow to be a little more parallel to the floor that it'd work better for coral placements and growth. Just my opinion of course.
Looking forward to updates

Thanks for the feedback. Yes, I agree with you on that. I'm really not that happy with the Tonga rock work I created. At some point I'm going to make some changes with that being one of them.
 

revhtree

Owner Administrator
View Badges
Joined
May 8, 2006
Messages
47,740
Reaction score
86,899
Rating - 100%
1   0   0
Looking great!
 
OP
OP
Akersta

Akersta

Active Member
View Badges
Joined
Jul 5, 2015
Messages
239
Reaction score
180
Location
Indianapolis
Rating - 0%
0   0   0
My ADHD has been a little out of control lately so I don't have many completion pictures to share. I've been slowly raising the salinity in my fish room. To my surprise, both Nitrate and Phosphate levels were very low. The brown slim algae is starting to subside as well. It has only been a week since the skimmer has been running. Although it sounds cool, emptying a 12" collection cup every other day is a real chore. I've been working on hooking up a diaphragm waste pump to pump through my attic and down the drain in my laundry room. I also have a neck cleaner being delivered tomorrow for it.

I'm still somewhat ignoring the fish room for now and letting the water become more established. Current plan is to add my first round of quarantined fish in June. I doubt I any corals until July or August. However, I'm out of space in my two 20 gallon frag tanks.

IMG_7222.JPG


IMG_7224.JPG


I did finally get a chance to hook up a new Geo 510 calcium reactor with the MasterFlex pump last week on my 55 gallon reef. Since this will be transform into an SPS frag tank I had to do it as my SPS have really suffered lately. It seems to be working very well. I do have a Geo 410 secondary reactor chamber coming tomorrow to help raise the PH.

IMG_7225.JPG


My main project as of lately is installing the HRV unit. After reading that you cannot install in an attic I had to make a quick change of plans and install in my laundry room. It's been a real pain to squeeze in beside my furnace and dodge around the ceiling studs. I managed to fit it in by a few inches. Just have to finish installing the ducting on top and the rest should be fairly easy. And no I didn't run the gas line to the furnace but would like to choke whoever did.

IMG_7221.JPG


The HRV will likely be useless by the time it's up an running considering the increasing outside humidity. I'm already planning on getting a small portable AC unit and installing in the fish room to take some of the load off the main unit.
 

jsker

Reefing is all about the adventure
View Badges
Joined
Apr 11, 2015
Messages
24,974
Reaction score
79,736
Location
Saint Louis
Rating - 0%
0   0   0
My ADHD has been a little out of control lately so I don't have many completion pictures to share. I've been slowly raising the salinity in my fish room. To my surprise, both Nitrate and Phosphate levels were very low. The brown slim algae is starting to subside as well. It has only been a week since the skimmer has been running. Although it sounds cool, emptying a 12" collection cup every other day is a real chore. I've been working on hooking up a diaphragm waste pump to pump through my attic and down the drain in my laundry room. I also have a neck cleaner being delivered tomorrow for it.

I'm still somewhat ignoring the fish room for now and letting the water become more established. Current plan is to add my first round of quarantined fish in June. I doubt I any corals until July or August. However, I'm out of space in my two 20 gallon frag tanks.

IMG_7222.JPG


IMG_7224.JPG


I did finally get a chance to hook up a new Geo 510 calcium reactor with the MasterFlex pump last week on my 55 gallon reef. Since this will be transform into an SPS frag tank I had to do it as my SPS have really suffered lately. It seems to be working very well. I do have a Geo 410 secondary reactor chamber coming tomorrow to help raise the PH.

IMG_7225.JPG


My main project as of lately is installing the HRV unit. After reading that you cannot install in an attic I had to make a quick change of plans and install in my laundry room. It's been a real pain to squeeze in beside my furnace and dodge around the ceiling studs. I managed to fit it in by a few inches. Just have to finish installing the ducting on top and the rest should be fairly easy. And no I didn't run the gas line to the furnace but would like to choke whoever did.

IMG_7221.JPG


The HRV will likely be useless by the time it's up an running considering the increasing outside humidity. I'm already planning on getting a small portable AC unit and installing in the fish room to take some of the load off the main unit.
look into a ductless ac unit
 

tcarter1936

Well-Known Member
View Badges
Joined
Jul 19, 2014
Messages
978
Reaction score
619
Location
West Melbourne florida
Rating - 0%
0   0   0
look into a ductless ac unit
My Mitsubishi heat pump ac ductless is perfect for my fish room. It takes care of the 2,5 gallons of evaporation I get each day and in summer I've never needed a chiller and the heat pump is so efficient that it's cheaper to heat the whole room than using my two 500 watt heaters.
 
OP
OP
Akersta

Akersta

Active Member
View Badges
Joined
Jul 5, 2015
Messages
239
Reaction score
180
Location
Indianapolis
Rating - 0%
0   0   0
Unfortunately I've been out of town for work most of June but I did manage to get a few things done beforehand. I ended up adding (4) 20 amp to the room. This is overkill but I would rather have enough capacity up front than have to add more later. The outlets were all placed along an interior wall underneath the 250DD as this was the easiest place to drop the Romex wire down for installation. It ended up being the hottest day of the year that day which was hovering around 90 deg. F. so I didn't want to stay in my attic longer than necessary. Since the outlets will be covered up by starboard panels and non-accessible once completed, I decided to go with panel mounted GFCI's so resetting can be done easily. The 20 amp GFCI's are rather expensive but I did find them at Menard's for around $50/each. Each 20 amp circuit only has (1) duplex outlet as of now. My logic being that only power strips and/or Apex 832 units are connected to minimize total outlets required.

IMG_7501.JPG

GFCI's at top of panel.


IMG_7500.JPG

I also managed to place the last 1/4" thick steel top plate into the corner. This was left out originally since I was in a hurry to fill the tanks. It turned out to be quite the hassle as the plate was the size of the opening and weighed around 100 lbs. A buddy helped me lift the plate over and down but it was impossible to place it downward since there was no place to stand and it was too risky to let fall into the glass. After $30 in random items at Home Depot, I was able to quickly rig up a pulley to safely lower the plate into position from the floor. Once in position, I was able to finish drilling the 1 3/4" holes for miscellaneous cables to get down to the controllers mounted underneath.

IMG_7350.JPG


IMG_7351.JPG

Overall the system seems to be doing very well. After checking my parameters yesterday, everything seems to be right on par with Nitrates and Phosphates at very low levels. I've got a decent amount of brown algae growing in the middle 300DD as this is the only tank I've had lights running over as of yet. The other 300DD has a decent amount of hair algae growing as it gets a fair amount of afternoon sun. The pod population seems to be doing very well as well at this point. I'll be hooking up (2) 300 watt heaters this week to raise the water temperature as I've kept the water at room temperature to date. Hopefully I'll have a few corals added to one of the tanks in the next week or so. I've got to run my first batch of fish in quarantine through a copper treatment before adding them next month. Hopefully by then my lids from ArtFully Acrylic will be in as I've had too many fish jump out in the past.
 
OP
OP
Akersta

Akersta

Active Member
View Badges
Joined
Jul 5, 2015
Messages
239
Reaction score
180
Location
Indianapolis
Rating - 0%
0   0   0
Figured it's time to share a few more pictures as things continue to progress at a slower pace. I starting adding some of what I thought were my most hardy LPS corals a month or so ago. Unfortunately a few of my larger Chalice colony's receeded and I ended up losing them. It was then that I pulled some of the more valuable corals back out. However, the few I have left don't seem to be phased. On that note, I've decided to hold off until later this fall or winter to add many more corals.

I received my tank covers from @artfullyacrylic yesterday and am very pleased. I spent way more time than I should have contemplating where to put cut outs.

IMG_7749.JPG


IMG_7746.JPG


IMG_7748.JPG


Now that the covers are on I hope to have my first batch of fish in them within the next month. I had to stop my first round of Cupramine as my clown tang was not doing well. After a long battle trying to bring him back to normal he died so now it's time to treat one more time for (3) weeks.

Had time to install a set of LED puck lights over top of the sump to help see during maintenance.

IMG_7750.JPG


IMG_7751.JPG


IMG_7752.JPG


Attempted to organize some of the wiring under my 20 gallon frag quarantine tanks along with finally hooking up my DOS pumps after sitting underneath for a year or more.

IMG_7754.JPG
 
Back
Top