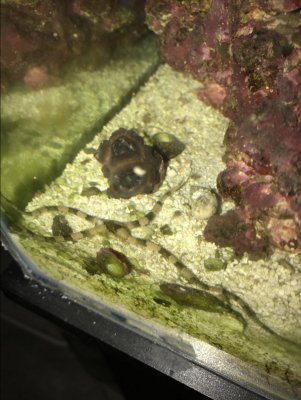
DIY acrylic frag rack

ahiggins

2500 Club Member
View Badges
Joined
Apr 13, 2016
Messages
4,827
Reaction score
3,493
Rating - 0%
0   0   0
Hey all! I've been meaning to work on my 40 gal breeder frag rack. Since I have the day off, I'm documenting it for you :)

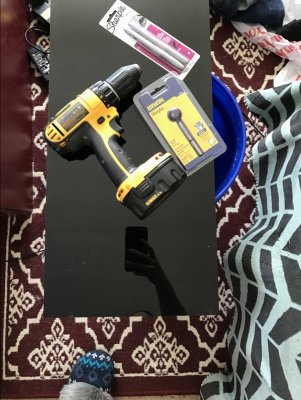
Materials:
1/4" acrylic sheet. (I bought a black 12x24". You could also use 3/8") bought on amazon
Handheld power drill (make sure you have extra batteries)
White permanent marker (or black if you're using clear acrylic)
1/2" forstner bit
5 gal bucket
Old frag rack (template)
Vacuume

Pic of materials:
IMG_0505.JPG
Step one:
Put the critters away...don't want them eating the acrylic bits.
IMG_0506.JPG

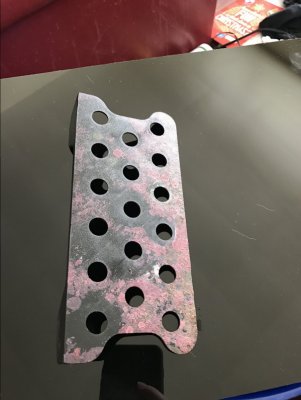
Step two:
Mark where you want the holes to be.
IMG_0507.JPG
IMG_0508.JPG
Step three:
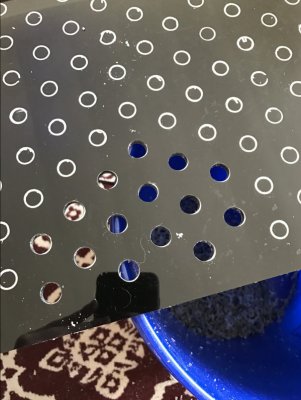
Start drilling!
IMG_0510.JPG

Short break-battery died :(
I got through 38 and a half holes
 
Last edited:

Pola0502ds

Zoa Addict
View Badges
Joined
Jan 13, 2016
Messages
1,574
Reaction score
880
Location
Poland, Ohio
Rating - 0%
0   0   0
I am in the process of making my own at work, i'm curious how you plan to attach it? It's this a rack that's getting attached to a side of the tank or is it sitting on the bottom? Mine will attached to the side so I need to some how attach my mag float to it..

A piece of advice since my company works with acrylic.. If you want to make each hole a little nicer, remove some burs, polish the edges, etc.. You can use a few different grits of sand paper on the higher end, hit each hole really quick, and then set up a torch. Pass over each hole with the torch and it will polish it right up.
 
OP
OP
ahiggins

ahiggins

2500 Club Member
View Badges
Joined
Apr 13, 2016
Messages
4,827
Reaction score
3,493
Rating - 0%
0   0   0
Good info :)
It's going to sit on 6" risers. I wish it was a bit wider than 12" but it was $30 more expensive so I opted for 12" lol it was only $12 on amazon. This thing easily would have cost $60+ buying it from a vendor.
135 holes down and my battery died again haha
And it's just for the frag tank so it doesn't have to be perfect :)
 
OP
OP
ahiggins

ahiggins

2500 Club Member
View Badges
Joined
Apr 13, 2016
Messages
4,827
Reaction score
3,493
Rating - 0%
0   0   0
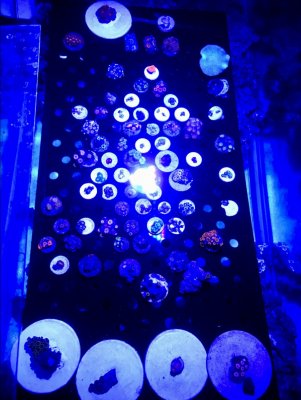
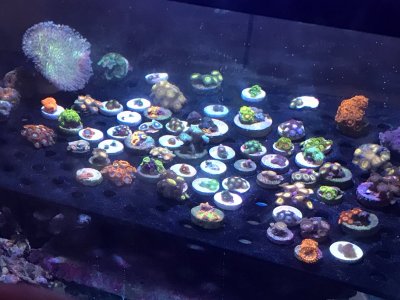
Alright! After charging the battery forEVER, it's done and in the tank. There's a 3" space on either side of no holes :)
And area is all cleaned up. Everything is pretty ticked off since I had to take them out of the tank to transfer
IMG_0517.JPG IMG_0518.JPG
 

hyde7278

Community Member
View Badges
Joined
Jan 10, 2017
Messages
95
Reaction score
43
Rating - 0%
0   0   0
IMG_0024.JPG


Very nice. I made a small rack with some egg crate and some superglue.

I have a biocube 29 so don't have a lot of space.
 
OP
OP
ahiggins

ahiggins

2500 Club Member
View Badges
Joined
Apr 13, 2016
Messages
4,827
Reaction score
3,493
Rating - 0%
0   0   0
IMG_0024.JPG


Very nice. I made a small rack with some egg crate and some superglue.

I have a biocube 29 so don't have a lot of space.
nice :) I had eggcrate but wanted to replace it for what seems like forever. it was just as simple as ordering acrylic and getting that drill bit.
My arms are very sore today lol
 
OP
OP
ahiggins

ahiggins

2500 Club Member
View Badges
Joined
Apr 13, 2016
Messages
4,827
Reaction score
3,493
Rating - 0%
0   0   0
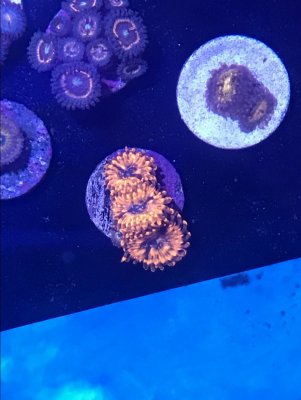
Quick update since everyone is open and happy.
And a pic of my favorite palys
And a pic of Fred, the 4 legged brittle star who is always super shy lol
IMG_0559.JPG IMG_0562.JPG IMG_0566.JPG
 

cromag27

octoaquatics.com - ig = @octoaquatics. view my sig
View Badges
Joined
Sep 7, 2013
Messages
8,249
Reaction score
11,239
Location
arizona
Rating - 0%
0   0   0
Careful when flame polishing plastics. they can easily catch on fire and melt.

Here's a rack I made the other day. it's alright.

IMAG1129.jpg
 
OP
OP
ahiggins

ahiggins

2500 Club Member
View Badges
Joined
Apr 13, 2016
Messages
4,827
Reaction score
3,493
Rating - 0%
0   0   0
Thanks wiz :) I love how it turned out!
And I like the sliding aspect of it cromag :)
 

RickG

Active Member
View Badges
Joined
Jan 21, 2017
Messages
385
Reaction score
252
Location
Miami
Rating - 0%
0   0   0
Hey all! I've been meaning to work on my 40 gal breeder frag rack. Since I have the day off, I'm documenting it for you :)

Materials:
1/4" acrylic sheet. (I bought a black 12x24". You could also use 3/8") bought on amazon
Handheld power drill (make sure you have extra batteries)
White permanent marker (or black if you're using clear acrylic)
1/2" forstner bit
5 gal bucket
Old frag rack (template)
Vacuume

Pic of materials:
IMG_0505.JPG
Step one:
Put the critters away...don't want them eating the acrylic bits.
IMG_0506.JPG

Step two:
Mark where you want the holes to be.
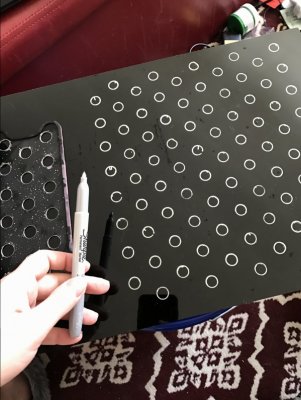
IMG_0507.JPG
IMG_0508.JPG
Step three:
Start drilling!
IMG_0510.JPG

Short break-battery died :(
I got through 38 and a half holes


Hey awesome frag rack! Was wondering if you could post the link to the acrylic sheet you bought, I can't find it
 

High pressure shells: Do you look for signs of stress in the invertebrates in your reef tank?

  • I regularly look for signs of invertebrate stress in my reef tank.

    Votes: 36 31.3%
  • I occasionally look for signs of invertebrate stress in my reef tank.

    Votes: 28 24.3%
  • I rarely look for signs of invertebrate stress in my reef tank.

    Votes: 21 18.3%
  • I never look for signs of invertebrate stress in my reef tank.

    Votes: 30 26.1%
  • Other.

    Votes: 0 0.0%
Back
Top