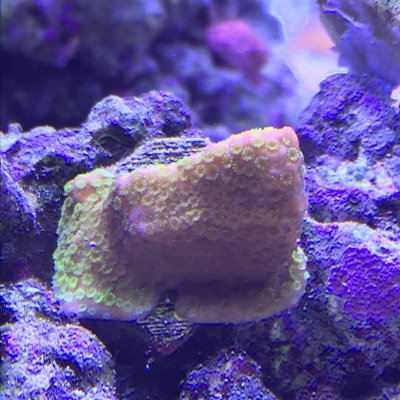
Ice cubes and Corn Pops?
Navigation
Install the app
How to install the app on iOS
Follow along with the video below to see how to install our site as a web app on your home screen.
Note: This feature may not be available in some browsers.
More options
You are using an out of date browser. It may not display this or other websites correctly.
You should upgrade or use an alternative browser.
You should upgrade or use an alternative browser.
Gilroy 425g Build Thread (All Apex, all the time)
- Monster Build
- Thread starter Terence
- Start date
- Tagged users None
Sulfur Denitrator ?
Ding ding ding. [emoji122]
Just got the real goods - as they say in the UK, what a nice piece of kit!
Pics and more to follow soon. Thanks @MarineDepot for the fast delivery, as always!
Pics and more to follow soon. Thanks @MarineDepot for the fast delivery, as always!
Nevermind, someone beat me to it. 
I thought white ones looked like teeth and the yellow ones looked like airsoft pellets.
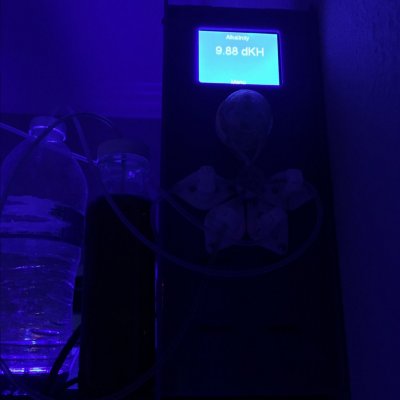
Well AMI went offline for about 24 hours as I ran out of the special Welshes "great juice"!
Today I got a special package and inside was a super huge resupply. Thanks @JimWelsh, I am back in business and measuring my kH again!
 !
!
Today I got a special package and inside was a super huge resupply. Thanks @JimWelsh, I am back in business and measuring my kH again!

 !
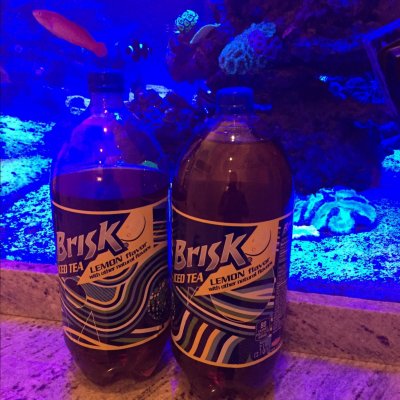
!Yep, I hear its secret is wrapped up in those "other natural flavors"
I glad you posted this. I just ran out to Walmart and bought 10 pallets before they get sold out. Can we say EBay Millionaire.Yep, I hear its secret is wrapped up in those "other natural flavors"
revhtree
Owner Administrator
View Badges
Staff member
Super Moderator
Reef Squad
Partner Member 2024
Excellence Award
RGB
Photo of the Month
Article Contributor
R2R TV Featured
Hospitality Award
Article Administrator
Black Friday Sponsor
Partner Sponsor 2023
Industry Professional
My Aquarium Showcase
- Joined
- May 8, 2006
- Messages
- 47,740
- Reaction score
- 86,931
I glad you posted this. I just ran out to Walmart and bought 10 pallets before they get sold out. Can we say EBay Millionaire.
LOL!
- Joined
- Jun 8, 2015
- Messages
- 753
- Reaction score
- 386
I just saw you are using the supplied wall wart for the Coralcare. You don't need to use it on 220 at all. All you need a basic 5V 1A USB power brick like from a phone. This is the one I am using on my Coralcare controller.

Sure - I know, its sixes really.
Earlier I showed a picture of some yellow and white stuff and it was successfully guessed that it was for a sulphur denitrator.
Even with my refugium area with a big collection of macroalgae, great skimmer, live rock in the sump, etc. I still have a Nitrate level around 10 -- and I really do not have that many fish yet.
But I firmly believe some of the success to a great reef tank with lots of growing healthy coral is to feed the tank a lot, have it available for uptake, and then get it out. Among many things, I believe the heavy feeding, lots of fish, strong skimming, calcium reactor and a sulfur denitrator is the combo that has really helped @Brad Syphus maintain such a great tank. So, I decided to add one.
When I was at one of the conferences I saw the calcium reactors from AquaMaxx from @Marine Depot and was really impressed with the build quality and the clever use of channeled acrylic for the plumbing. These reactors are also what are used (with some additional pieces) for their sulphur denitrators. I spoke to Joseph there and he recommended their largest model, the TS-3 - so that is what I got.
I got the unit a week ago. It was VERY well packaged with lots of foam inserts. The instructions were very clear.
Here is a walkthrough of the set up and my experience setting it up.
Here are all the pieces that are included:
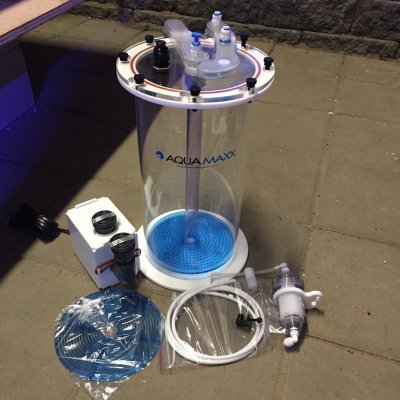
First you rinse all the media. There are two kinds, the yellow sulphur "balls" and the limestone calcium rock.
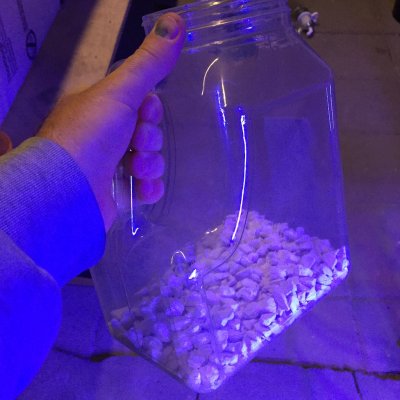
Look, I feel like Sutter finding a nugget like this!
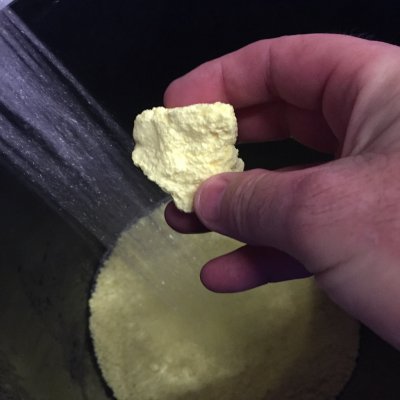
You want to put something in the tube so when you pour in the media it doesn't go down the main tube.
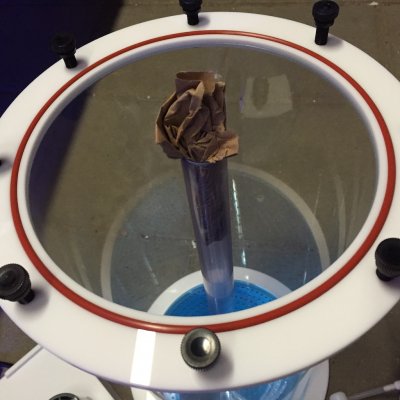
First the sulphur media goes in - they say 70% sulphur media to 30% calcium rubble.
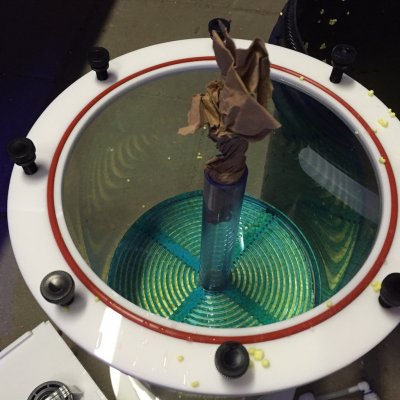
Next goes in the rubble, and then it still had some room so I added in some Two Little Fishes Reborn crushed coral. Up to the level recommended (2" below top)
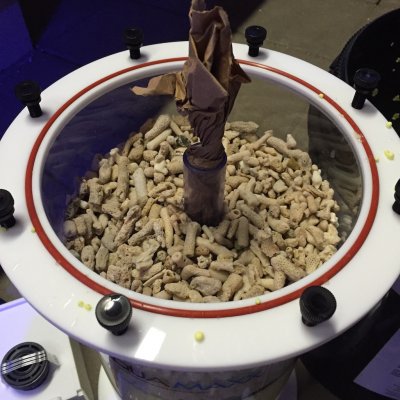
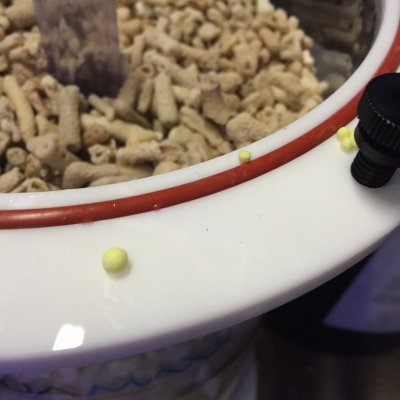
One thing to make sure of with any reactor is to make sure the area on the top surface and the o-ring is completely clean before putting the top on. Even a little grain of media like this will result in a leak as the top will not seal.
 \
\
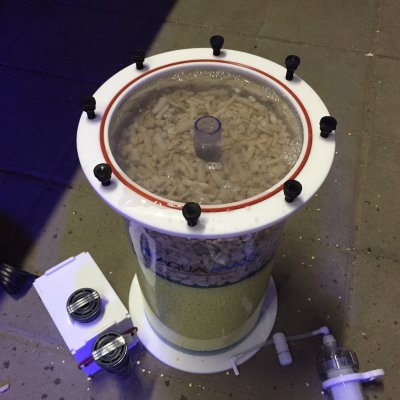
Reactor was filled with tank water and the top went on. The reactor uses a QUALITY Sicce pump so I really do not understand the reason to cover that up with an acrylic box with rubber bands. <confused on that one>
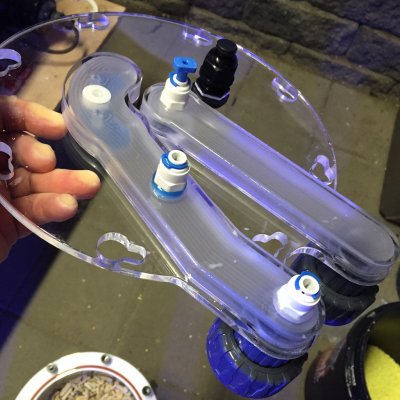
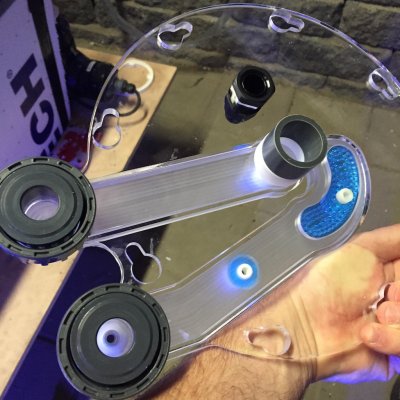
The design of the lid is really innovative. The use of acrylic pieces that are milled out and glued to the top of the reactor become the plumbing method to the recirculation pump.
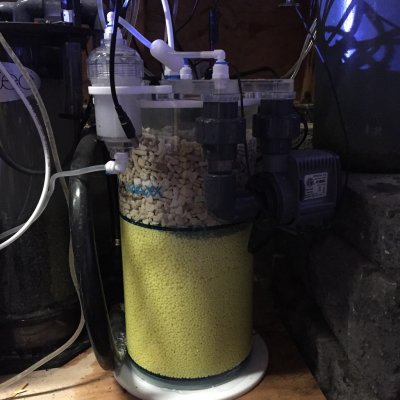
Reactor went in place next to the other gear. To feed the Sulfur Denitrator, I plumbed a Tee into my feed from my PMUP pump that feeds my carbon reactors.
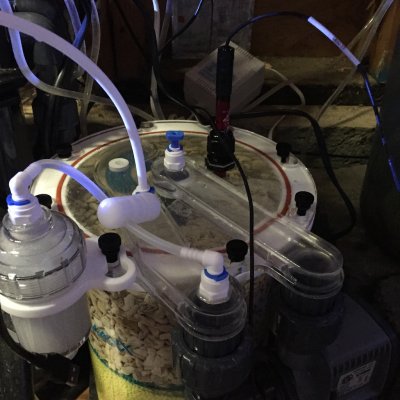
Installed the ORP probe into the top - more on this later.
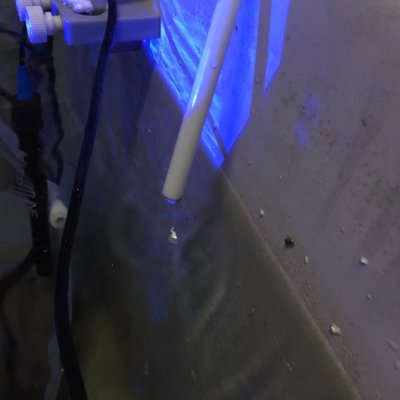
Adjusted the flow with the pinch valve to get it to just drip drip drip. It will be a couple of weeks until the bacteria colonize and it starts dropping the NO3.
I hope this was helpful to you all. This is really a nice piece of gear. In a week or so I will report back on how I am going to use the ORP and then ultimately what the net effect is on my level of NO3. Thanks for following along!
Even with my refugium area with a big collection of macroalgae, great skimmer, live rock in the sump, etc. I still have a Nitrate level around 10 -- and I really do not have that many fish yet.
But I firmly believe some of the success to a great reef tank with lots of growing healthy coral is to feed the tank a lot, have it available for uptake, and then get it out. Among many things, I believe the heavy feeding, lots of fish, strong skimming, calcium reactor and a sulfur denitrator is the combo that has really helped @Brad Syphus maintain such a great tank. So, I decided to add one.
When I was at one of the conferences I saw the calcium reactors from AquaMaxx from @Marine Depot and was really impressed with the build quality and the clever use of channeled acrylic for the plumbing. These reactors are also what are used (with some additional pieces) for their sulphur denitrators. I spoke to Joseph there and he recommended their largest model, the TS-3 - so that is what I got.
I got the unit a week ago. It was VERY well packaged with lots of foam inserts. The instructions were very clear.
Here is a walkthrough of the set up and my experience setting it up.
Here are all the pieces that are included:

First you rinse all the media. There are two kinds, the yellow sulphur "balls" and the limestone calcium rock.

Look, I feel like Sutter finding a nugget like this!

You want to put something in the tube so when you pour in the media it doesn't go down the main tube.

First the sulphur media goes in - they say 70% sulphur media to 30% calcium rubble.

Next goes in the rubble, and then it still had some room so I added in some Two Little Fishes Reborn crushed coral. Up to the level recommended (2" below top)

One thing to make sure of with any reactor is to make sure the area on the top surface and the o-ring is completely clean before putting the top on. Even a little grain of media like this will result in a leak as the top will not seal.
 \
\Reactor was filled with tank water and the top went on. The reactor uses a QUALITY Sicce pump so I really do not understand the reason to cover that up with an acrylic box with rubber bands. <confused on that one>

The design of the lid is really innovative. The use of acrylic pieces that are milled out and glued to the top of the reactor become the plumbing method to the recirculation pump.


Reactor went in place next to the other gear. To feed the Sulfur Denitrator, I plumbed a Tee into my feed from my PMUP pump that feeds my carbon reactors.

Installed the ORP probe into the top - more on this later.

Adjusted the flow with the pinch valve to get it to just drip drip drip. It will be a couple of weeks until the bacteria colonize and it starts dropping the NO3.

I hope this was helpful to you all. This is really a nice piece of gear. In a week or so I will report back on how I am going to use the ORP and then ultimately what the net effect is on my level of NO3. Thanks for following along!
Last edited:
Earlier I showed a picture of some yellow and white stuff and it was successfully guessed that it was for a sulphur denitrator.
Even with my refugium area with a big collection of macroalgae, great skimmer, live rock in the sump, etc. I still have a Nitrate level around 10 -- and I really do not have that many fish yet.
But I firmly believe some of the success to a great reef tank with lots of growing healthy coral is to feed the tank a lot, have it available for uptake, and then get it out. Among many things, I believe the heavy feeding, lots of fish, strong skimming, calcium reactor and a sulfur denitrator is the combo that has really helped @Brad Syphus maintain such a great tank. So, I decided to add one.
When I was at one of the conferences I saw the calcium reactors from AquaMaxx from @Marine Depot and was really impressed with the build quality and the clever use of channeled acrylic for the plumbing. These reactors are also what are used (with some additional pieces) for their sulphur denitrators. I spoke to Joseph there and he recommended their largest model, the TS-3 - so that is what I got.
I got the unit a week ago. It was VERY well packaged with lots of foam inserts. The instructions were very clear.
Here is a walkthrough of the set up and my experience setting it up.
Here are all the pieces that are included:

First you rinse all the media. There are two kinds, the yellow sulphur "balls" and the limestone calcium rock.

Look, I feel like Sutter finding a nugget like this!

You want to put something in the tube so when you pour in the media it doesn't go down the main tube.

First the sulphur media goes in - they say 70% sulphur media to 30% calcium rubble.

Next goes in the rubble, and then it still had some room so I added in some Two Little Fishes Reborn crushed coral. Up to the level recommended (2" below top)

One thing to make sure of with any reactor is to make sure the area on the top surface and the o-ring is completely clean before putting the top on. Even a little grain of media like this will result in a leak as the top will not seal.
\
Reactor was filled with tank water and the top went on. The reactor uses a QUALITY Sicce pump so I really do not understand the reason to cover that up with an acrylic box with rubber bands. <confused on that one>

The design of the lid is really innovative. The use of acrylic pieces that are milled out and glued to the top of the reactor become the plumbing method to the recirculation pump.


Reactor went in place next to the other gear. To feed the Sulfur Denitrator, I plumbed a Tee into my feed from my PMUP pump that feeds my carbon reactors.

Installed the ORP probe into the top - more on this later.

Adjusted the flow with the pinch valve to get it to just drip drip drip. It will be a couple of weeks until the bacteria colonize and it starts dropping the NO3.

I hope this was helpful to you all. This is really a nice piece of gear. In a week or so I will report back on how I am going to use the ORP and then ultimately what the net effect is on my level of NO3. Thanks for following along!
Had one of these on my 150. Awesome tool! If the drip rate gets off, you'll smell it! Lol.
That is why you use the ORP probe. With an eye on the ORP, should anything go wrong, I can cut the flow off via a solenoid valve plugged into my Apex Energy Bar 832 DC24 port (those will be on the market soon)Had one of these on my 150. Awesome tool! If the drip rate gets off, you'll smell it! Lol.
That is why you use the ORP probe. With an eye on the ORP, should anything go wrong, I can cut the flow off via a solenoid valve plugged into my Apex Energy Bar 832 DC24 port (those will be on the market soon)
That's awesome. Thank you for sharing. The only reason I haven't set it up again is that. I totally agree on the feeding and exporting. Maybe I can talk the wife into letting it back in now that I have the apex. Hehe
Wow that Aquamaxx denitrator is very cool! So unique in the plumbing on the top. Did it come with that probe port on the top of the lid or did you do that? I ask bc I'm very interested in the use of a ORP probe to control or be a safety check for the denitrator reactor.
I've used a Korallin BioDenitrator 1305 reactor on a few tanks now with great success. They are an awesome tool. I'm curious what the instructions say about what drip rate to start at and at what point to increase the drip rate and by how much? Like has been said, you will definitely smell it (kind of like rotten egg smell) when you need to increase the drip rate.
One issue I've had is, despite adjusting the drip rate with a 1/4" John Guest ball valve, the drip rate will eventually slow down, making you check and adjust it every day or so. I recently bought a higher end valve (1/4" Vertex needle gate valve) and hope that will solve the problem. We'll see as I haven't installed it yet. What ball valve are you using?
Also if you don't mind, how often does AquaMaxx say to change out the sulfer beads and how often to clean them? And do they explain how they advise you clean them? I love my Korallin unit but the directions they gave with the reactor were crap.
I used to use an AquaMaxx biopellet reactor and was impressed with the performance and build quality so if I ever have an issue with my Korallin Im happy that I can turn to a AquaMaxx as a replacement. Thanks!
Similar threads
- Replies
- 115
- Views
- 2,947
- Replies
- 20
- Views
- 482
- Replies
- 1
- Views
- 103
- Replies
- 10
- Views
- 200
New Posts
-
-
AIO Build steveschuergers 90 gallon Goni heavy mixed reef.
- Latest: Reefing_addiction
-
-
-


