Lets See some DIY Tank Stands

Poseidon

2500 Club Member
View Badges
Joined
Apr 7, 2007
Messages
3,258
Reaction score
37
Location
Swartz Creek, MI
Rating - 0%
0   0   0


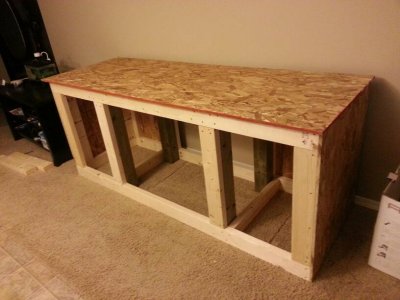
Before any glue, or fasteners. Just to show the corner construction.


No glue or screws here either.


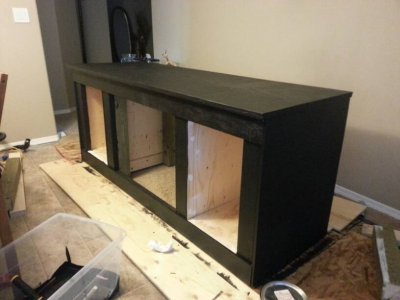
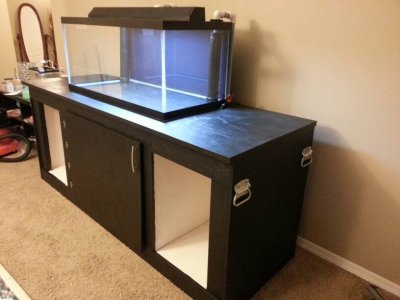
Those are all during initial construction, and before final sanding of the top. (You can see a gap in the front left corner between the tank and stand, that has been corrected.)
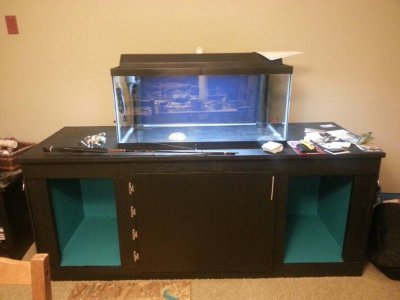
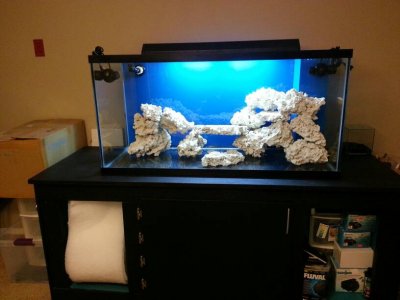
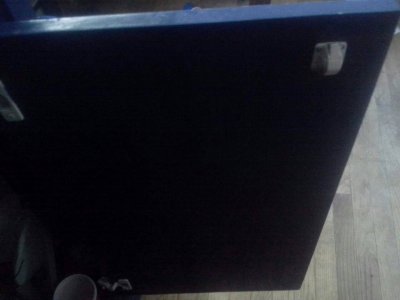
Here it is today:


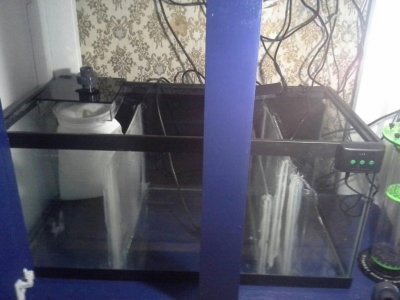
A move forced the design change. I no longer have a basement, for the sump. :( 
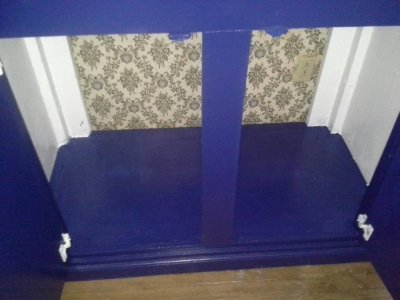
The stand is very solid, and I wanted a minimal design, when it had the shelf, there was rope lights above each, lighting the shelves for "knick knack" items.
 
Last edited:

Dave3112

2500 Club Member
View Badges
Joined
Dec 1, 2009
Messages
2,574
Reaction score
40
Location
Athens,AL
Rating - 0%
0   0   0
ImageUploadedByReef2Reef Aquarium Forum1362325020.336571.jpg


Down and dirty one I had my 125 on for a while. I'll actually skin it and trim it when I set the tank back up again.


Sent Via the R2R Forum APP
 

WillKatt

Active Member
View Badges
Joined
Jun 22, 2012
Messages
462
Reaction score
2
Location
Denver
Rating - 0%
0   0   0
MIne is not done yet. It just needs to be skinned

P1020901.jpg


Will look like this when done.

mock7.jpg
 

Gary M

New Member
View Badges
Joined
Mar 3, 2013
Messages
14
Reaction score
0
Location
Troy New York
Rating - 0%
0   0   0
the diy stand,


this is the frame i made today, its made out of 3/4" x 3+1/2" finish pine when the skins are attached the total thickness will be 1+1/4" thick


these are the skins that i will be putting on the frame, they are 1/2" pine vaneer plywood, they will have a custom match stain to match the wood work in our house


took a piece of 1/4" corian and lined the bottom of the stand, its now water proof any leaks down below will stay in the stand


base, top


Tradewinds

Active Member
View Badges
Joined
Apr 19, 2013
Messages
406
Reaction score
52
Location
O'Fallon, MO
Rating - 0%
0   0   0
Bump, lets see some more custom stands please.

I am in the process of building a stand for a 120 and would like to get some more ideas on ways to skin the frame and see different trimming options.
 

TrialandError

Well-Known Member
View Badges
Joined
Aug 14, 2012
Messages
503
Reaction score
2
Location
Fort Myers, FL
Rating - 0%
0   0   0
Not sure where my pics went but this is my stand after it was done. I did the stand with 2x4's and the skin is tounge and groove planks. The back is open and the sides and front each have a panel that comes off for access to the sump and electrical.

634A0E24-0432-4CAC-A426-544D8CD0B780-9708-00000BCD0BAA6633_zps8073c14c.jpg


C24A37F3-38CF-4C7A-A18A-5930560F16F2-18900-000014E284CF4D31_zpsbfa75215.jpg


I put up a sheet of plywood between the sump and the right side of the stand as I will eventually put in shelves. But that is where my electrical equipment is.
4C11BD2A-9D1A-4146-8698-D096F4F0F222-18900-000014E29A545DBF_zps2c7e1261.jpg


1F45D51F-1D9E-4D5A-BA9A-D9F87F958A05-2500-000002F3170F90D6_zpse52fe680.jpg


F345D9C5-CB83-469E-9F18-9EEDB0D5D96E-25838-000016BC741905AA_zps6654a8f2.jpg
 

JMSKI333

Valuable Member
View Badges
Joined
Sep 4, 2010
Messages
1,727
Reaction score
42
Location
Buffalo, NY
Rating - 0%
0   0   0
Here is my stand that I built back in 2009. It is made 100% out of 3/4 oak plywood and 3/4 oak boards for trimming. The whole thing is glued and screwed like a **** and you could honestly drive a truck on it. I am a carpenter/framer for a living and I feel we all over build the heck out of our stands with 2x and 4x construction. Top is just 2x layers of 3/4" oak plywood with oak board face nailed to hide the plys.

IMG_1062_zps6813eb71.jpg


IMG_1019_zpsf038a033.jpg


035.jpg


036.jpg


034.jpg
 

Charron22

New Member
View Badges
Joined
Dec 4, 2013
Messages
22
Reaction score
0
Location
Canada
Rating - 0%
0   0   0
My old 40 Gallon breeder on top of my DIY stand! I love it. Last picture is my new 90 Gallon on it!
 

Attachments

  • 1386568657259.jpg
    1386568657259.jpg
    55.1 KB · Views: 959
  • 1386568673795.jpg
    1386568673795.jpg
    43.6 KB · Views: 967
  • 1386568696674.jpg
    1386568696674.jpg
    48.4 KB · Views: 978
  • 1386568716586.jpg
    1386568716586.jpg
    43.3 KB · Views: 965
  • 1386568864363.jpg
    1386568864363.jpg
    46.1 KB · Views: 971

Ron Reefman

Lets Go Snorkeling!
View Badges
Joined
Aug 12, 2012
Messages
9,284
Reaction score
20,871
Location
SW Florida
Rating - 0%
0   0   0
180g mixed reef, 70g hexagon anemone tank and an 8' x 2' x 18" sump/refugium/DSB. The sliding doors will soon be swapped out for Formica doors. Blue pattern on one side to match the tile and canopy skirt, of flip them over and the other side is off white to go with the tile floor. The high frame in the base (first photo) is to hold a flexible PVC shower pan liner (gray material wrapped over the wood in photo 2). It has a bulkhead and a pipe that goes out thru the block wall to the backyard in case of a serious leak. The 1HP chiller is also out behind the house in a ventilated plastic storage cabinet.


[URL=http://s395.photobucket.com/user/RonReefman/media/PB080005.jpg.html]
[/URL]
 
Last edited:

revhtree

Owner Administrator
View Badges
Joined
May 8, 2006
Messages
47,740
Reaction score
86,887
Rating - 100%
1   0   0
Great job!
 

tone973

Community Member
View Badges
Joined
Aug 19, 2012
Messages
62
Reaction score
1
Location
johnson city TN
Rating - 0%
0   0   0
Not sure where my pics went but this is my stand after it was done. I did the stand with 2x4's and the skin is tounge and groove planks. The back is open and the sides and front each have a panel that comes off for access to the sump and electrical.

634A0E24-0432-4CAC-A426-544D8CD0B780-9708-00000BCD0BAA6633_zps8073c14c.jpg


C24A37F3-38CF-4C7A-A18A-5930560F16F2-18900-000014E284CF4D31_zpsbfa75215.jpg


I put up a sheet of plywood between the sump and the right side of the stand as I will eventually put in shelves. But that is where my electrical equipment is.
4C11BD2A-9D1A-4146-8698-D096F4F0F222-18900-000014E29A545DBF_zps2c7e1261.jpg


1F45D51F-1D9E-4D5A-BA9A-D9F87F958A05-2500-000002F3170F90D6_zpse52fe680.jpg


F345D9C5-CB83-469E-9F18-9EEDB0D5D96E-25838-000016BC741905AA_zps6654a8f2.jpg

This looks great. Like this allot.
 

AsphaltPays

Valuable Member
View Badges
Joined
Apr 26, 2011
Messages
1,939
Reaction score
18
Location
Schoharie,NY
Rating - 0%
0   0   0
Here's a few pics of mine
 

Attachments

  • 1389278722559.jpg
    1389278722559.jpg
    81.2 KB · Views: 843
  • 1389278779782.jpg
    1389278779782.jpg
    86.6 KB · Views: 832
  • 1389278803899.jpg
    1389278803899.jpg
    86.1 KB · Views: 846
  • 1389278826712.jpg
    1389278826712.jpg
    91.7 KB · Views: 836
  • 1389278954566.jpg
    1389278954566.jpg
    65.6 KB · Views: 833

Being sticky and staying connected: Have you used any reef-safe glue?

  • I have used reef safe glue.

    Votes: 117 88.0%
  • I haven’t used reef safe glue, but plan to in the future.

    Votes: 8 6.0%
  • I have no interest in using reef safe glue.

    Votes: 5 3.8%
  • Other.

    Votes: 3 2.3%
Back
Top