Lets See some DIY Tank Stands

scason

Active Member
View Badges
Joined
Aug 17, 2014
Messages
131
Reaction score
0
Location
spring hill,tn
Rating - 0%
0   0   0
Here our build. Still in progress. Been a family project getting all the kids included.
 

Attachments

  • 1411276352681.jpg
    1411276352681.jpg
    37.4 KB · Views: 636
  • 1411276373832.jpg
    1411276373832.jpg
    41.7 KB · Views: 592
  • 1411276421244.jpg
    1411276421244.jpg
    38.2 KB · Views: 567
  • 1411276778684.jpg
    1411276778684.jpg
    36.5 KB · Views: 633
  • 1411276840559.jpg
    1411276840559.jpg
    30.1 KB · Views: 580

_Alex_

Valuable Member
View Badges
Joined
Nov 22, 2009
Messages
2,109
Reaction score
87
Location
wichita, kansas
Rating - 0%
0   0   0
I did this one other night about an hour. Basically took a diy 90 gal stand down to fit a 30 cube. Planning on skinning and staining.

uploadfromtaptalk1411308400962.jpg
 

vtecintegra

Valuable Member
View Badges
Joined
May 14, 2010
Messages
1,386
Reaction score
1,563
Location
Tampa
Rating - 0%
0   0   0
Some more.
 

Attachments

  • DSC05994.jpg
    DSC05994.jpg
    93.3 KB · Views: 702
  • DSC05996.jpg
    DSC05996.jpg
    93.1 KB · Views: 712
  • DSC05997.jpg
    DSC05997.jpg
    92.2 KB · Views: 1,799
  • DSC06000.jpg
    DSC06000.jpg
    92.2 KB · Views: 757
  • DSC06001.jpg
    DSC06001.jpg
    88.2 KB · Views: 756

prsnlty

Jackie
View Badges
Joined
Jun 22, 2011
Messages
7,541
Reaction score
5,235
Location
Citrus Co, Florida
Rating - 0%
0   0   0
My 180g peninsula still in progress... the column closest to the wall pulls out. It has 3 shelves for testing supplies and additives plus a section for brushes and nets. Need to get a pic of it.
uploadfromtaptalk1420614308203.jpg
uploadfromtaptalk1420614602931.jpg
uploadfromtaptalk1420614658655.jpg
uploadfromtaptalk1420614424660.jpg
uploadfromtaptalk1420614447270.jpg
 

ski1870

New Member
View Badges
Joined
Feb 2, 2015
Messages
19
Reaction score
1
Location
Massachusetts
Rating - 0%
0   0   0
I have a 120 gal tank on the pine stand it came with. The tank is full and I need to replace the sump system below. It can not be removed without taking the center brace board that seperates the doors. Is it safe to remove this board while I remove it, then replace and resecure the board???
 

glb

7500 Club Member
View Badges
Joined
May 12, 2013
Messages
8,129
Reaction score
3,362
Location
Miami
Rating - 0%
0   0   0
These all look great! For those of you without a middle brace in the front, how did you attach your doors? I've been studying the furniture I have like that and they have a piece of wood glued behind the middle side of the door so the other door has something to rest on and so there's no gaps. How did you do it?
 

revhtree

Owner Administrator
View Badges
Joined
May 8, 2006
Messages
47,763
Reaction score
87,175
Rating - 100%
1   0   0
Wow these are some great stands and canopies!
 

Daniel@R2R

Living the Reef Life
View Badges
Joined
Nov 18, 2012
Messages
37,493
Reaction score
63,926
Location
Fontana, California
Rating - 100%
1   0   0
Let's revive this one again!
 

Willhersh34

Community Member
View Badges
Joined
Jan 18, 2022
Messages
92
Reaction score
155
Location
Appleton
Rating - 0%
0   0   0
Stand after initial build
IMG_2111[110].jpg

Stand up close
image0.jpeg

Stand and tank
IMG_2211.jpg

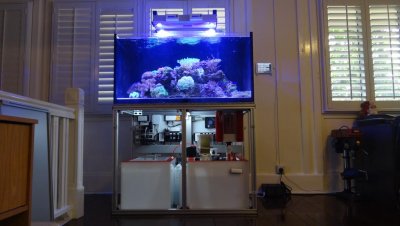
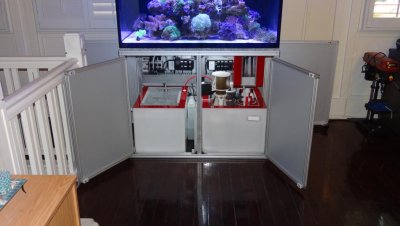
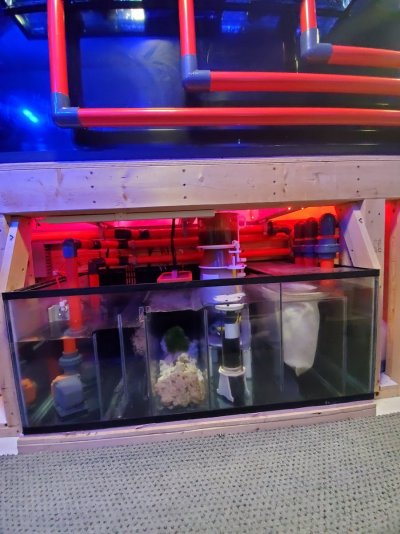
Inner stand is built with 2 x 4's. Inside is painted with Killz in egg white to help with vision under tank. Outside is skinned with 1/4" birch sheeting. Panted with polyurethane based spray paint, courtesy of my wife. Sheeting was attached with simple finish nails and liquid nails. Supports are secured with stainless steel deck screws (wood screws heads strip too easily) and with liquid nails. I countersunk all the screws but did not fill in the sink holes as I knew I was covering that with sheeting.

Now...........do I need the liquid nails AND the deck screws? Absolutely unnecessary. However, a pesky spouse questioning the strength..........yeah, I did that to appease her. This thing is so overbuilt I'm pretty sure it would hold, say, one of those 2 door Fiat mini wagon grocery getter deals.

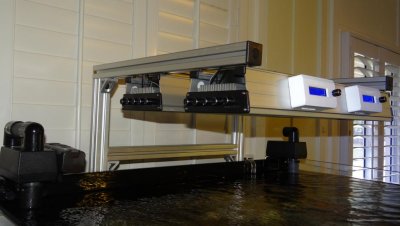
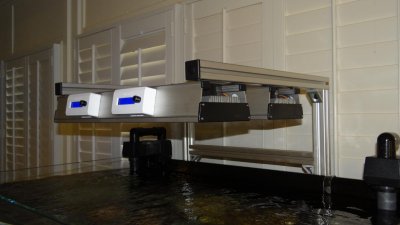
And I did make a mistake. I have about 3" width front to back on the top. I forgot to account for the width of the 2 x 4's when I built the cross bracers. It worked out OK as that gave me built in "cable management" (IT nerd shows his head again!). All in all this turned out good for my first stand build, with 2 takeaways: size the cross braces correctly and build the stand slightly higher for more room underneath for components/sump/ato res. I will also be adding LED strips for extra understand lighting but that's minor.
 

flagg37

Custom stair builder - TreeofLifeStairs.com
View Badges
Joined
May 28, 2016
Messages
950
Reaction score
1,119
Location
Denver area
Rating - 0%
0   0   0
8D0C3666-4F7D-4E5F-A89A-93F1403C55CC.jpeg
These are all the panels

F3895AA0-5C43-471A-88E5-6F001F541011.jpeg
Assembled

9FD1BBF7-84E6-4358-B7D8-A96056A76D23.jpeg

Stained

F7BEEA85-3F5C-41D5-A145-C1BB80191D8F.jpeg

Inside

53227BFD-D2DF-4FA9-9F97-632AD1761299.jpeg

With door

62FF22FE-65B9-437B-914F-005442F8B231.jpeg

Open

286A565A-B5A8-4738-85C3-D396AED4B35B.jpeg
 

Algae invading algae: Have you had unwanted algae in your good macroalgae?

  • I regularly have unwanted algae in my macroalgae.

    Votes: 35 34.0%
  • I occasionally have unwanted algae in my macroalgae.

    Votes: 22 21.4%
  • I rarely have unwanted algae in my macroalgae.

    Votes: 9 8.7%
  • I never have unwanted algae in my macroalgae.

    Votes: 6 5.8%
  • I don’t have macroalgae.

    Votes: 28 27.2%
  • Other.

    Votes: 3 2.9%
Back
Top