Ludnix's 50g Cube

ludnix

Valuable Member
View Badges
Joined
Sep 27, 2015
Messages
1,282
Reaction score
1,643
Location
Fortuna, California
Rating - 0%
0   0   0
I've finally deciced to bite the bullet and get a SCA 50g cube Starfire rimless tank!
SCA50g.jpg


Tank specs:
24x24x20"
3 panels Starfire

sump.jpg


Sump:
19x16x13

I am receiving the tank, sump, skimmer, return pump, and MDF black stand within the next two weeks from Empire City via Amazon. I've never bought a tank online so this will be an interesting first for me. I am anticipating getting the tank and stand on a pallet at work, from which I will load it into my kia soul and transport home. Getting it upstairs will require some help I think.

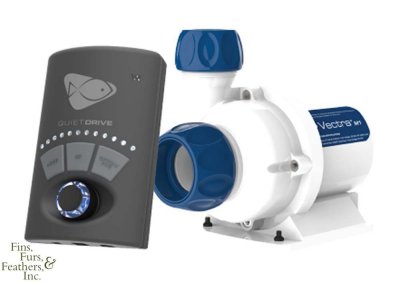
Right off the bat, with this kit, the reviews suggest upgrading the return pump. I'm a nerd and love new gadgets so I decided to get the Ecotech M1 Vectra to replace the return. I'm looking forward to riding the DC controllable bandwagon.
vectra.jpg


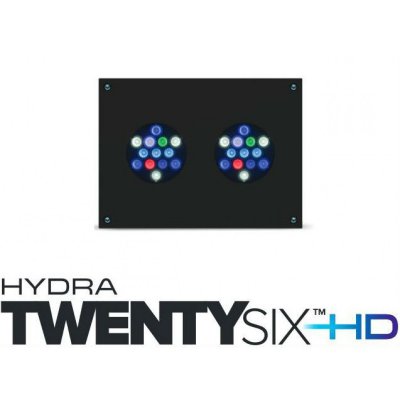
For lighting I decided to get the AI Hydra 26 +HD LED. I have helped a club member with their AI lighting and I was a fan so I decided to try one for myself. My last two builds have all been DIY LEDs from RapidLED so this will be a nice break away from soldering.
hydra.jpg
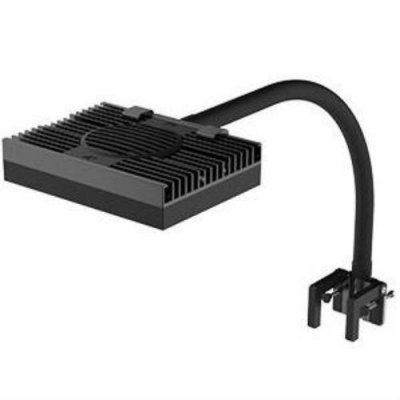
Which is being mounted with a AI Hydra Flex Mounting arm:
hydra_flex.jpg

This build will be an upgrade from my existing 14g Biocube. It's going to be sitting in the same location so it's going to take some preparation, logistics and some help! See the full build for the 14g biocube here, and follow along on this thread as I document the transfer and growth of the new tank!

fts.jpg
 
Last edited:
OP
OP
ludnix

ludnix

Valuable Member
View Badges
Joined
Sep 27, 2015
Messages
1,282
Reaction score
1,643
Location
Fortuna, California
Rating - 0%
0   0   0
My first tank was in 2007. It was a 30g "cube" by Oceanic. I think I got it at Petco along with the live rocks. I was still had a long way to go and a lot of lessons about what happens when you buy too cheap. I was a senior in High School when I started this tank now a decade ago.
day12.jpg


Within a year, with help from my parents, we were able to upgrade the 30g to a 120g display in our Tropical themed Tiki Room. There's an ancient and eventually broken build thread on RC.
doors.jpg

side.jpg


After about 5-6 years of running, the tank was broken down and sold to another local club member. My parents were able to retire in Hawaii and I get to visit. ;)

In a new location I started my 14g biocube, which I ended up purchasing from the same club member who had bought the 120g a few years prior.
Tank_and_stand-800x600.jpg


I think it's funny that I'm returning to the cube shaped tank. I hope it'll be an interesting journey to see how this next one will end up looking. This hobby has been great influence on my life and I've made some great friends through it. Now to see which of those friends will want to help carry the tank up with me!;)
 
OP
OP
ludnix

ludnix

Valuable Member
View Badges
Joined
Sep 27, 2015
Messages
1,282
Reaction score
1,643
Location
Fortuna, California
Rating - 0%
0   0   0
My brother in law is graciously bringing his truck to take the tank while I will take the stand. I peaked in the tank box to check for busted panels or other nightmares, but it all looks immaculate from what I could see from the top! Can't wait to get it home and unwrapped. The stand is completely assembled and much nicer than I was expecting considering it's MDF. I also received the hydra26 and flex arm, so I'll just be waiting for bulk reef supply's shipment and the vectra coming direct from ecotech.
 
OP
OP
ludnix

ludnix

Valuable Member
View Badges
Joined
Sep 27, 2015
Messages
1,282
Reaction score
1,643
Location
Fortuna, California
Rating - 0%
0   0   0
Unboxing of the tank and sump! You can see they really did a good job fitting the styrofoam so there was no room for anything to slide around. I couldn't find a single dent on the box or any sign of damage.
unboxing.jpg


I've mounted some LED puck lights for the sump. I might change to a different light later but this will make it easier to work with the sump for now.
lights.jpg


The sump as it was shipped:
sump.jpg

I'm planning to ditch the filter floss and bio media. I might run a small refugium but the glass layout seems to only really allow for that in the narrow center.

I've got a few shipments of plumbing arriving next week so I can finish the sump. I'm planning to do silicone tubing from the Vectra to red PVC that splits into two 1/2" returns to fit on the stock loc-line. I am planning to do the beananimal overflow method using all three bulkheads in the overflow, so the return will have to go over the back wall of the overflow with a few 90 degree elbows.
 
OP
OP
ludnix

ludnix

Valuable Member
View Badges
Joined
Sep 27, 2015
Messages
1,282
Reaction score
1,643
Location
Fortuna, California
Rating - 0%
0   0   0
Plumbing Plans
I've gotten the shipment notification for the plumbing which is set to arrive on Wednesday! I went with red PVC and schedule 80 fittings to get a nice clean look. In an attempt to not have to do the 3 runs to the hardware store I usually do when plumbing, I drew up some exploded diagrams. These were absolutely paramount in my being able to order the parts online.

The Return
Return_plans.jpg

For the return, I'm planning on doing 3/4" silicone tubing to a Tee fitting up behind the tank and overflow box. From the Tee, it will be all rigid plumbing over the back wall of the tank and into the overflow box. I'm using silicone tubing because it will help dampen vibrations from the pump. The Vectra is supposed to be quiet but vibrations are hard to avoid so anything to help dampen them will help bring some silence to this build. I chose silicone tubing over vinyl because it doesn't kink, doesn't retain a coil, it can stretch around hose barb fitting better, and it's so easy to clean. Unfortunately, BRS only sells it in white and in limited sizes, but searching online I couldn't find any colorized silicone tubing in these larger diameters either. 3/4" white it will have to be.

The Beananimal Drains
drain_plans.jpg

For the drain, the plan is all in 1" Red PVC, with the ultimate design being an internal Beananimal overflow. You can see the standard Durso on the left with the john guest 1/4" fitting which will be drilled and tapped into the Durso. The 1/4" line that comes from that will be bent over to the maximum water height of the overflow. That 1/4" line will prevent air from getting into the Durso if the water gets too high creating a siphon, draining the overflow quickly and safely. There will be a gate valve underneath for adjustment if necessary, but I think the rightmost valve is the only drain which will really need the adjustments.

This middle bulkhead will be the emergency drain line which is just a standpipe, nothing fancy going on here. If the drain on the left and right get clogged, the middle drain is there to save my carpet.

The right most drain is a full siphon. This is also just a standpipe but it's drain leads underwater in the sump to keep a full siphon at all times. The gate valve below the bulkhead will be important to tuning the siphon accordingly.

I'm doing this complicated setup as a stop gap against overflow failures and noise. I've never been so unfortunate as to have a Durso get clogged and my carpet ruined, but that doesn't mean it isn't going to happen someday. I can, however, attest to how noisy a Durso can be. Those little anti-siphon air lines on the top of a Durso can get clogged with salt easily and end up creating a siphon anyways which makes that awful flushing sound. When that's not happening there's still a constant gurgling and trickling sound. It's not always so loud that it's a problem, but when it's a rimless cube in your living room, it might be.

This is my first Beananimal overflow so if anyone sees anything wrong or has suggestions let me know!
 
OP
OP
ludnix

ludnix

Valuable Member
View Badges
Joined
Sep 27, 2015
Messages
1,282
Reaction score
1,643
Location
Fortuna, California
Rating - 0%
0   0   0
I've mounted my two BRS dosing pumps in the top right section of the stand. They are mounted up high to leave room for a row of Panduit underneath.
dosing_pumps.jpg


I then got to work on the plumbing. I used the Schedule 80 everywhere I could. 3 trips the hardware later... we have the sump done!
sump.jpg

Getting to work on the top section of plumbing. Here's the Durso in the overflow, I am drilling and tapping it for a 1/8" NPT john guest fitting for RO/DI tubing, this will be the siphon air line for emergencies if the first siphon clogs.
drilled_and_tapped.jpg


With the John Guest fitting:
durso_john_guest.jpg


My return pump uses the silicone tubing to reduce vibration transfer from the Vectra to plumbing making noise. You can see where the silicone tubing is attached to the rigid pvc behind the tank with a hose barb fitting and clamp.
return.jpg


The tank is getting tuned in but it's already less noisy than the air pump for the biocube protein skimmer so I'm super impressed with the BA overflow!
tank_running.jpg


Letting things run for a while and get to up to salinity and temperature, but in a few days I hope to transfer everybody over!
 
OP
OP
ludnix

ludnix

Valuable Member
View Badges
Joined
Sep 27, 2015
Messages
1,282
Reaction score
1,643
Location
Fortuna, California
Rating - 0%
0   0   0
Tank is still chugging along and working correctly without leaks, yay! I decided to order a DA Reef Keeper Lite (Basic) for controlling my dosing pumps and ATO. I spent a lot of time researching the various controllers, and have even played around with making my own arduino and Raspberry Pi controllers, but ultimately for the money and ability: the RKL will be more than adequate for now.

Will be posting updated pictures of the tank tonight, I transferred everybody from the biocube over the weekend and they seem to be enjoying their new digs so it's time to share.
 
OP
OP
ludnix

ludnix

Valuable Member
View Badges
Joined
Sep 27, 2015
Messages
1,282
Reaction score
1,643
Location
Fortuna, California
Rating - 0%
0   0   0
Everything is transferred over now! After matching the salinity, temp and alkalinity all of the Biocube's livestock were transferred over. I also picked up an additional 13lbs of live rock to make some more real estate for corals!
fts.jpg


Right Side:
right.jpg


Left:
left.jpg


3/4:
three_quarter.jpg


The pagoda cup that had fallen and burned itself on ricordea now has a cute little cup to sit in. At least until I get a clam for that spot!
pagoda.jpg

pagoda2.jpg


montipora.jpg


rockwork.jpg

top.jpg


feather_duster_processed.jpg


I also got the power strip mounted and cords routed. The power strip is plugged into a plug-in GFCI.
electrical.jpg


I picked up a Conch at the LFS, here's a silly GIF of it.
conch_gif.gif


Thanks for checking out the build!

euphyllia.jpg
 
OP
OP
ludnix

ludnix

Valuable Member
View Badges
Joined
Sep 27, 2015
Messages
1,282
Reaction score
1,643
Location
Fortuna, California
Rating - 0%
0   0   0
I received the reef keeper in the mail and will be setting it up soon in a future post! In the mean time, I epoxied the rocks together to stabilize the structure in preparation for the engineering gobies I hope to get.
I also picked up the Flame Hawkfish from the local fish store, he's adapting well but did eat the Fire Shrimp I had. It was definitely a risk with hawkfish, but I had kept large cleaner shrimp with them in the past and not had issues but I guess this guy is a little more aggressive with inverts.

Full tank shot:

fts.jpg


flamehawk2.jpg


flamehawk.jpg
 

High pressure shells: Do you look for signs of stress in the invertebrates in your reef tank?

  • I regularly look for signs of invertebrate stress in my reef tank.

    Votes: 42 31.6%
  • I occasionally look for signs of invertebrate stress in my reef tank.

    Votes: 30 22.6%
  • I rarely look for signs of invertebrate stress in my reef tank.

    Votes: 27 20.3%
  • I never look for signs of invertebrate stress in my reef tank.

    Votes: 34 25.6%
  • Other.

    Votes: 0 0.0%
Back
Top