Tona's 200g - Office Reefer

TonapahNorth

Reefed In
View Badges
Joined
Sep 29, 2013
Messages
949
Reaction score
661
Location
Indiana
Rating - 0%
0   0   0
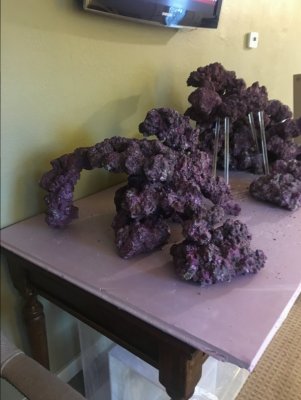
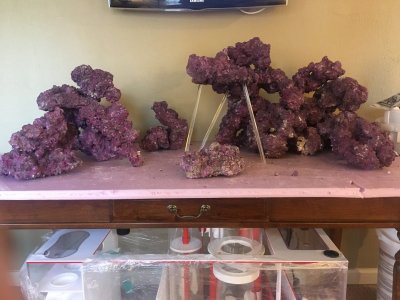
As I may have mentioned time to time recently, I am adding to my addiction with a reef tank at my office. I have been remodeling my personal space to add a tank and will be posting pictures of the stand soon. That ordeal deserves its own post here. It's coming soon.

I spent much time debating where to get the tank. Mostly it ended up with making a decision about how long I wanted to wait. I've been very pleased with the customer service and exceptional attention I've received from Crystal Dynamics. They have kept me apprised along the way. I would highly recommend them at this point. Zoya is a great customer service rep.

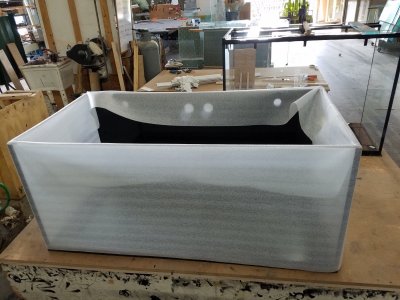
I ordered a 60x32x26 tank with 3 sides starphire. It has 3/4" glass and it's being drilled for the Synergy Reef Shadow overflow. I've decided I can't wait much longer to post my build thread. I'm getting too excited myself. So I got these pics Friday night from Zoya. The tank looks great. It needs some more silicone work and a water test. It's a beauty!

IMG_0488.JPG
IMG_0487.JPG
 
OP
OP
TonapahNorth

TonapahNorth

Reefed In
View Badges
Joined
Sep 29, 2013
Messages
949
Reaction score
661
Location
Indiana
Rating - 0%
0   0   0
IMG_7227.JPG
And the water test is now happening - looks good. No bowing.

Can't wait to get this bad boy home. So I can fill it.

I hope to have time to post tomorrow some pics and my saga with building my homemade stand.


#reef2reef #worldwidecorals #mywwccontest
 
OP
OP
TonapahNorth

TonapahNorth

Reefed In
View Badges
Joined
Sep 29, 2013
Messages
949
Reaction score
661
Location
Indiana
Rating - 0%
0   0   0
Super nice tank!

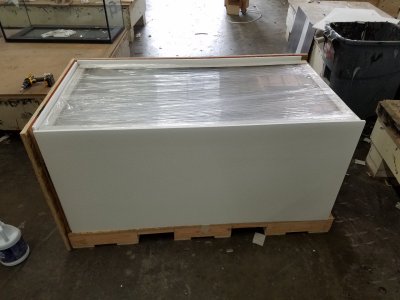
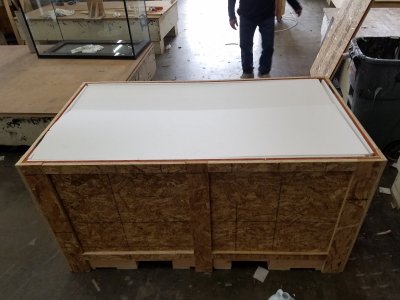
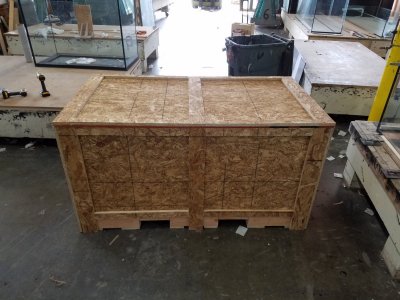
The folks at Crystal Dynamics have really indulged me in keeping me in the loop with pics and great service. They sent me pics today of the crating process. Why am I more nervous now? lol. I guess I've seen the stevedores in the docks. It's just another crate to them.

IMG_7262.JPG

IMG_7263.JPG

IMG_7264.JPG

IMG_7265.JPG
 
OP
OP
TonapahNorth

TonapahNorth

Reefed In
View Badges
Joined
Sep 29, 2013
Messages
949
Reaction score
661
Location
Indiana
Rating - 0%
0   0   0
So about two years ago, one of our local libraries decided to sell about 35 feet of a custom desk that they had built and set up as a librarian customer service and media desk on the third floor. It was in the shape of two "L"s inverted side by side with the work space in between so as to form an open rectangle of sorts. I think you get the idea.

I saw the notice on Facebook and immediately reached out. I had some ideas to build myself a cool desk and thought I could put it to good use. After some haggling, we reached a deal which included me doing the disassembly and the haul out. Did I tell you it was on the third floor? .....

I gathered up a flat bed trailer and about 5 buddies. We arrived one Saturday morning and disassembled it into about 822 pieces (I exaggerate .. hey it's my story) which we numbered and lettered. This thing was built on site and by a fine craftsman. I would venture to say that it had to take weeks to build. Yeah, we disassembled it in about 3 hours. Mostly pry bars and hammers but there were a few screws. We only had to cut one panel. Thank goodness.

We lugged it down piece by piece into the sunshine - from the heights of the darkened catacombs in this library. When it hit sunlight, I thought to myself, maybe this wasn't a good idea. It looked pretty bad. It had been up there for many years. After some time and some considerable sweat equity ... (did I mention it was 10+ foot long sections and on the third floor?) ... we got it all loaded. We took it to my law office where it sat .... in an empty office ... for two years. Yeah I know. smh ... I'll put that thing to good use. Yeah right. (Save your busy lawyer jokes) ;) ...

Fast forward a couple years to November 2016. I had a two week trial scheduled for January and with the holidays coming as well as trial prep, my calendar was pretty clear for December. Two days after Thanksgiving, we settled the case ... so I sat .. and started thinking. 'The time is right." I can do this and have it done by The New Year. So ...

I destroyed my beautiful 20 x 20 office. I set about to removing all my artwork, my tv, my desk and furniture, and my lounge area to another storage room upstairs. I got some help and we cleared the office in about a day with all the other things going on. I moved a working office to the room I had stored the library desk parts and moved the library desk parts into the back part of the hallway/lobby. It was a big shuffle so that I could still have some work space in the interim. It's a good thing I did ... because it's now mid Feb 2017 and I'm still not done ... haha. But I'm close .. the tank is coming. The tank is coming!

I hinted earlier that there was a story behind the stand. In fact, I have had a reef tank at home for a few years. It's lovely and my wife and I enjoy it. But I've always wanted bigger. So mid-design on my desk and work area, I realized that there was a LOT of desk left over. So I decided to put a reef tank in my office. Thus ... this reef tank was, in fact, an afterthought. Poorly planned and I'll designed but I learned along the way. This is the cause for the delay. I am very pleased with it and the process of learning has been nice actually.

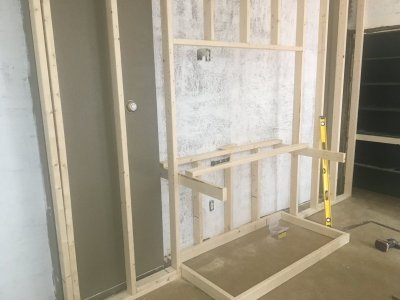
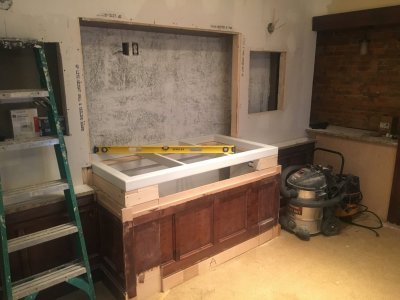
So here is where the pictures start. I realized quickly that I'm not a contractor, despite my handy nature. I needed help. So I called to the bullpen for my good friend and contractor to come do much of the heavy lifting. There is a lot going on in this picture but suffice it to say that we wanted to even the wall while leaving space behind it for cabling and plumbing as necessary. I wanted the tank slightly recessed so we came up with this design. This big bulky design. On the right, note the green shelving which before this was an old built in hutch with doors.

IMG_5870.JPG

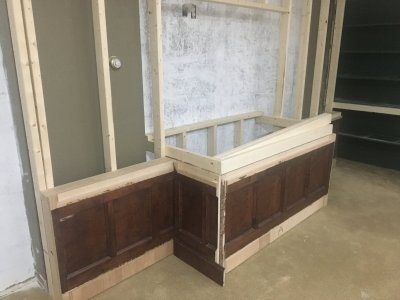
We put the panels on to see how it would look. Give me some rough ideas.

IMG_5872.JPG

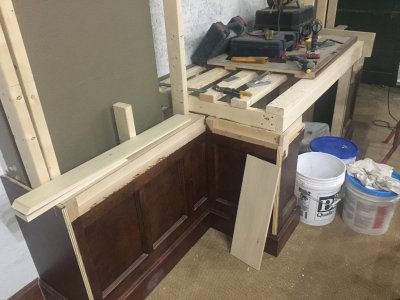
I told him that the tank would be about 200 gallons and it would have a lot of weight, so he beefed it up even more - rightly so. Strong enough to hold tools. Oh yeah. Notice the studs in the walls have been cut. I decided to add shelving and an area to put the control units.

IMG_5905.JPG

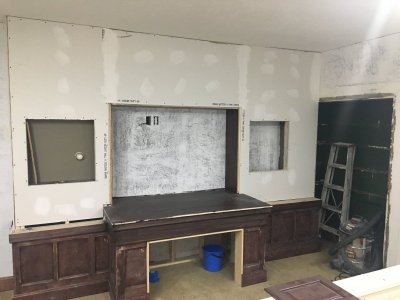
So, we leveled it, decked it with 3/4 solid ply, cut out the front panel, and sheeted the walls. Nice right?

IMG_6497.JPG

But wait .... I quickly discovered that there really wasn't enough room to access the sump. I've never had a tank this big so I didn't realize how big everything is correspondingly. Now I know why people have whole rooms for their sump ... yeah you can call it a fish room. Whatever. It's for the sump and you know it. I digress (as usual). The things I bought were huge. So out it came. All. Of. It. Out. Started over.

The majority of the problem was the headspace on the front access panel. I came up with the idea that it needed to come out and we had to minimize the header. So I called up another client who put a rush job on a steel powder coated frame to sit on top of the walls. Reeves Mfg. - nice work guys. Notice the right side of the picture. I decided that since I was going to have issues with space under the stand, I'd create another "sump" area where I could put the ATO, doser tanks, dosers, and the like. I tore out those shelves and discovered a nice brick wall on what was apparently a former exterior wall. The space behind the wall and over on the right side connect so it can be plumbed and connected. Ok, the plan is coming together. The cutout on the left side is going to be shelving and the right side cutout is going to house the Apex and other controls.

IMG_7068.JPG

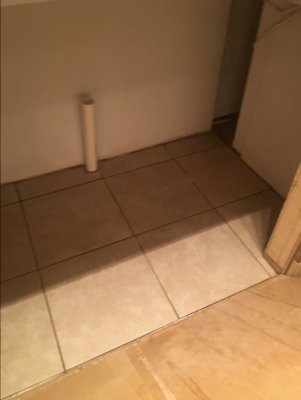
We then painted the insides white. plumbed in a drain and tiled both of the sump areas. Notice the space behind the wall which connects the two sump areas. I installed the electrical - 4 gang in each sump area and a 4 gang near the Apex area cutout. There are two separate 20A breakers for it all. I was going to put in a floor drain but decided to remain optimistic.

IMG_7078.JPG

Well... thanks for reading along. I'll post more later. More of the finished product. We are close. The tank is coming..... the tank is coming!
 
Last edited:
OP
OP
TonapahNorth

TonapahNorth

Reefed In
View Badges
Joined
Sep 29, 2013
Messages
949
Reaction score
661
Location
Indiana
Rating - 0%
0   0   0
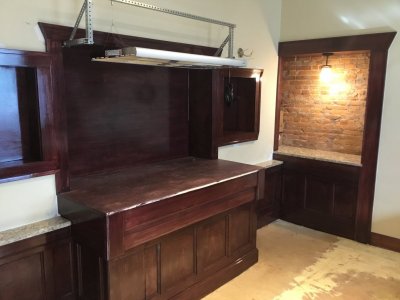
Getting close. All that is left is the skirt hood and some trim work around the edge of the stand after the tank arrives. The carpet is going in today. The lights above the shelves and control panel are ready for install.

I like the way it's turning out. Tank arrives tomorrow. Yippee!

image.jpg
 

Preme

Valuable Member
View Badges
Joined
Jun 27, 2016
Messages
1,317
Reaction score
1,240
Rating - 0%
0   0   0
Super sweet scape, and super clean set up and tank.

But I'm really interested in seeing a picture of that sump ;)
 
OP
OP
TonapahNorth

TonapahNorth

Reefed In
View Badges
Joined
Sep 29, 2013
Messages
949
Reaction score
661
Location
Indiana
Rating - 0%
0   0   0
Super sweet scape, and super clean set up and tank.

But I'm really interested in seeing a picture of that sump ;)

Thanks. It's a CL-44 from Synergy. It's big. Real big. That's why I had to make more room in the stand. As you could see above, when I tore it apart, I raised it several inches and cleared a lot of bulk from the overhead with the powdercoated steel frame.

@mixer911 and crew at Synergy Reef do some beautiful work. I have their 10g ATO and their newest overflow as well. I'll post more on it for sure soon enough.
 

Preme

Valuable Member
View Badges
Joined
Jun 27, 2016
Messages
1,317
Reaction score
1,240
Rating - 0%
0   0   0
Thanks. It's a CL-44 from Synergy. It's big. Real big. That's why I had to make more room in the stand. As you could see above, when I tore it apart, I raised it several inches and cleared a lot of bulk from the overhead with the powdercoated steel frame.

@mixer911 and crew at Synergy Reef do some beautiful work. I have their 10g ATO and their newest overflow as well. I'll post more on it for sure soon enough.

That's the sump I was originally going with until I decided to go with the Triton Method and needed a custom built sump. How's there Overflow? I was debating about getting one also.
 

Preme

Valuable Member
View Badges
Joined
Jun 27, 2016
Messages
1,317
Reaction score
1,240
Rating - 0%
0   0   0
Awesome build @TonapahNorth thanks for tagging me on it! Following along.

@Rex we are actually getting ready to release some Triton method sumps! Keep an eye out.

Awesome luckily I found that out before I decided on something else... I know you can release to much info but do you have a estimate of when they'd be out?
Also there better be a Red/White themed one those are sweet ;)
 

mixer911

Make them green with envy
View Badges
Joined
Jun 11, 2009
Messages
2,422
Reaction score
748
Location
Murfreesboro
Rating - 0%
0   0   0
Awesome luckily I found that out before I decided on something else... I know you can release to much info but do you have a estimate of when they'd be out?
Also there better be a Red/White themed one those are sweet ;)
Soon very soon. Yep they will definitely be available in the red/White CL versions.
 
OP
OP
TonapahNorth

TonapahNorth

Reefed In
View Badges
Joined
Sep 29, 2013
Messages
949
Reaction score
661
Location
Indiana
Rating - 0%
0   0   0
How's there Overflow? I was debating about getting one also.

Honestly all I can say at this point is that it seems the best looking overflow I've ever seen. The fit and finish are what you'd expect from the folks at Synergy. My display is right at 200g plus the CL sump. When I get it set, I'll post pics. While it crossed my mind, Im not too concerned about the gph flow on it because I think it's rate at 1500 - which is enough.
 
OP
OP
TonapahNorth

TonapahNorth

Reefed In
View Badges
Joined
Sep 29, 2013
Messages
949
Reaction score
661
Location
Indiana
Rating - 0%
0   0   0
This build look amazing, following.

Thanks. I'll try to keep up with things. I have a feeling it's going to go a little faster for a short while anyway.

Pretty sweet build! Cant wait to see the outcome. That stand is killer!

Thank you. I'm liking the way the stand is looking. I sure hope I can keep it clean looking underneath.
 

NHreefguy

Well-Known Member
View Badges
Joined
Oct 25, 2015
Messages
631
Reaction score
473
Rating - 0%
0   0   0
Thanks. I'll try to keep up with things. I have a feeling it's going to go a little faster for a short while anyway.


Thank you. I'm liking the way the stand is looking. I sure hope I can keep it clean looking underneath.

Wire management isnt my strong side [emoji23]
 

Being sticky and staying connected: Have you used any reef-safe glue?

  • I have used reef safe glue.

    Votes: 142 88.2%
  • I haven’t used reef safe glue, but plan to in the future.

    Votes: 9 5.6%
  • I have no interest in using reef safe glue.

    Votes: 7 4.3%
  • Other.

    Votes: 3 1.9%
Back
Top