DIY Automatic Filter

SethOF

Community Member
View Badges
Joined
Nov 24, 2015
Messages
79
Reaction score
39
Rating - 0%
0   0   0
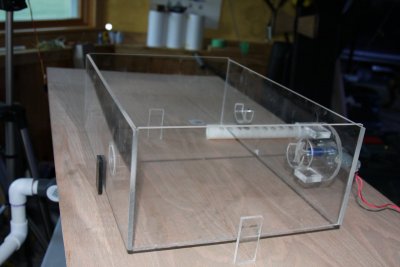
This is an image of a DIY automatic filter I just finished. I will post a video of it in operation later as well as a breakdown on the build and cost.

Credit to DBR_reef for his post that was the inspiration.
2.jpg
 

DBR_Reef

Active Member
View Badges
Joined
Apr 4, 2016
Messages
376
Reaction score
310
Location
Rochester, NY
Rating - 0%
0   0   0
well done- top loading is definitely the way to go if you have the space. what are you using for filter media?
 

revhtree

Owner Administrator
View Badges
Joined
May 8, 2006
Messages
49,417
Reaction score
99,043
Rating - 100%
1   0   0
That looks great man! Please get us more info as soon as you can! I have to share! :)
 

radiata

Valuable Member
View Badges
Joined
Nov 2, 2015
Messages
1,134
Reaction score
796
Rating - 100%
1   0   0
WOW! That eBay material is 300 feet long? The Theiling Roller Mat you're emulating is only 135 feet long. Hope your system works! Keep us all in the loop...
 

markfmvl

Active Member
View Badges
Joined
May 12, 2016
Messages
122
Reaction score
86
Location
Idaho
Rating - 0%
0   0   0
nice design.... where did you source the motor and how is it controlled?
 
OP
OP
S

SethOF

Community Member
View Badges
Joined
Nov 24, 2015
Messages
79
Reaction score
39
Rating - 0%
0   0   0
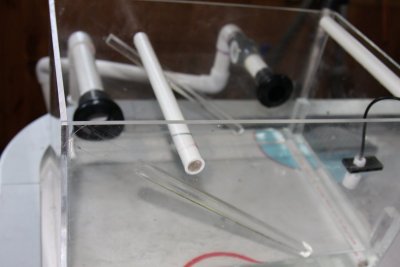
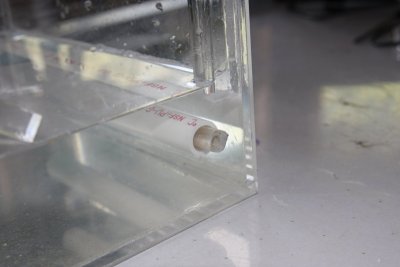
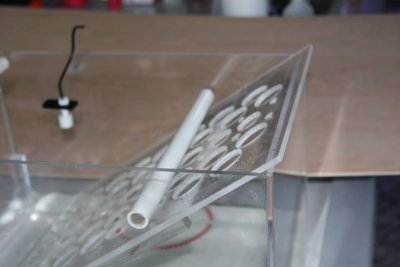
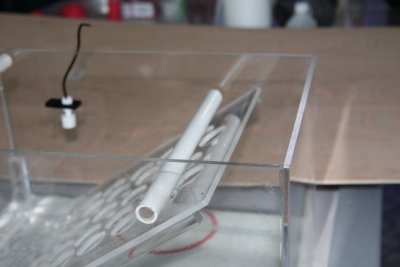
IMG_5359.JPG IMG_5360.JPG IMG_5362.JPG IMG_5363.JPG IMG_5370.JPG Holder.JPG IMG_5368.JPG Loading.jpg More information as promised


I started out with an available 18x12x12 acrylic tank. (made from ¼ inch acrylic)

I then drilled the drain holes in an 18x12 acrylic plate (filter plate), the holes were drilled over an area that left a clearance of about 1.5 inches from the long sides. I also ground a little from the long sides to allow placement in the tank.

Two holes drilled in the tank, one intake (1 inch) and one outflow (1 1/2 inch). I did not drill an overflow, but the design is such that if the filter paper is fully clogged, the water will rise and flow over the filter plate into the return section.

I installed three 1/2 inch PVC pipes as guides. at the locations marked on the tank over rounded 1/2 inch acrylic rods. (I used a square rod with edges ground. A round acrylic rod is better). This is to allow the filter paper to more easily roll around the guides.
I glued two 1/2 inch square rods on the inside long sides of the tank, on this was placed the drilled acrylic plate (I wanted it to be removable to clean the bottom of the tank). The drilled plate was angled in a way that it can slide out completely, and when installed rests on the rods and makes a tight fit at the bottom below one of the guides.


It allows easy placement and removal of the plate that makes installing the filter paper easy and allows cleaning of the tank.


I fashioned the top as a rectangular box, 6x12x18, this holds the filter paper both fresh and dirty, removable to allow the filter plate to be removed/installed (The paper will need to be cut for this). The cover will be any flat material (plastic/acrylic).


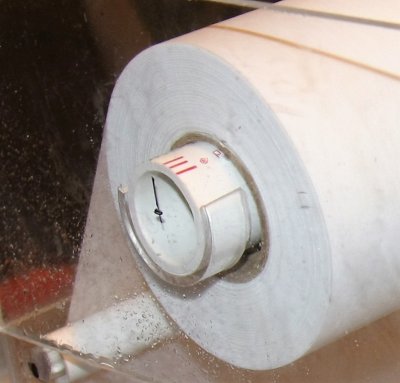
To allow easy placement of the filter paper, I cut a half inch piece from a 2 inch acrylic cylinder, then made 2 halves, each half was glued to hold the 1 1/4 inch PVC pipe that has the clean filter paper.


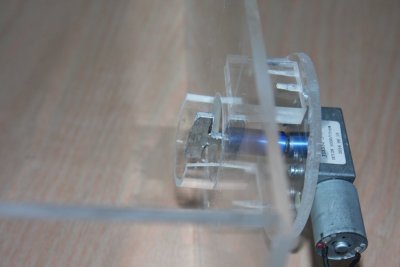
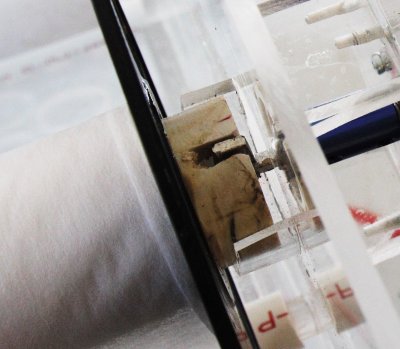
The powered end that holds the dirty paper was done differently. I wanted to be able to load and unload easily, one end was done similar to the clean filter side, but the power end has a hole (1 1/4 inch) through which the motor shaft passes, to allow unloading without unscrewing, I fashioned an aluminum adapter with one end 1 1/4 inch wide and the other ground down to fit into a coupler. The coupler then joins this to the shaft of the motor ( a 5 rpm 12v DC gearmotor). I glued a 1 inch piece of PVC inside the PVC that holds the filter paper to provide better surface for the aluminum adapter to rotate the pipe, this was cut to fit the adapter.


To load/unload, the motor will be rotated so that the adapter is vertical, you simply lift up the spool. I obtained some 6 inch diameter plastic spools from ebay, and mounted them on the prepared dirty filter PVC pipe.

For the operation, a float switch was placed on the inside.

If you have a controller such as Apex simply wire the float switch to your controller and you can program one outlet to turn on when the switch closes, the gear motor is then plugged to this outlet.

A second option that I have also tested (preferred) is to get a relay (I tested the Functional Devices RIBL1CDC) and simply connect both the float switch to the input and the gear motor to the output of the relay. You can power both circuits with one 12v DC power source.

Option 3 is either manually advancing the paper as needed or using a timer. The overflow design makes this safe but the affordable cost of the relay and float switch suggests that there is no reason not to automate it

This was designed to be served by a pump, with placement anywhere. I found out that the intake requires a valve to adjust the flow, a bigger outflow will allow more flow through the filter.

IMG_5359.JPG


IMG_5360.JPG


IMG_5362.JPG


IMG_5363.JPG


IMG_5370.JPG


Holder.JPG


IMG_5368.JPG


Loading.jpg
 

250mixreef

Active Member
View Badges
Joined
Sep 17, 2015
Messages
151
Reaction score
182
Rating - 0%
0   0   0
Have you installed this on your system how is it working any issues with the paper
 
OP
OP
S

SethOF

Community Member
View Badges
Joined
Nov 24, 2015
Messages
79
Reaction score
39
Rating - 0%
0   0   0
I am not using this system at this time. I do have a Theiling Rollermat.

This is the info on the filter paper (rayon/polyester blend filter paper)
 

Daschmidt

New Member
View Badges
Joined
May 19, 2017
Messages
5
Reaction score
0
Location
Monterey
Rating - 0%
0   0   0
IMG_1189.PNG
IMG_1267.PNG
IMG_1268.PNG
IMG_1189.PNG
IMG_1267.PNG
Lol so I was inspired to make one so I did and after I bought all the gear and spent probably more than 1.5 times the already made thriling rolermat I have mine offline as well. Many modifications and two overflows it still doesn't quite work the paper that I got and I got a number of different microns likes to start rolling up one side or the other un evenly also I ended up using a rotisserie motor instead this one didn't have enough power even though it's the exact one in original instructions as the media got clogged up the motor bound up
Interesting the original post bought and is useing the store bought one
 

TOP 10 Trending Threads

HAVE YOU EVER BROUGHT A CORAL OR FISH BACK FROM THE BRINK OF DEATH? SHARE YOUR BOUNCE-BACK STORIES!

  • Yes! I thought it would not recover, but it bounced back!

    Votes: 77 67.5%
  • No. I tried to help the coral/fish recover, but it could not bounce back...

    Votes: 32 28.1%
  • Other (please explain).

    Votes: 5 4.4%
Back
Top