My Zoo Med 50 Gallon Low Boy Build

calireefer831

New Member
View Badges
Joined
Dec 19, 2010
Messages
23
Reaction score
21
Location
Prunedale, CA
Rating - 0%
0   0   0
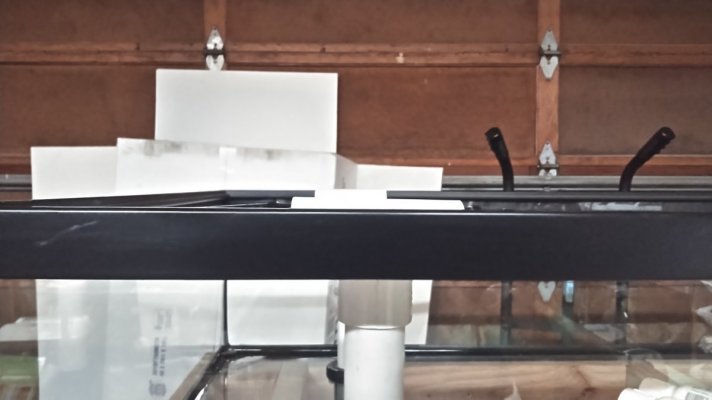
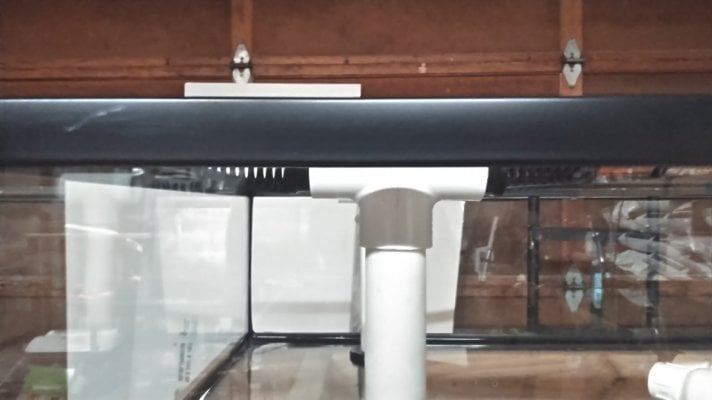
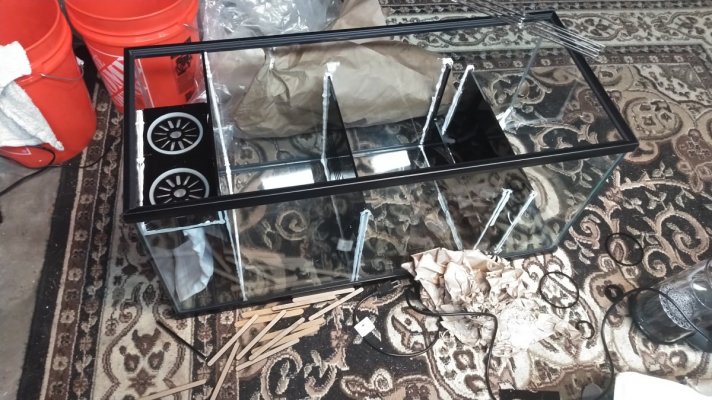
So I cam across a zoomed frag tank at my lfs for $150 and I had been looking at doing a frag/growout tank for some time so I decided to buy it.

I am still deciding on how I want to set it up but i figured I would post pics and update as I go along.

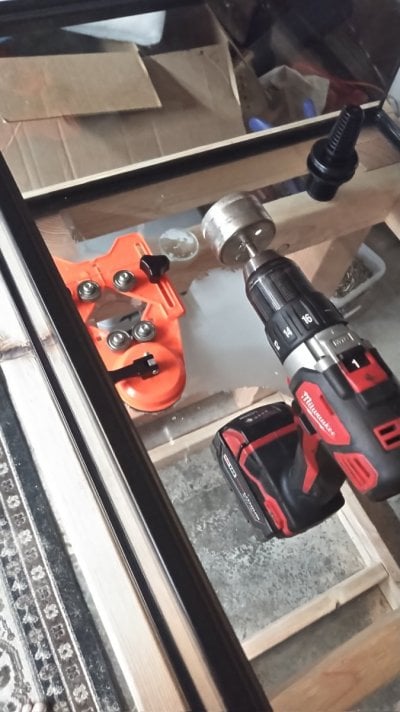
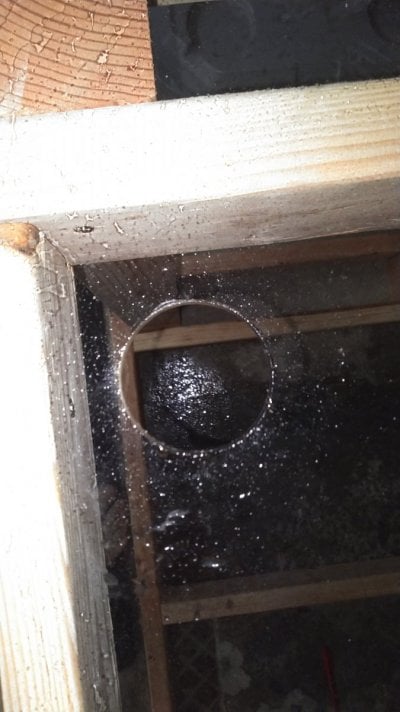
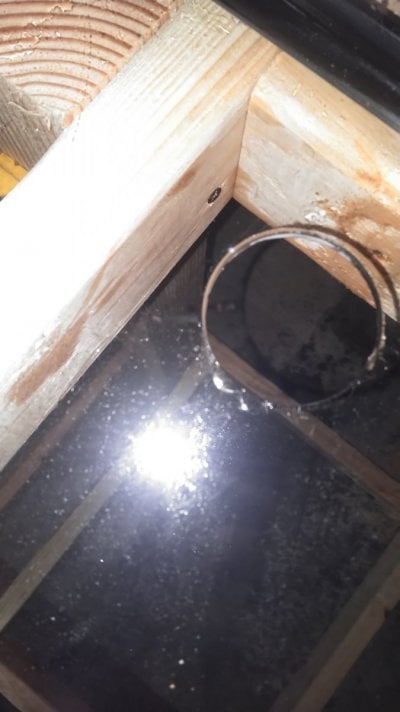
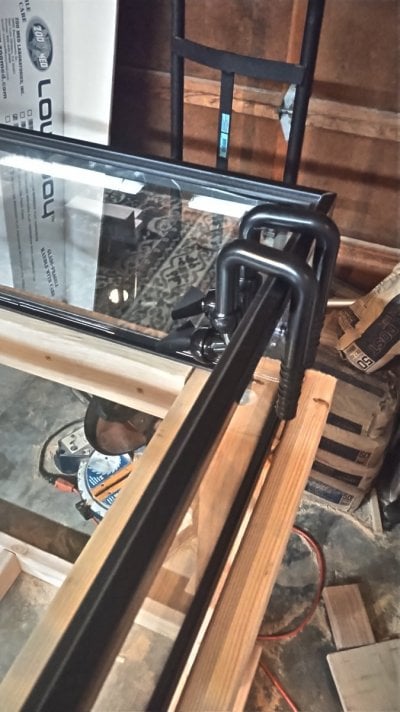
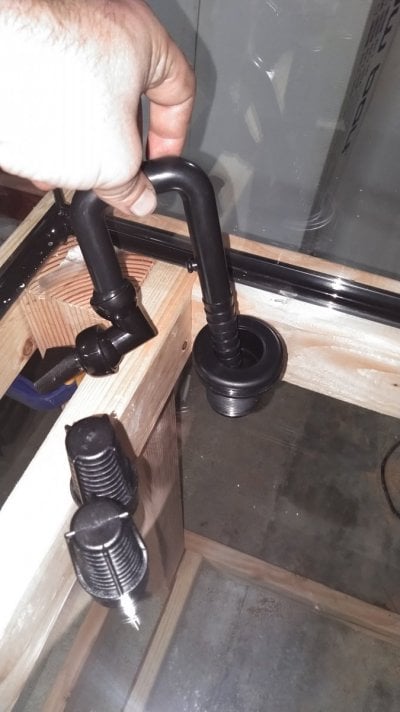
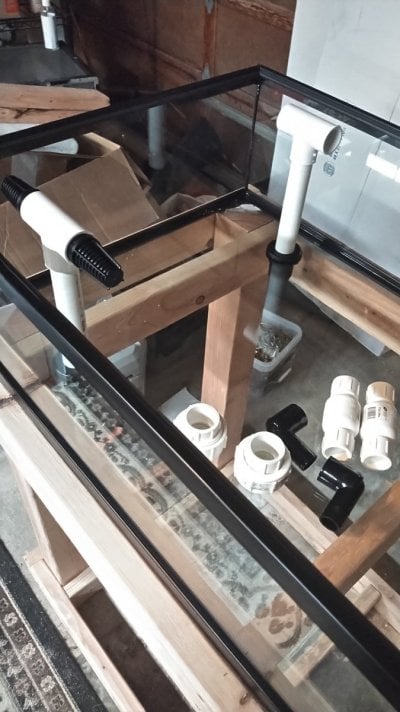
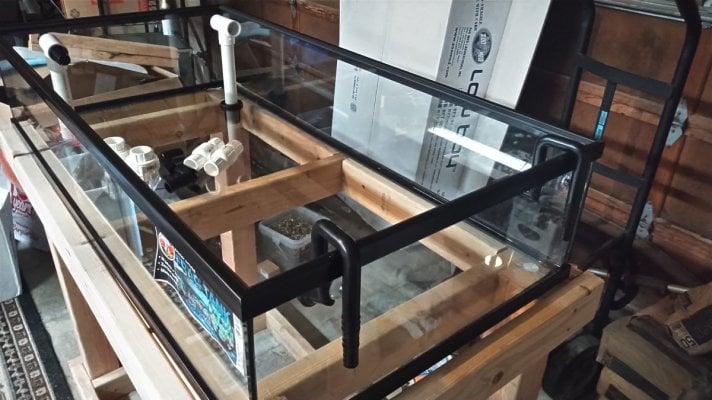
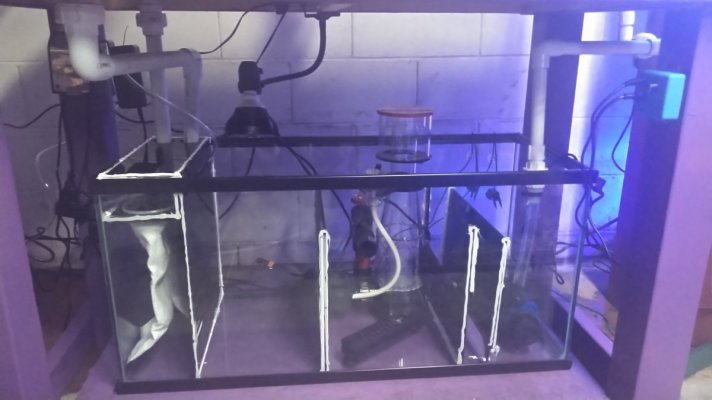
My plan is to drill two holes for overflows and have dual returns. I have ordered most plumbing fittings and a glass hole drilling kit which should arrive soon.

I purchased 50 pounds of reef rock rubble which I plan to use as my substrate as I am not a big fan or plugs or egg crate

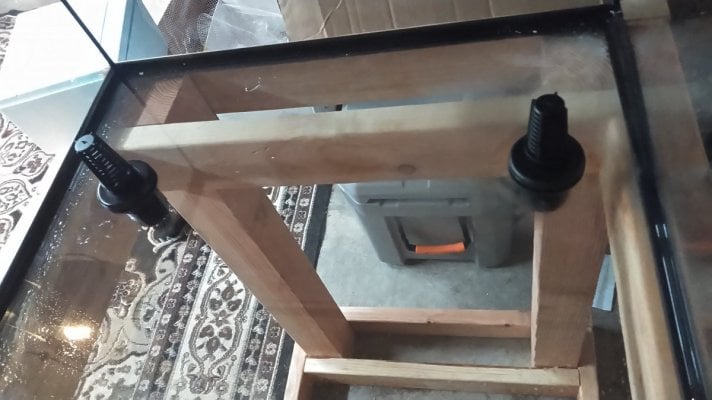
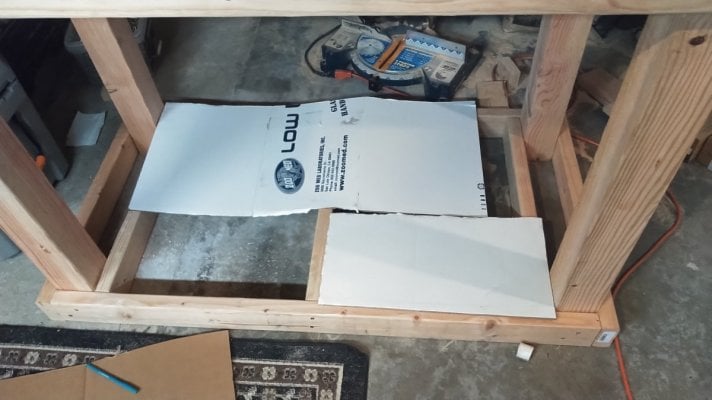
Pics today is my progress on the stand for the tank. I will likely add some plywood and am debating about if i want to paint or stain the stand.

KIMG0964.JPG KIMG0963.JPG KIMG0962.JPG KIMG0967.JPG
 
Last edited:

Peace River

Thrive Master
View Badges
Joined
Apr 29, 2014
Messages
21,550
Reaction score
164,766
Location
USA
Rating - 100%
1   0   0
Congratulations on your new adventure! I have often thought about getting one of these tanks so I look forward to seeing yours come together. Good luck!
 
OP
OP
C

calireefer831

New Member
View Badges
Joined
Dec 19, 2010
Messages
23
Reaction score
21
Location
Prunedale, CA
Rating - 0%
0   0   0
Got home from a long day at work and the mailman left some goodies so I drilled out my holes for my bulkheads and installed them. I put the strainers in the bulkheads temporarily but will add PVC pipe to get the proper water level in the tank.
I have never drilled holes in a tank before so I was a bit nervous. I think I did ok for my first time
 

Attachments

  • KIMG0972.JPG
    KIMG0972.JPG
    129.9 KB · Views: 376
  • KIMG0973.JPG
    KIMG0973.JPG
    119.5 KB · Views: 382
  • KIMG0974.JPG
    KIMG0974.JPG
    88.7 KB · Views: 378
  • KIMG0975.JPG
    KIMG0975.JPG
    123.2 KB · Views: 405
  • KIMG0976.JPG
    KIMG0976.JPG
    128.1 KB · Views: 500

Opus

2500 Club Member
View Badges
Joined
Aug 29, 2011
Messages
4,432
Reaction score
2,996
Location
North Texas
Rating - 0%
0   0   0
What is your plan for lighting. I've thought about setting one up but I don't have the option of hanging my lights. Luckily my LFS sells these predrilled with an overflow kit already installed. They also have a metal stand you can buy.
 

dedragon

5000 Club Member
View Badges
Joined
Feb 23, 2019
Messages
5,895
Reaction score
4,399
Rating - 0%
0   0   0
I would look into led bars or t5 if looking for best spread/ least shading. Maxspect jump ethereal is also a very nice light and comparable to the prime but i think slightly more powerful. Lower priced lights like noopsyche and smat farms are getting great reviews especially for corals with lower lighting needs. I havent seen at real tests with acropora or par levels yet though for smat farms
 
OP
OP
C

calireefer831

New Member
View Badges
Joined
Dec 19, 2010
Messages
23
Reaction score
21
Location
Prunedale, CA
Rating - 0%
0   0   0
I would look into led bars or t5 if looking for best spread/ least shading. Maxspect jump ethereal is also a very nice light and comparable to the prime but i think slightly more powerful. Lower priced lights like noopsyche and smat farms are getting great reviews especially for corals with lower lighting needs. I havent seen at real tests with acropora or par levels yet though for smat farms
Thanks for your input. I had t5s on the first reef tank I had and I'm personally not a big fan so I will not be doing t5s but I will look into the LED that you recommended
 
OP
OP
C

calireefer831

New Member
View Badges
Joined
Dec 19, 2010
Messages
23
Reaction score
21
Location
Prunedale, CA
Rating - 0%
0   0   0
Today's update. Worked a little bit more on the plumbing. I received my returns in the mail and they are much smaller than I expected so I'm not 100% sure I will use them. I may order bigger ones or make my own.

For my overflows I cut a piece of PVC 8 inches long and it seems to be just right. I may take another 1/4 inch off it once I fill it with water. Will have to wait and see I have two more strainers ordered for the second overflow

I'm still debating about my sump setup. Currently leaning toward a 40g breeder. And a 10 gallon tank for my ATO reservoir. I cut out cardboard with the footprint of both and put them under my tank to get an idea about space.
 

Attachments

  • KIMG0988.JPG
    KIMG0988.JPG
    138.3 KB · Views: 502
  • KIMG0989.JPG
    KIMG0989.JPG
    110.1 KB · Views: 484
  • KIMG0990.JPG
    KIMG0990.JPG
    140.5 KB · Views: 440
  • KIMG0991.JPG
    KIMG0991.JPG
    72.9 KB · Views: 441
  • KIMG0992.JPG
    KIMG0992.JPG
    73.7 KB · Views: 442
  • KIMG0993.JPG
    KIMG0993.JPG
    154 KB · Views: 525
  • KIMG0994.JPG
    KIMG0994.JPG
    113.8 KB · Views: 418
OP
OP
C

calireefer831

New Member
View Badges
Joined
Dec 19, 2010
Messages
23
Reaction score
21
Location
Prunedale, CA
Rating - 0%
0   0   0
Todays update. I've made a good bit of progress. I moved the tank to where it will go. I added plywood and painted it what I would call "coraline purple". Originally I wasn't sure if I even wanted to paint or stain it. I've also started working on the plumbing and I changed the overflow. I also added my rubble rock as my substrate.

KIMG1002.JPG KIMG1004.JPG KIMG1007.JPG KIMG1009.JPG KIMG1008.JPG 28515.jpeg
 
OP
OP
C

calireefer831

New Member
View Badges
Joined
Dec 19, 2010
Messages
23
Reaction score
21
Location
Prunedale, CA
Rating - 0%
0   0   0
Saturdays update. So I got my skimmer and my heater. Still waiting on my sump divider kit I ordered. I have been trying to work on my return plumbing but I'm just fighting the vinyl tubing. I may try using a heat gun to help form it the way I need it to. If that doesn't work I will probably switch to all PVC return lines.

I think I've finally decided on my light. A kessil apx9.

KIMG1049.JPG KIMG1048.JPG
 
Last edited:
OP
OP
C

calireefer831

New Member
View Badges
Joined
Dec 19, 2010
Messages
23
Reaction score
21
Location
Prunedale, CA
Rating - 0%
0   0   0
Todays update. Finally finished my return plumbing. Not the prettiest but it should work. If I were to to this over again I would probably drill out two more holes and put in bulkheads for returns. I was nervous never having drilled glass before that I didn't want to put in to many holes in the tank. I also added some silicone around the top of the bulkheads just for good measure. My sump divider should arrive monday so hopefully next week I can add water. I also added where I plan to hang my kessil from

KIMG1051.JPG KIMG1053.JPG KIMG1052.JPG 29317.jpeg
 
Last edited:
OP
OP
C

calireefer831

New Member
View Badges
Joined
Dec 19, 2010
Messages
23
Reaction score
21
Location
Prunedale, CA
Rating - 0%
0   0   0
Another update. I installed the divider kit in my sump. Added my refugium light and did my return plumbing and have started to fill it with water
 

Attachments

  • KIMG1061.JPG
    KIMG1061.JPG
    89 KB · Views: 330
  • KIMG1060.JPG
    KIMG1060.JPG
    218.5 KB · Views: 353
OP
OP
C

calireefer831

New Member
View Badges
Joined
Dec 19, 2010
Messages
23
Reaction score
21
Location
Prunedale, CA
Rating - 0%
0   0   0
I finally have water in it! I am currently letting it cycle. I think it looks good and I am excited to start filling it. I added plastic screws to my sump to use the adjustable water height divider. I got the light mounted and programed. The skimmer seems to be working fine so far. And the pump I got seems to be just right where I may not need to add a gyre or wavemaker. I have been tweaking a few different things here and there and I will likely continue to do so for the next week or two

KIMG6119.JPG KIMG6120.JPG KIMG6121.JPG
 
OP
OP
C

calireefer831

New Member
View Badges
Joined
Dec 19, 2010
Messages
23
Reaction score
21
Location
Prunedale, CA
Rating - 0%
0   0   0
So I couldn't help myself today and went to three lfs. here are some pics. I will add more pics as the frags open up more.
 

Attachments

  • IMG_0480.jpg
    IMG_0480.jpg
    119.3 KB · Views: 358
  • IMG_0478.jpg
    IMG_0478.jpg
    113.6 KB · Views: 358
  • IMG_0477.jpg
    IMG_0477.jpg
    127.4 KB · Views: 309
  • KIMG1097.JPG
    KIMG1097.JPG
    150 KB · Views: 303
  • KIMG1109.JPG
    KIMG1109.JPG
    134.4 KB · Views: 293
  • KIMG1108.JPG
    KIMG1108.JPG
    141.4 KB · Views: 278
  • KIMG1105.JPG
    KIMG1105.JPG
    76.6 KB · Views: 285
  • KIMG1098.JPG
    KIMG1098.JPG
    157.7 KB · Views: 278
  • KIMG1099.JPG
    KIMG1099.JPG
    143.3 KB · Views: 253
  • KIMG1106.JPG
    KIMG1106.JPG
    96.4 KB · Views: 242
  • KIMG1101.JPG
    KIMG1101.JPG
    98.4 KB · Views: 239
  • KIMG1107.JPG
    KIMG1107.JPG
    89.7 KB · Views: 230
  • KIMG1104.JPG
    KIMG1104.JPG
    107.9 KB · Views: 220
  • KIMG1102.JPG
    KIMG1102.JPG
    95.5 KB · Views: 232
  • KIMG1100.JPG
    KIMG1100.JPG
    117.1 KB · Views: 210
  • KIMG1103.JPG
    KIMG1103.JPG
    83.5 KB · Views: 305

TerraMagnus

Community Member
View Badges
Joined
Aug 18, 2019
Messages
46
Reaction score
126
Location
Raleigh, NC
Rating - 0%
0   0   0
Would you mind doing me a small favor please? Zoo Med has published dimensions for this tank that look suspiciously like they are rounding off fractional inches, or maybe only measuring the glass dimensions and not the rim. I'm looking at these for stacking in a muscle rack but there are no local sources I can go to with a tape measure and get precise external dimensions with rim.

Would you mind maybe checking the external dimensions and seeing if it's indeed fractionally more than what Zoo Med advertises? (48″ x 24″ x 10″)
 
OP
OP
C

calireefer831

New Member
View Badges
Joined
Dec 19, 2010
Messages
23
Reaction score
21
Location
Prunedale, CA
Rating - 0%
0   0   0
Would you mind doing me a small favor please? Zoo Med has published dimensions for this tank that look suspiciously like they are rounding off fractional inches, or maybe only measuring the glass dimensions and not the rim. I'm looking at these for stacking in a muscle rack but there are no local sources I can go to with a tape measure and get precise external dimensions with rim.

Would you mind maybe checking the external dimensions and seeing if it's indeed fractionally more than what Zoo Med advertises? (48″ x 24″ x 10″)
Hopefully this helps
 

Attachments

  • KIMG1137.JPG
    KIMG1137.JPG
    122.9 KB · Views: 272
  • KIMG1136.JPG
    KIMG1136.JPG
    129.1 KB · Views: 282
  • KIMG1135.JPG
    KIMG1135.JPG
    110.8 KB · Views: 300

Looking back to your reefing roots: Did you start with Instant Ocean salt?

  • I started with Instant Ocean salt.

    Votes: 187 71.4%
  • I did not start with Instant Ocean salt, but I have used it at some point.

    Votes: 19 7.3%
  • I did not start with Instant Ocean salt and have not used it.

    Votes: 49 18.7%
  • Other.

    Votes: 7 2.7%
Back
Top