224g build

seitzjh

Active Member
View Badges
Joined
Aug 27, 2016
Messages
267
Reaction score
548
Location
Lake Worth, FL
Rating - 0%
0   0   0
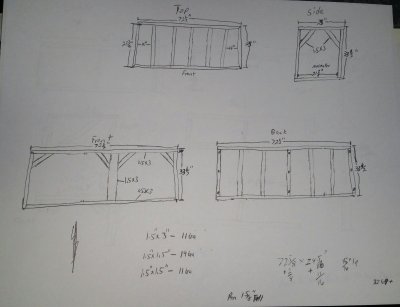
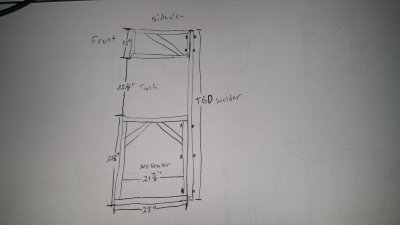
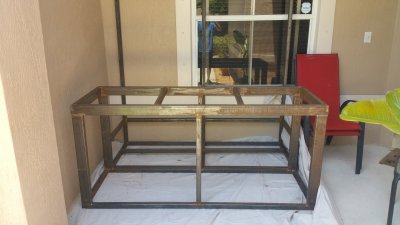
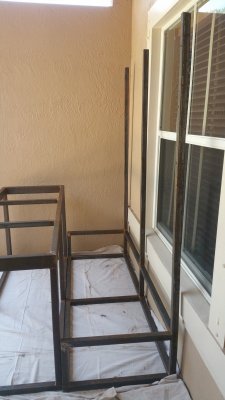
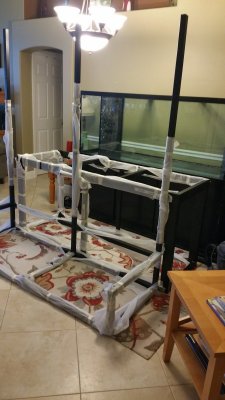
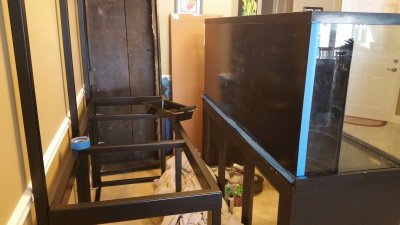
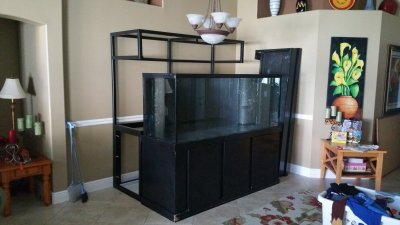
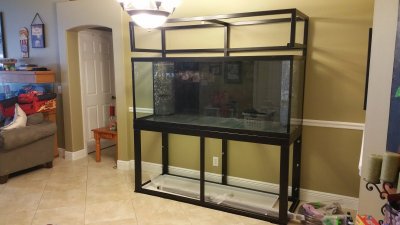
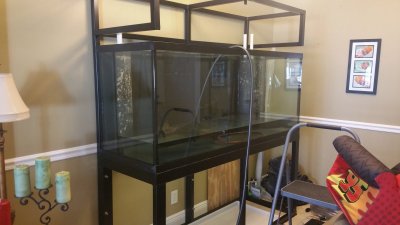
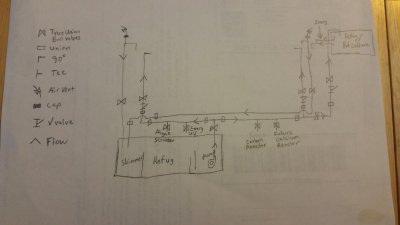
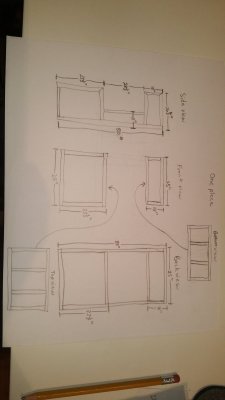
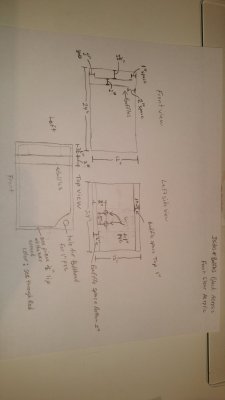
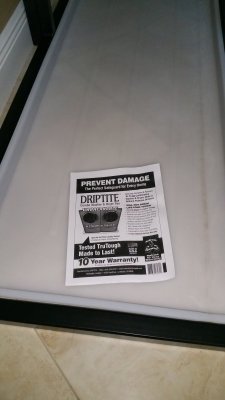
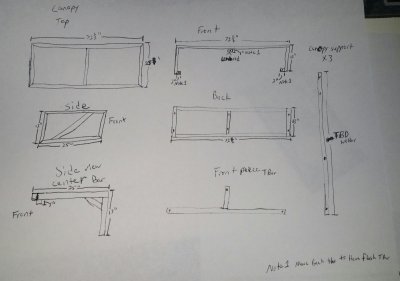
So I have been working on a tank build since I think February. I had picked up a 224gal tank with almost everything for $600. UV, chiller, skimmer, pump, lights, rock, stand, and sump. I had drawn up plans for a custom stand had it made up and powder coated. Had a drip pan made up. I have started buying efficient equipment and started receiving them. I have been trying to sell the other equipment to help fund the build. I have drawn up piping plans and another stand. Piping plan as not been updated yet. I had resealed tank and water tested a few months ago. I already mounted rodi in the garage. I need to move stand over about 1 1/2" for room for the other. I should be receiving my (3) xr30w pro g4's this week. I have my apex controller with ALD, WXM, LSM, and PM2 also already Vectra L1 and (2) Maxspect gyre xf-150. After I figure out my plumbing need to order all plumbing parts and PVC. I have to order my storage tanks for mixing station and start curing rock while I work on plumbing. I also have to run wiring from independent breaker and add another outlet.
20160427_181057-1.jpg 20160427_181044-1.jpg 20160427_181019.jpg 20160522_125350.jpg
20160522_125455.jpg 20160617_145904.jpg 20160618_132851.jpg 20160618_151217.jpg 20160618_181712.jpg 20160626_170927.jpg 20160814_193205.jpg 20160814_221505.jpg 20160814_233414.jpg 20160618_141305.jpg
 

jsker

Reefing is all about the adventure
View Badges
Joined
Apr 11, 2015
Messages
24,974
Reaction score
79,738
Location
Saint Louis
Rating - 0%
0   0   0
And then there was the build:) nice job!
 
OP
OP
seitzjh

seitzjh

Active Member
View Badges
Joined
Aug 27, 2016
Messages
267
Reaction score
548
Location
Lake Worth, FL
Rating - 0%
0   0   0
Looking good. Did you bolt the light rack to the main stand?
That is just the canopy it is bolted to stand with stainless steel carriage bolts. I haven't decided how I'm going to do the light rack yet inside canopy. The stand and canopy are going to be skinned in wood.
 

mlb7225

Active Member
View Badges
Joined
Sep 16, 2014
Messages
168
Reaction score
81
Location
Thousand Oaks, CA
Rating - 0%
0   0   0
That is just the canopy it is bolted to stand with stainless steel carriage bolts. I haven't decided how I'm going to do the light rack yet inside canopy. The stand and canopy are going to be skinned in wood.
Oh sweet. can't wait to see after the wood is installed.
 
OP
OP
seitzjh

seitzjh

Active Member
View Badges
Joined
Aug 27, 2016
Messages
267
Reaction score
548
Location
Lake Worth, FL
Rating - 0%
0   0   0
I have 2 corner over flows with (2) 1" bulks in each. What size pvc on drain in tank should I use? I'm doing (1) 1" return on each side. And how should I set plumbing on drain (1) 1 1/2" Durso on each side then reduce to 1" to BH's? Any suggestions. I'm not sure if 3/4" bottom is tempered. Yes some ball valves in diagram will be change to gate for dialing in.
 
Last edited:
OP
OP
seitzjh

seitzjh

Active Member
View Badges
Joined
Aug 27, 2016
Messages
267
Reaction score
548
Location
Lake Worth, FL
Rating - 0%
0   0   0
wow that is crazy i have a similar designed stand for our 220. when we built it we made our top piece slide into the lower section
IMG_20160718_092527812.jpg
IMG_20160822_055406069.jpg
Your stand came out nice. On my stand I have it bolted to the bottom. I did 11 gauge for bottom and 14 gauge for the top
 

ochriso

Active Member
View Badges
Joined
Sep 26, 2015
Messages
189
Reaction score
41
Location
Cantonment. Fla
Rating - 0%
0   0   0
thanks! definitely 11ga on bottom and 14ga on top. top frame is 1x2 box tubing and the lower frame on the top is 1-1/2 angle hopefully to help with mounting lights. Going to wrap ours with corian type 1/2'' thick acrylic sheet attached with recessed magnets
 

revhtree

Owner Administrator
View Badges
Joined
May 8, 2006
Messages
47,855
Reaction score
87,962
Rating - 100%
1   0   0
Looking good!
 
OP
OP
seitzjh

seitzjh

Active Member
View Badges
Joined
Aug 27, 2016
Messages
267
Reaction score
548
Location
Lake Worth, FL
Rating - 0%
0   0   0
It has been a while since my last update. I had to take a big break on the build. Money had to go other places. I just started again a few weeks. I have started working on the piping and the support. Once support bracket is complete i will be able to move only 4 nuts and the whole bracket can come out in one piece so i can get powder coated.

20170708_180121.jpg
20170708_224052.jpg
20170708_224118.jpg
20170728_220434.jpg
20170728_220524.jpg
20170728_220549.jpg
20170728_220632.jpg
 
OP
OP
seitzjh

seitzjh

Active Member
View Badges
Joined
Aug 27, 2016
Messages
267
Reaction score
548
Location
Lake Worth, FL
Rating - 0%
0   0   0
Got this dry fitted yesterday.
20170802_204023.jpg


I started laying out rock while i wait for my water storage tanks to hopefully arrive next week so i can work on the mixing station. I have this as a possible aquascape. Any suggestions are greatly appreciated.
20170802_201415.jpg
20170802_201423.jpg
20170802_201437.jpg
20170802_201448.jpg
 

Just grow it: Have you ever added CO2 to your reef tank?

  • I currently use a CO2 with my reef tank.

    Votes: 6 7.1%
  • I don’t currently use CO2 with my reef tank, but I have in the past.

    Votes: 4 4.7%
  • I have never used CO2 with my reef tank, but I plan to in the future.

    Votes: 5 5.9%
  • I have never used CO2 with my reef tank and have no plans to in the future.

    Votes: 65 76.5%
  • Other.

    Votes: 5 5.9%
Back
Top