I actually use mine to cut butter.Added a few different Forest Saw blades. Cuts like butter!
Navigation
Install the app
How to install the app on iOS
Follow along with the video below to see how to install our site as a web app on your home screen.
Note: This feature may not be available in some browsers.
More options
You are using an out of date browser. It may not display this or other websites correctly.
You should upgrade or use an alternative browser.
You should upgrade or use an alternative browser.
Anyone enjoy woodworking?
- Thread starter kschweer
- Start date
- Tagged users None
That is a jointer! And I thought I was doing good with my Rikon 8" jointerNow I'm just working on getting the last couple of pieces of equipment that I want for my home shop. A new 8"x 83" parallelogram jointer with a helical cutter. A 20" planer with a helical cutter. And a new 17" bandsaw. Probably more than enough for anything I will ever need. I don't do any woodworking for a living. Strictly a hobby and to take care of projects that I like or if the occasional neighbor or family member wants something not found in a store.
Keep in mind that’s end grain. Not just cutting pieces to fit but making the blanks to slice them from. Allot of Work.I'm sure with a few qualified brains around, and a few hours you could make the appropriate jigs in order to make a floor like that feasible. I would still charge insane time on it though because I wouldn't want to do it.
I have. 12” grizzly jointer and I’m super happy with it.
I'm aware. I do tumbling block end grain boards often. Jigs, precise milling, and a drum sander make repeatability easy and a lot faster.Keep in mind that’s end grain. Not just cutting pieces to fit but making the blanks to slice them from. Allot of Work.
Hey everyone,
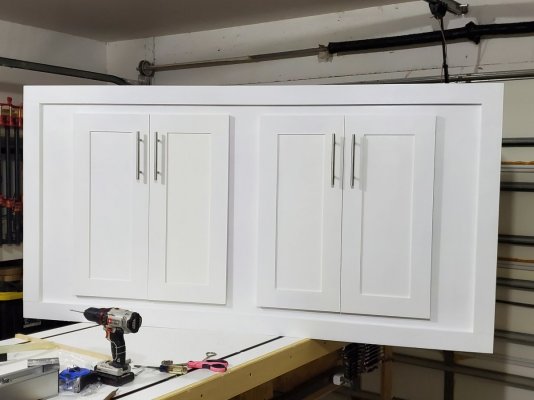
I needed a cloth to wipe on a Poly-Finish to a few cabinet doors that I made. I didn't have any suitable cloths around, so I thought about using an old Filter Sock. I cut one up into 4 pieces, it worked great, no lint, held the finish with minimal drip, and spread the Poly-Finish like glass.
Glad I didn't toss out all my old Filter Socks!
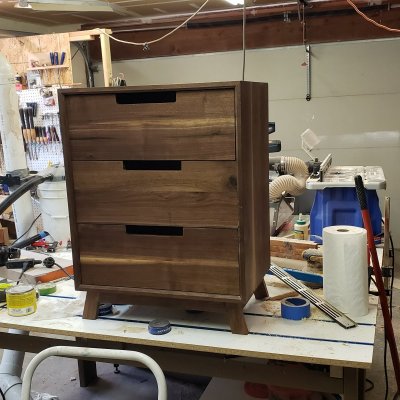
Yes absolutely counts. Stand looks fantastic.
Not sure if you were shooting for a Craftsman style, but pulled it off awesome.
Taper and inset of the feet look great.
Yes it counts and looks great!
Thanks!Yes it counts and looks great!
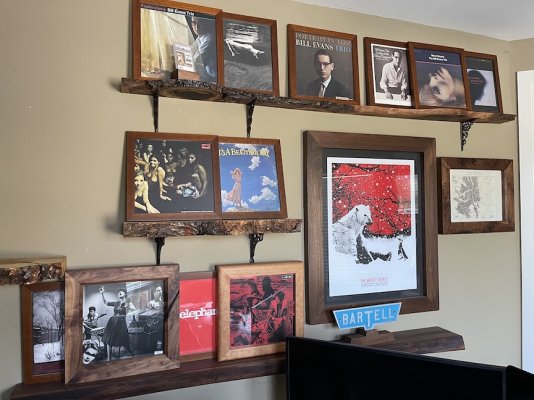
After being amazed at the cost of cheap plastic-y frames from the nationwide craft stores, I started to making some hardwood frames for some of my older concert posters and vintage records, then end and coffee tables, bedroom set and some desk and dining tables. Prefer walnut and cherry and some local elm. Reefing is going to end for me in less than a decade when my youngest is out of college and we can travel more, so this is a good hobby since it doesn't mind if you take off and head out of town.
I love that I can make stuff and see if I like it. If not, I just make something else - so far it has been easy to get rid of solid hardwood stuff if I don't want it. I also love the sap wood mixed with the heartwood.
Working on a few mid century chairs right now to perfect a template... then to make a dozen of them.
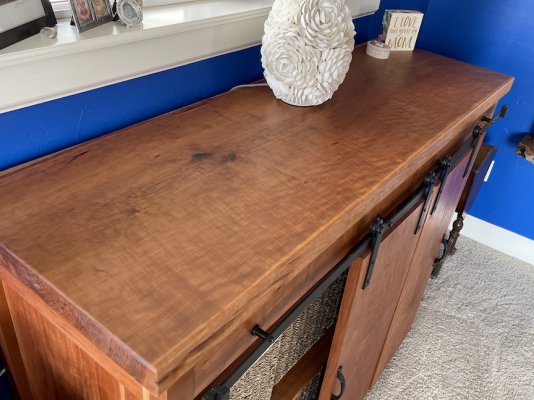

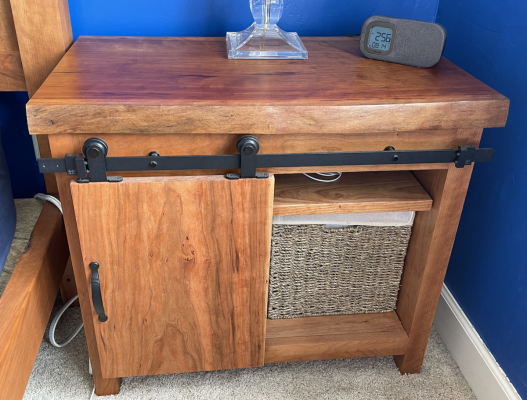
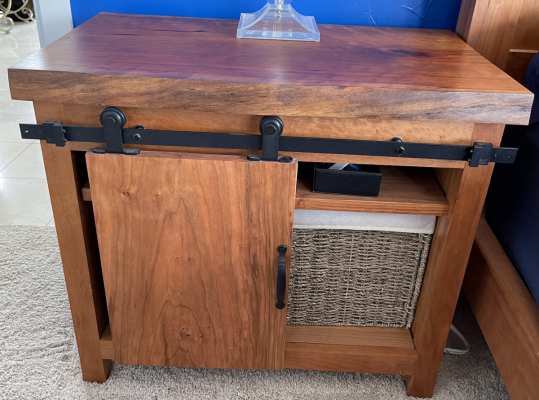
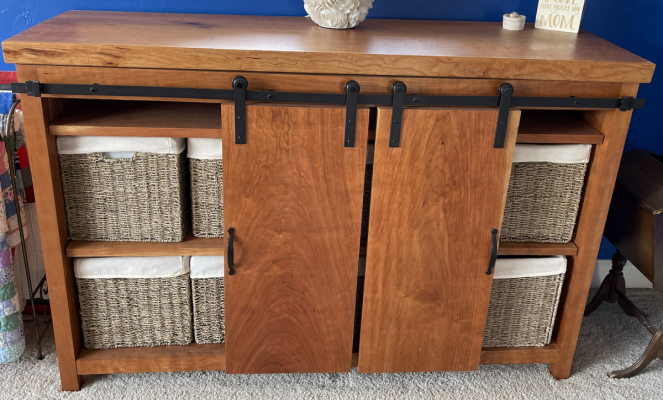
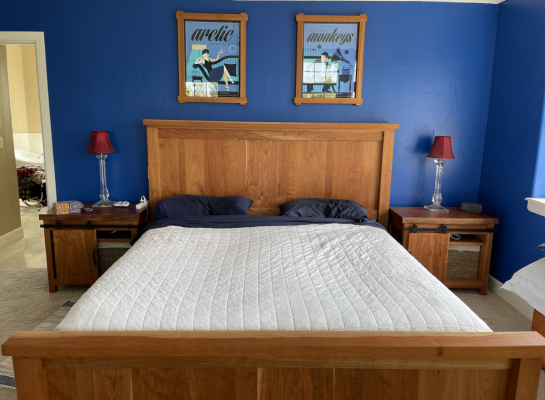
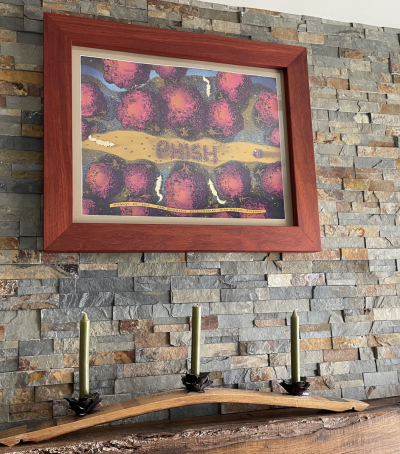
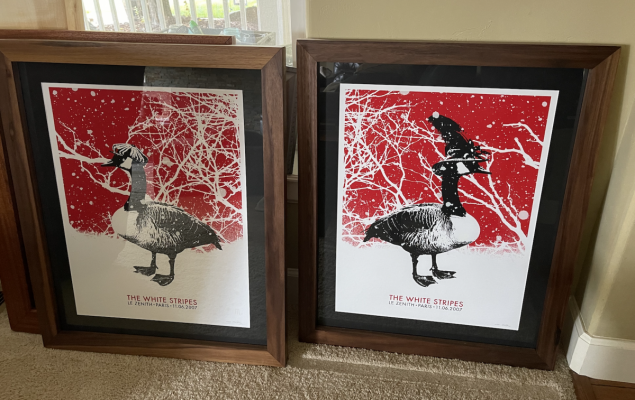
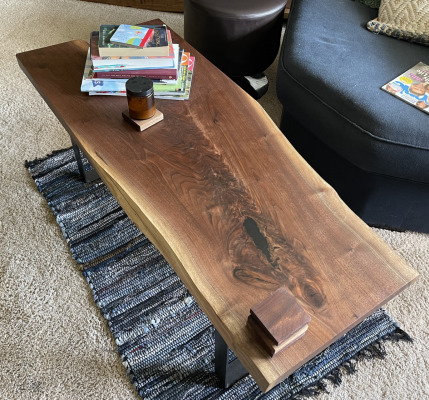


Need ideas and advice from the DIY woodworkers
I have a new project of restoring an old wheelbarrow. I’ve been telling my wife for over 10 years that this antique wheelbarrow that’s been in our yard for 40+ years is in desperate need of repair. No, she liked that worn out antique look (lucky for me) and didn’t want me to touch it. Well it’s finally past a simple fix and she was convinced it needed work.
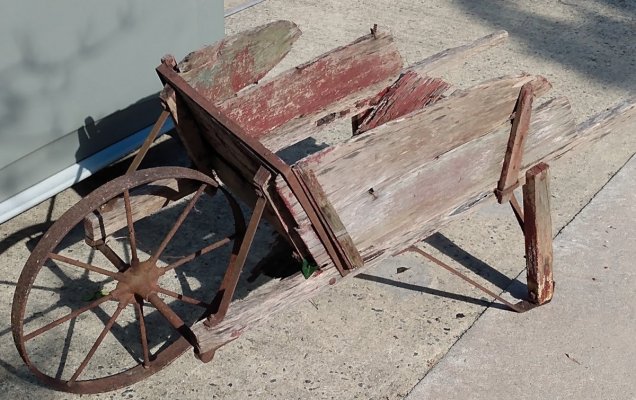
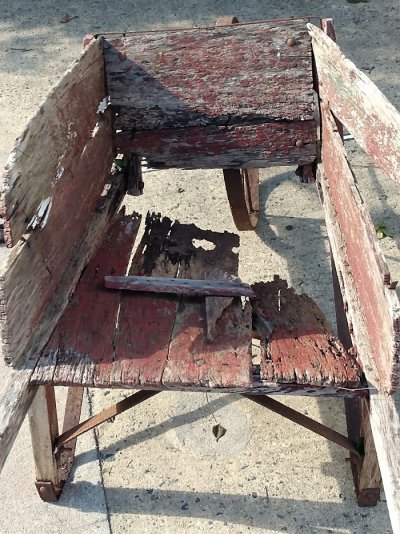
This is no longer a couple nails and a paint job. This is a total rebuild. Not one stick of wood is salvageable. So I’ve cut all the frame wood out of pressure treated and formed the round handles, and now about ready to start to build it back and ran into this little issue. The removable side pieces are simply held in place by the front frame and side metal U pieces that hold a vertical piece of wood. Here’s the wood loosely fit into that U bracket.
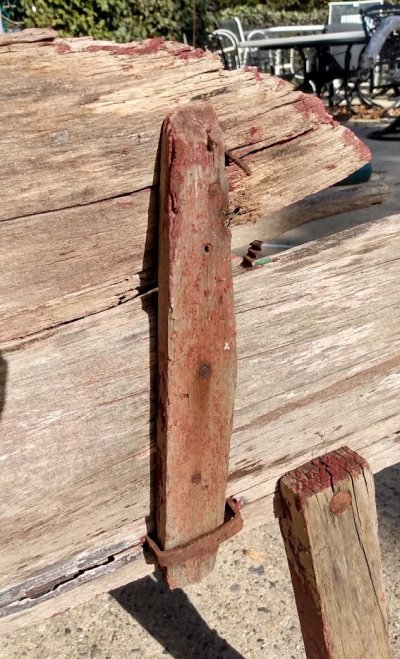
Now the problem….that metal U bracket…
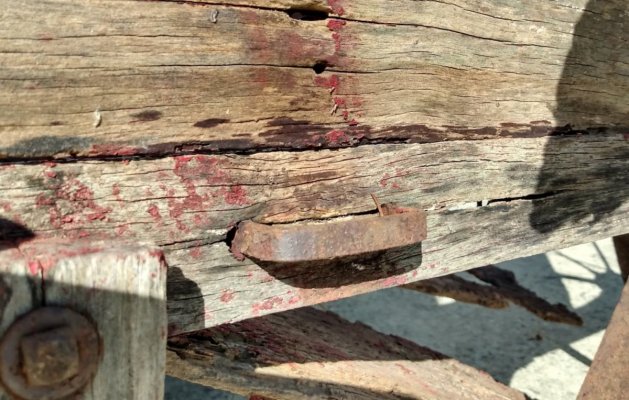
Is held in place by siding it through the holes and bending the back side flat to the wood
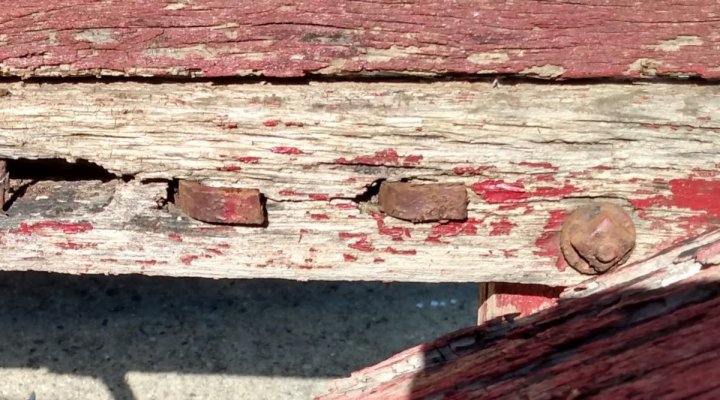
I would imagine this was originally done by heating these metal parts in a forge and sliding them through the holes and using a hammer, bend this red hot metal over. These aren't thin sheet metal, but fairly thick. Not even sure how to remove them.
And that's were I need suggestions. How can I put these into the new rebuild?
I have a new project of restoring an old wheelbarrow. I’ve been telling my wife for over 10 years that this antique wheelbarrow that’s been in our yard for 40+ years is in desperate need of repair. No, she liked that worn out antique look (lucky for me) and didn’t want me to touch it. Well it’s finally past a simple fix and she was convinced it needed work.


This is no longer a couple nails and a paint job. This is a total rebuild. Not one stick of wood is salvageable. So I’ve cut all the frame wood out of pressure treated and formed the round handles, and now about ready to start to build it back and ran into this little issue. The removable side pieces are simply held in place by the front frame and side metal U pieces that hold a vertical piece of wood. Here’s the wood loosely fit into that U bracket.

Now the problem….that metal U bracket…

Is held in place by siding it through the holes and bending the back side flat to the wood

I would imagine this was originally done by heating these metal parts in a forge and sliding them through the holes and using a hammer, bend this red hot metal over. These aren't thin sheet metal, but fairly thick. Not even sure how to remove them.
And that's were I need suggestions. How can I put these into the new rebuild?
Cool project for sure.Need ideas and advice from the DIY woodworkers
I have a new project of restoring an old wheelbarrow. I’ve been telling my wife for over 10 years that this antique wheelbarrow that’s been in our yard for 40+ years is in desperate need of repair. No, she liked that worn out antique look (lucky for me) and didn’t want me to touch it. Well it’s finally past a simple fix and she was convinced it needed work.


This is no longer a couple nails and a paint job. This is a total rebuild. Not one stick of wood is salvageable. So I’ve cut all the frame wood out of pressure treated and formed the round handles, and now about ready to start to build it back and ran into this little issue. The removable side pieces are simply held in place by the front frame and side metal U pieces that hold a vertical piece of wood. Here’s the wood loosely fit into that U bracket.

Now the problem….that metal U bracket…

Is held in place by siding it through the holes and bending the back side flat to the wood

I would imagine this was originally done by heating these metal parts in a forge and sliding them through the holes and using a hammer, bend this red hot metal over. These aren't thin sheet metal, but fairly thick. Not even sure how to remove them.
And that's were I need suggestions. How can I put these into the new rebuild?
What is the ending finish look like? Will it be left raw but treated wood, Or are you planning to paint it?
Are you opposed to modifying the bracket (cut off the bent portion) as it isn't seen?
There are a few options here.
Here's what I would do for simplicity sake.

Cut and remove a notch (red) for the hardware to slide up into. And cut and glue in a filler piece equal to the size of your notch with the grain orienting the correct direction.
This keeps your original hardware intact. If it's going to be painted it will never be seen. If it's going to be left rough it's Not too hard to match the color and direction of the grain when you only need a half inch filler piece.
Last edited:
Thanks for the reply. My stupidity will never cease to amaze me. Here was my thought process. Make the brackets out of aluminum thinking aluminum would be easier to bend. Then, as I thought about installing these shiny new brackets through the holes, I had my DOH moment. By simply tapping the current bracket with a hammer, I expose enough metal on the inside to bend the brackets.
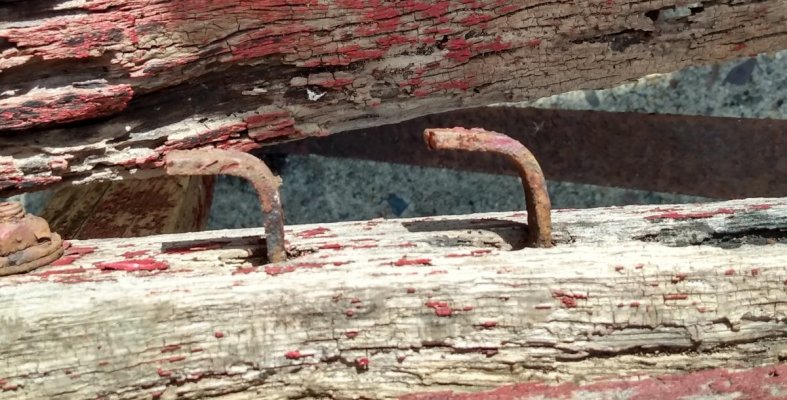
Straighten out these bends and a little anvil work and it's as good as new.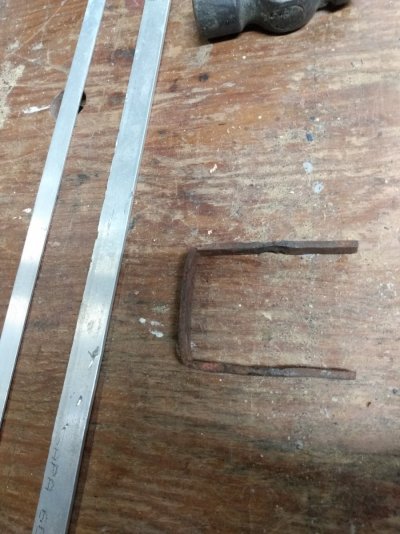
I'm now confident I can reverse this process in putting them back in.

Straighten out these bends and a little anvil work and it's as good as new.

I'm now confident I can reverse this process in putting them back in.
Cool project for sure.
What is the ending finish look like? Will it be left raw but treated wood, Or are you planning to paint it?
Are you opposed to modifying the bracket (cut off the bent portion) as it isn't seen?
There are a few options here.
Here's what I would do for simplicity sake.

Cut and remove a notch (red) for the hardware to slide up into. And cut and glue in a filler piece equal to the size of your notch with the grain orienting the correct direction.
This keeps your original hardware intact. If it's going to be painted it will never be seen. If it's going to be left rough it's Not too hard to match the color and direction of the grain when you only need a half inch filler piece.
Again, thanks for the reply. I knew I could come here to get ideas but am now confident I've solved by first dilemma. You raised my second dilemma....the finish.
My wife likes.....wants that weathered, paint peeling old look. As it is, I planned, if I can find it, to used rough sawn wood to give that rustic look. Now the finish is where I'm having problems. I simply want to paint it red and be done. Also not sure of the color or the metal...should that also be red? I have time before finishing.
Attempting to finish and make new things look old, I can't help you with. I personally refuse to for my wife, or clients I build for.Again, thanks for the reply. I knew I could come here to get ideas but am now confident I've solved by first dilemma. You raised my second dilemma....the finish.
My wife likes.....wants that weathered, paint peeling old look. As it is, I planned, if I can find it, to used rough sawn wood to give that rustic look. Now the finish is where I'm having problems. I simply want to paint it red and be done. Also not sure of the color or the metal...should that also be red? I have time before finishing.
Age wears wood/metal and paint very specifically. Most people will just rough it up with a chain or bristle brush after... Personally I think they come out looking unnatural.
Similar threads
- Replies
- 5
- Views
- 192
- Replies
- 7
- Views
- 240
TOP 10 Trending Threads
- Replies
- 38
- Views
- 372
- Replies
- 25
- Views
- 526
- Replies
- 21
- Views
- 165
-
- Sticky
- Replies
- 63
- Views
- 540
- Replies
- 26
- Views
- 194
- Replies
- 41
- Views
- 824


