Staples Innovative Marine EXT 75 Mixed Reef Build

Staplesofficewar

Active Member
View Badges
Joined
Dec 11, 2022
Messages
195
Reaction score
80
Location
Evans
Rating - 100%
3   0   0
I've been in and out of the fish business since around 2003 when I picked up a few red belly piranha while in College In Pennsylvania. Thats another story all together. Around the same time, I found out a buddy of mine had a reef system setup and I became hooked. Since that I time I have had many sizes and shapes of reefs from octogen budget builds, to my latest ongoing build - my EXT75. In between that were several projects started that never finished, or finished with poor results. I'd had a custom 46 bowfront where I had a new bottom panel made so I could have an internal overflow and standpipes, a back drilled 110, a reef ready 90, and most recently and most successfully, my IM 25 lagoon. That tank is now slap full (no build thread) so I decided to leap and went with another innovative marine tank. Do a few posts to catch up, but as of now, it is setup in its location - just moving fresh water around.

Tank: 75 EXT with Nuvo Aluminum Stand
Sump: RFS27
Pump: MightyJet XL DC pump
Lights; Prime 16HD x 4
Skimmer: Simplicity 120DC
Pwrheads: Nero 5 x 2

And misc. equipment that I will share or move from the 25. Not sure on the fate of that tank yet, but the plan today is to keep both.
 
OP
OP
Staplesofficewar

Staplesofficewar

Active Member
View Badges
Joined
Dec 11, 2022
Messages
195
Reaction score
80
Location
Evans
Rating - 100%
3   0   0
October 16 - 2023
I finally, after a few posts here inquiring about amount paid for new EXT 75 systems, pulled the trigger. The setup with tank, stand, plumbing, sump and pump was on sale for 20% off and no tax - so a bargain right? It took me weeks of considering it, and months of waiting for a tank of similar size and dimensions to come up for sale someplace in the southeast, but nothing ever came close.... and I do enjoy the piece of mind a new tank provides. Still, I ordered a few days later than supply of tanks and had to wait 5 weeks for delivery.

November 21, 2023

Tank day! SAIA showed up pretty late in the day - so it made sense to take off the entire day...

IM packaging is one of the best I have ever seen - not a single issue with packaging. Above and beyond. Here are a few unboxing pics.

IMG_7338.jpg


IMG_7339.jpg


IMG_7340.jpg


IMG_7341.jpg
 
OP
OP
Staplesofficewar

Staplesofficewar

Active Member
View Badges
Joined
Dec 11, 2022
Messages
195
Reaction score
80
Location
Evans
Rating - 100%
3   0   0
The next day I did find an issue with fitment in the sump. The plate the supports the media baskets (or socks if you prefer) was too long / wall between heater chamber was slightly out and would not let the plate sit flat. While difficult to see in the photo, I was able to send video and pictures to IM for their help. In the end they made everything right and I was very surprised at their reactiveness to the issue. I had already really liked the brand from my experience with their 25 AIO lagoon, but this sealed the deal for me. I suppose you could call me a cheerleader for them at this point.

IMG_7358.jpg
 
OP
OP
Staplesofficewar

Staplesofficewar

Active Member
View Badges
Joined
Dec 11, 2022
Messages
195
Reaction score
80
Location
Evans
Rating - 100%
3   0   0
There was a fairly long lull of activity over the weeks before Christmas and New Years. Between work and traveling back home it was hard to find time to eat and sleep let alone play. I did get it moved into the house from the garage around the 17th of December after some fittings came in from Ali that I needed to pull the return lines in closed to the back of the tank. You see, the stock included plumbing sticks out past the overflow box by 1.5-2" or so. This, couldnt with a chair rail around the room lining up exactly with the return line ball valves pushed the tank about 4" from overflow to the wall and 8" overall. I know some dont think thats a big deal, but I petty tight on space.

Before mod:

IMG_7672.jpg


And After: I replaced the straight bulkheads with integrated 90 bulkheads, and dropped the entire return section down about 6". This moved it all in away from the wall, and ball valves below the chair rail. I now access those ball valves from under the tank stank.
IMG_8031.jpg


IMG_8035.jpg

IMG_8032.jpg
 
OP
OP
Staplesofficewar

Staplesofficewar

Active Member
View Badges
Joined
Dec 11, 2022
Messages
195
Reaction score
80
Location
Evans
Rating - 100%
3   0   0
Added pond liner under the PVC board for the inevitable spills. The bottom board is supposed to be water proof, so not worried about a little water getting under it, but I dont want it leaking onto the wood floor. This seemed like a little bit of insurance for cheap.

I used gorilla all weather tape all round the edges to secure it. Here you can see the front and left edge complete.

IMG_7837.jpg
 

X-37B

Fight The Good Fight
View Badges
Joined
Sep 10, 2018
Messages
9,836
Reaction score
17,108
Location
The Outer Limits
Rating - 0%
0   0   0
Added pond liner under the PVC board for the inevitable spills. The bottom board is supposed to be water proof, so not worried about a little water getting under it, but I dont want it leaking onto the wood floor. This seemed like a little bit of insurance for cheap.

I used gorilla all weather tape all round the edges to secure it. Here you can see the front and left edge complete.

IMG_7837.jpg
Nice!. I used cauking tape around the inside. It seals well as no water can get under the stand on my ext 170.
20240109_141625.jpg
 

X-37B

Fight The Good Fight
View Badges
Joined
Sep 10, 2018
Messages
9,836
Reaction score
17,108
Location
The Outer Limits
Rating - 0%
0   0   0
That looks nice. Is the caulk tape very sticky? I would consider adding that to the liner as well.
Yes sticky, works well, and is designed for wet environments. Running all the way around seals it so nothing can go to the floor. I thought if a liner but this was easy to install.
 
OP
OP
Staplesofficewar

Staplesofficewar

Active Member
View Badges
Joined
Dec 11, 2022
Messages
195
Reaction score
80
Location
Evans
Rating - 100%
3   0   0
A few notes on my old live rock (dead) cleaning process that worked very well on my 25. I first pressure wash the rocks best I can to knock a lot of the exterior dead stuff off, as well as get a little way into the pores of the rock. The idea isn't to get too deep, but remove as many organics as possible. After that, I soak the rocks in a 50/50 vinegar and water bath for 6-8 hours. This removes the outer layer of rock and sort of opens up the pores... at least in my mind. Follow this with a good rinse in regular tap water. Next I soak them in a 10:1 solution of bleach with a handful of power heads. Too long wont hurt, but too short might. The idea here is to dissolve as many organics as possible. Pressure washing the rocks in the first place helps keep the beach stronger longer. As bleach oxidizes the organics, it becomes weaker - so less organics up front means stronger bleach reaches deeper. I transfer the rocks every 2 days or so into a clean container - make sure to shake the rocks under water when moving them. I let the dirty bleach water settle a bit, then pump it through a filter sock back into the container with the rocks. You wont use all the water since a lot of junk has settled out, get what you reasonably can, then top off the container with more bleach and water. After 2-3 weeks, I continue for another week with fresh clean water each time I move them (no bleach) and try to rinse as much bleach away as possible. Keep changing the water until a chlorine test shows relatively low levels (I go until it matches my city water). Once that happens, I soak for another week in RO water and some prime for good measure. Finally, its time to let them sit out - any dry place will work - for a few weeks. You need the rocks to dry completely out.
 
OP
OP
Staplesofficewar

Staplesofficewar

Active Member
View Badges
Joined
Dec 11, 2022
Messages
195
Reaction score
80
Location
Evans
Rating - 100%
3   0   0
Next up ( after drying of course) - a few potential rock configurations to consider. I cut up some cardboard and made a fake 3 wall tank so I could better visualize it.

IMG_6849.jpg


IMG_6911.jpg


IMG_6918.jpg
 
OP
OP
Staplesofficewar

Staplesofficewar

Active Member
View Badges
Joined
Dec 11, 2022
Messages
195
Reaction score
80
Location
Evans
Rating - 100%
3   0   0
I let it set for a few weeks as I got busy again, and tried a couple more arrangements.

IMG_8008.jpg


IMG_8013.jpg


The last pic is pretty close to where I landed with a small modification suggestion by @Katrina71 on a post where I was looking for suggestions.


IMG_8019.jpg


All of these are dry stack - so not it was time for epoxy sticks, superglue, and patience.
 
OP
OP
Staplesofficewar

Staplesofficewar

Active Member
View Badges
Joined
Dec 11, 2022
Messages
195
Reaction score
80
Location
Evans
Rating - 100%
3   0   0
This past Sunday was epoxy, fill tank, and start cycle day... A very busy day. My RO system is rated at 75 GPD, but without a booster pump I am pretty sure I can only get about 55-60/day. I drained the holding tank Saturday night, and started mixing salt. By 8PM Sunday, I had the rock in place, live sand in, and water circulating.

As for gluing the rock together, I would mark with tape the points between rocks that meet, and glue at least 3 points between each rock where practical. I would then mixt up enough epoxy to make 3 dough balls. I would put a generous amount of gel superglue first, then the ball of epoxy, then more glue (just like mounting a frag) and the push the rocks together. i would work the mushed out epoxy and glue back into the point and roughen the surface of the epoxy up so that it doesn't stick out too bad. Once all the joints were complete, I out more superglue on the front facing exposed epoxy and sprinkled some crushed coral on it.

Again - In my hast, I only took a few photos. Here is the right side rock structure before and after I glued it all together.

Before:
IMG_8036.jpg


After: Not the feet at 3 points to keep the rock elevated. I also plan to move my bulldozer (resident pistol in my 25) over and he can move some sand! This pic is ALMOST final - there was one final rock to add to the front.

IMG_8037.jpg
 
OP
OP
Staplesofficewar

Staplesofficewar

Active Member
View Badges
Joined
Dec 11, 2022
Messages
195
Reaction score
80
Location
Evans
Rating - 100%
3   0   0
And Finally, a post to catch up to current conditions with a few showing the clearing progress over the past few days.
Day 0: Filling - nice milky water

IMG_8038.jpg


Day 0 - 3 hours later

IMG_8039.jpg


Day 1 - Before work pic

IMG_8042.jpg


Day 2 - nice and clear with a better look at the final rocks. Only the rock bridge in the middle is not epoxied in place. The left and right parts are single pieces now with 3 legs for support under each.

IMG_8098.jpg


I left room up front for my GSP Island and a Zoa Island from my other tank.

Cycling only with Dr. Tims Ammonia, the caribsea live sand, and Microbactor 7.

I already have some nitrates 3 days after starting the cycle!
 

Katrina71

Learn, Laugh, Love
View Badges
Joined
Mar 26, 2017
Messages
37,351
Reaction score
211,028
Rating - 100%
1   0   0
I let it set for a few weeks as I got busy again, and tried a couple more arrangements.

IMG_8008.jpg


IMG_8013.jpg


The last pic is pretty close to where I landed with a small modification suggestion by @Katrina71 on a post where I was looking for suggestions.


IMG_8019.jpg


All of these are dry stack - so not it was time for epoxy sticks, superglue, and patience.
Did you decide what you like best? Ok, duh I see! It looks really good!
 

Gumbies R Us

Certified Noob
View Badges
Joined
Nov 10, 2022
Messages
15,817
Reaction score
26,327
Location
North Georgia
Rating - 0%
0   0   0
And Finally, a post to catch up to current conditions with a few showing the clearing progress over the past few days.
Day 0: Filling - nice milky water

IMG_8038.jpg


Day 0 - 3 hours later

IMG_8039.jpg


Day 1 - Before work pic

IMG_8042.jpg


Day 2 - nice and clear with a better look at the final rocks. Only the rock bridge in the middle is not epoxied in place. The left and right parts are single pieces now with 3 legs for support under each.

IMG_8098.jpg


I left room up front for my GSP Island and a Zoa Island from my other tank.

Cycling only with Dr. Tims Ammonia, the caribsea live sand, and Microbactor 7.

I already have some nitrates 3 days after starting the cycle!
Aquascape looks great!
 
OP
OP
Staplesofficewar

Staplesofficewar

Active Member
View Badges
Joined
Dec 11, 2022
Messages
195
Reaction score
80
Location
Evans
Rating - 100%
3   0   0
Added some shade today to keep as much light off as possible for the next 8-12 weeks. Might not help, but wont hurt either. I will be adding pods after cycle is complete and feeding them to keep the nitrifying bacteria alive and well.
IMG_8124.jpg
 
OP
OP
Staplesofficewar

Staplesofficewar

Active Member
View Badges
Joined
Dec 11, 2022
Messages
195
Reaction score
80
Location
Evans
Rating - 100%
3   0   0
But there is still lots to take care of in those weeks. I ended up routing my ATO water line this weekend.
I want at least a week of ATO capacity, and looking at surface area of this tank vs my 25, that looks like 7 gallons or so. The issue was space. I have a cabinet on the left (IKEA) to house the electronics, dosing, dos tanks, etc, so not a ton of space there. I considered sliding in a 10 gallon glass tank, but that took up far too much space.

I decided to go ahead and route a new RO line from the upstairs closet to the wall near the tank...
I already had access to the correct floor joist space from security cameras I installed over the summer, so about 50% of the route was easy. The next issue was getting the tube 2 spaces over from the current joist. I know this probably doesn't make too much sense verbally. In other words, I had to get inside the wall, then down though the subfloor into the space between the 1st and 2nd story, Run 20' towards the back of the house, then go through to joists to the right and then through the top of the wall plates, to the bottom.

Luckily, I have pics from pre-insulation to make the job a little easier.


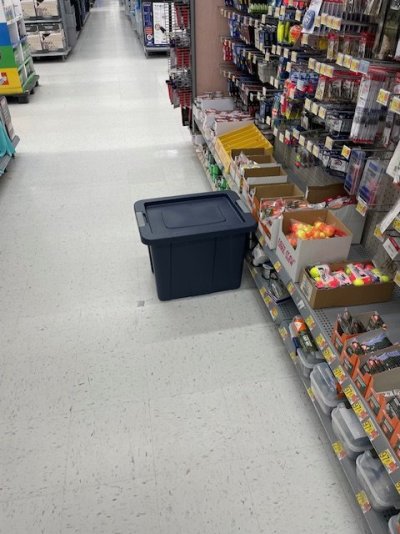
Once I had the route planned and parts from Amazon and Walmart (17 gallon food contact rated tub) I was ready to get going.


Getting to the exiting access hole I cut in over the summer.

IMG_8126.jpg


Opened. There is about 1' of space between the ceiling drywall and the upper level sub floor.
IMG_8127.jpg


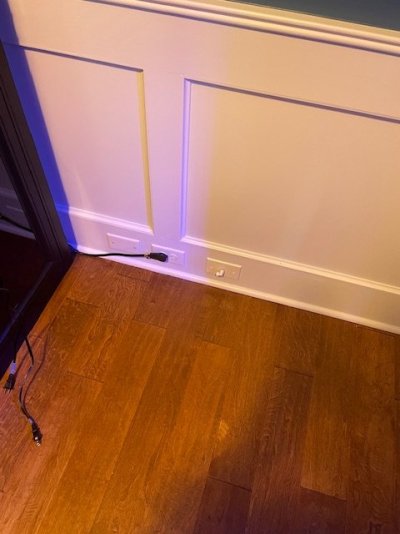
2 joists left - I had to open the space up at the top to gain access to an unused coaxial cable that I used to pull the RO tube in. Who uses Coax anymore anyways? Access hole at top, RO line sticking out box on bottom.
IMG_8128.jpg

Just a 90 degree fitting. Will have cut off valve and redundant SV to control water addition.

IMG_8133.jpg


Tube upstairs. Should get me 3 weeks between fillings. Will be a little bit of a pain to carry buckets up, but I dont have any unsightly tanks to hid either.

IMG_8136.jpg
 

Attachments

  • IMG_8123.jpg
    IMG_8123.jpg
    77.7 KB · Views: 93
  • IMG_8132.jpg
    IMG_8132.jpg
    48.9 KB · Views: 53

TOP 10 Trending Threads

WHAT TYPE OF LIGHT ARE YOU USING FOR YOUR REEF?

  • LEDs.

    Votes: 167 92.8%
  • T5 Florescence.

    Votes: 23 12.8%
  • Metal Halides.

    Votes: 7 3.9%
  • Other (Please explain).

    Votes: 3 1.7%
Back
Top