Tony's 250 Build thread

Tony Hight

Community Member
View Badges
Joined
Jun 19, 2017
Messages
55
Reaction score
91
Rating - 0%
0   0   0
Leading up to this build
I’ve been working on the design of and slowly acquiring equipment for this build for several months now so bear with me as these first few posts will be long. After this, I’ll try to update my progress on a regular basis.

I started reefing close to three years ago and like many of my hobbies, I jumped in with both feet. My first tank was a Planet Aquarium 120 gallon rimless with Starphire Glass. Despite the extensive research I did beforehand, I learned quite a few lessons both in starting and running that tank over these last few years. Even though it took some initial convincing for my wife, she quickly found her place in the hobby as well. While I’m all about the equipment and operation, she has fallen in love with the fish and coral. At this point, she can name more corals by sight than I can. I’ll spare you the details of the 120 tank progression as this thread is about my dream tank 250 build.

In January of 2019 we decided to move to a new home. I felt this was a perfect time to upgrade the tank and do some things I wished I had done in the beginning. It really didn’t take much convincing for my wife to jump on board and she quickly began enabling my desires. We purchased our home earlier this year and rented it back to the previous owners while they had a house built so I have had several months to plan and design this build. We just moved in the first week of October and I am finally able to start putting things together.

20191019_115526.jpg
 
OP
OP
T

Tony Hight

Community Member
View Badges
Joined
Jun 19, 2017
Messages
55
Reaction score
91
Rating - 0%
0   0   0
The Move – Transfer or start from scratch?
At first, we were looking to keep the current tank running and use the move as the time to transfer current corals/fish over to their new home. I spent several weeks working through the logistics and thinking through the challenges of doing this.

Ultimately, I want to do this build right. This takes time and patience both in the design process as well as the actual build itself. We decided that our best option was to shut down the current tank prior to the move and start fresh after we were settled in the new house, so we didn’t rush any aspect of the new tank.

It took us about 6 weeks shut the old tank down. We sold everything to local reefers through one of our favorite local FB groups (Arizona Reef Guys and Gals Coral Research and Preservation Society). We started with the coral, which went quite fast, moved to our fish (which went even faster) and then broke the tank down, cleaned it and sold the tank, stand and sump. All of the other equipment was cleaned and stored for use on the new tank. This was probably the hardest part of this process. We had to part ways with several pieces of coral and fish that we loved, some of which had been with us since the beginning of the tank and our journey in the hobby. We had to remind ourselves that this was an opportunity to do things differently and we would, no doubt, acquire new fish and corals that would become a part of our family and we would fall in love with all over again.

20190506_141236.jpg

20191018_122918.jpg

20191019_103354.jpg

20191019_103415.jpg

20191019_103430.jpg

20191019_103452.jpg

20191019_103516.jpg

20191019_103532.jpg

20191019_103921.jpg
20191019_103519.jpg 20191019_103559.jpg
 
OP
OP
T

Tony Hight

Community Member
View Badges
Joined
Jun 19, 2017
Messages
55
Reaction score
91
Rating - 0%
0   0   0
The Tank
In February of this year I decided to go with Crystal Dynamic Aquarium Manufacturing for my tank. My wife and I were planning on going with a 180…at first. Then it became a 210, 225 and we finally landed on a 250 gallon. This was partially due to the dimensions we were looking for and mainly because 250 gallons just sounded so much better.

Our last tank was mainly LPS and Softies. In this tank, we want to do a combination of SPS and LPS corals so we went with a little taller tank so we can do the LPS towards the middle and bottom of the tank and still give plenty of room for the SPS to grow at the top. We have had both sand and bare bottom in the past and decided to go with bare bottom once again on this tank as it fits the best with our long term goals.
Specs:
  • 250 gallons (~320 total system volume)
  • Dimensions: 72”(L) X 27” (W) X 30” (H)
  • Starphire front – black back
  • ½” glass
  • Double overlapping Eurobraced top
  • Reinforced vertical seams
  • (2) ½” panes of glass on the bottom followed by ½” black HDPE sealed in place
  • 16” Shadow overflow by Synergy Reef Systems
  • (2) 1” returns
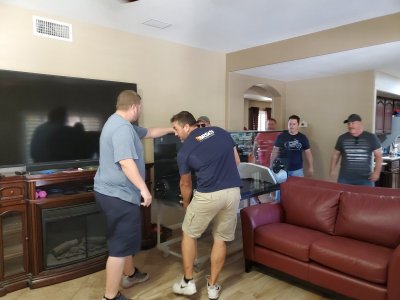
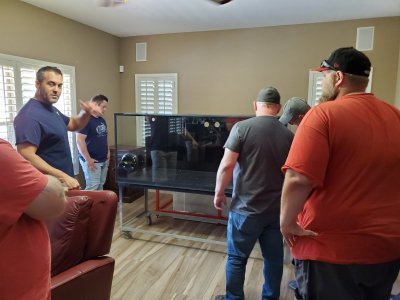
We ordered the tank on Feb 13th (not sure if this was a valentine’s day present from my wife to me or me to my wife). It took about 10 weeks to build and was delivered towards the end of April where it has sat in the cate for the past 5 months.

20190425_154631.jpg
20190425_154641.jpg
20190425_154651.jpg
20190425_154659.jpg
20190425_154710.jpg
20191019_120043.jpg
 
OP
OP
T

Tony Hight

Community Member
View Badges
Joined
Jun 19, 2017
Messages
55
Reaction score
91
Rating - 0%
0   0   0
The Sump
We went with a custom sump for this build that was done by a friend and local reefer in AZ. Ultimately, I wanted water volume, room for current and future equipment, a large refugium, versatility in filtration media and an overall sweet looking setup. All of this went into the design I came up with and my friend turned it into a work of art.
Specs:
  • 120 gallons (112 actual capacity)
  • Live water volume when running – 78 gallons
  • 3/8” White Acrylic
  • Dimensions: 60”(L) X 23”(W) X 20”(H)
  • Overflow: 3.5 gallons – 6 x 7 x 19.25
  • Sock/Filter Chamber: 7.5 gallons – 6 x 14.75 x 20
  • Refugium: 46 gallons – 29.75 x 22.5 x 15.75
  • Skimmer: 13.5 gallons – 14 x 22.25 x 10
  • Return: 7.5 gallons – 8.5 x 22.5 x 8
  • (3) 1.5” bulkheads for main and emergency drains
  • (12) dosing ports – 4 each in return, overflow and refugium sections
  • Removable sock tray that can be converted to use normal filter pad
  • Adjustable skimmer section from 6” to 10”
20191019_114505.jpg

20191019_114528.jpg
 
OP
OP
T

Tony Hight

Community Member
View Badges
Joined
Jun 19, 2017
Messages
55
Reaction score
91
Rating - 0%
0   0   0
The Stand
The stand/wrap took some planning and is ultimately a combination of what my wife and I wanted. I wanted space to be able to get under the tank and work (my favorite part) and she wanted it to look like a piece of furniture that blended with the décor of the house. We opted to go with a steel stand powder coated red to match my red/white (Reef Octopus) theme.

We wanted the height of the tank to be ideal for viewing so people wouldn’t be looking down into the tank, but I also needed something I could still reach to the bottom of while standing on a work platform. We decided to go with a 40” tall stand to fit those needs.

The stand is finished off with a wood wrap that attaches to the steel frame via magnets. Once attached, you wouldn’t know that this isn’t an all wood stand. It also allows for the ability to change the look of the entire set up b simply having a new wrap made. I also wanted the ability to hide my auto top off as well as my apex, power-bars and other controllers so we had a matching cabinets made for each side. On the left is an open back cabinet that slides over just about any auto top-off container I’d need. On the right is the equipment cabinet with false panel in front where I will have all of my main apex units and controllers. There is a door on the side that allows access to the power-bars and mess of cabling and wires that power the tank and equipment.

The finishing touch was the molding on top. We had originally planned on a canopy to close everything off and hide some of the light spill. After much consideration and debate, I wanted something that allowed for easy access to the tank, and that could be removed if necessary when doing coral placement, or other maintenance for full tank access so we went with a 7” molding that just sits right on top of the tank. This provides the nice decorative finish we were looking for, hides the Erobracing and still allows the access I desired as well.

20191016_122105.jpg
20191016_131337.jpg
20191016_132510.jpg
20191016_133216.jpg
20191016_133244.jpg
20191016_154926.jpg
20191016_154955.jpg
20191016_155041.jpg
20191017_182546.jpg
20191017_182555.jpg
20191017_182618.jpg
20191017_182643.jpg
20191019_115526.jpg
20191019_115556.jpg
 
OP
OP
T

Tony Hight

Community Member
View Badges
Joined
Jun 19, 2017
Messages
55
Reaction score
91
Rating - 0%
0   0   0
Running Electrical
Currently there is only one 15-amp shared circuit behind where the tank will be going. Due to the other items in the house that are on this circuit the heaters alone would come close to maxing it out and I still have lighting, pumps, two 50-watt UVs among other items to consider. I decided to run two dedicated 20-amp GFCI circuits to the tank. I want to be able to split the load between two separate circuits and use one as a failsafe. Everything is about redundancy so for all my most important items (heaters, pumps, wavemakers, etc), I have two. The goal is to have one return pump, 2 of my four planned wavemakers and one heater on each circuit so that if one fails, my tank is still operational and providing the life support it needs. I’ll also have a battery backup on one circuit and connected to the Apex in way that will allow me to get notification if one or both circuits fail.

I had a few options to get power behind the tank. I’ll already need to run conduit for RO tubing for my auto water change, so I decided to go with conduit buried in the ground from the electrical panel for a cleaner look.

It’s about 55 feet of trench and I had a quote for $750 to do the whole thing. I’ve ran electrical before so this is one area I decided I would do the work myself to save a bit of money. We’re also planning to add artificial turf in the backyard at some point which means I need to reroute some drip tube and low voltage lighting wire. Since the drip tubing runs almost along the same path, doing this myself gives me the opportunity to tackle both projects at once. I also decided to run a 3rd 20-amp GFCI circuit for use on the outside of the house as well.

Being in Arizona, the ground is hard as rock beyond about 4 inches. I dug the trench over the course of a week starting after work and going until dark each day. Once I had the basic trench section several inches deep, I’d run water through it before calling it a night and I was then able to finish digging to depth the next day and move on to the next section. My son (11) and I went to Home Depot Saturday morning to get all the supplies and got started on the electrical portion of the project around 11am. We weren’t in a rush and I used the project as an opportunity to teach my son and pick his brain as to why he thought we were doing certain things, but we were still able to wrap up the electrical project by about 4:30pm that day and I now have power behind the tank! I’ll be finishing the plumbing and irrigation portion for the backyard over the next week and be able to focus on the tank again after that.

Overall, I’m happy with the decision to do this myself. I dug the trench (along with the additional digging/planning for the irrigation changes) over the course of 5 days for about an hour each night and then spent just under 6 hours installing the electrical. My total cost for all the parts, conduit, wire, etc was just over $250. Ultimately, for one week of my time I was able to save about $500 that I can now use on another aspect of the tank – most likely saving it for BRS Black Friday!!

20191108_173159.jpg
20191108_173223.jpg
20191108_173237.jpg
20191110_125318.jpg
20191110_125313.jpg
20191110_125325.jpg
20191109_195207.jpg
 
Last edited:
OP
OP
T

Tony Hight

Community Member
View Badges
Joined
Jun 19, 2017
Messages
55
Reaction score
91
Rating - 0%
0   0   0
Beautiful tank. CDA does such amazing work. I have a 72"x30"x27" from them I got set up not long ago.
I almost went with those dimensions but decided to switch the width and height. With my stand the viewing window is 26"tall.
 
OP
OP
T

Tony Hight

Community Member
View Badges
Joined
Jun 19, 2017
Messages
55
Reaction score
91
Rating - 0%
0   0   0
Plumbing
Progress has been slow as of late with the holidays and other things on my plate. I worked on the plumbing a little at a time over the course of a few weeks and was finally able to finish it up a week ago.
Pipe is red PVC with schedule 80 fittings to match the theme. I ran 1.5” for the Bean-Animal drains and 1.25” for the returns. After my original drawings I decided to run dual UV, one on each return. Originally, I was going to plumb a UV into the manifold. I will run one at 1500 gph to affect algae and bacteria and the other at around 300 gph to affect protozoa. Once I unboxed the UV’s, I had to do some tweaking to my original plans. This involved another order of parts as things weren’t quite fitting the way I had originally planned them. The only drawback I’m slightly concerned with is the number of bends I had to add to get the UV’s incorporated. Originally, I had very few bends leading up to my bulkheads. With the UV’s, my only good option was to run the return lines back down to the floor, into the UV and then out towards the bulkheads. I’ll be a bit nervous until I can get water in there and know I can get the flow I’m looking for.
The left side return will be pushing close to 1500 gph and has the fewest number of bends. The right return will only need to get up to about 300 gph so it has the most bends as well as runs the manifold. Right now, my only plans for the manifold are for gfo, carbon and pellet reactors as needed but I wanted to future proof the plumbing as much as possible. Also, on each return line I reduce to 1” towards the top to add in flow sensors so I can monitor the flow I am getting on each return line. There is a gate valve coming off of each UV to dial this in as needed.
I will say, I used a ton of unions on this tank, but I am so glad I did. Each union was strategically placed to allow me to move almost every fitting around as needed to align and secure. This made lining things up so much easier and I don’t think I would do it any other way.

20191208_185939.jpg
20191208_190000.jpg
20191208_190017.jpg
20191208_190032.jpg
20191208_190051.jpg
20191208_190103.jpg
20191208_190118.jpg
20191208_190127.jpg
20191208_190133.jpg
20191208_190233.jpg
20191208_190325.jpg
 
OP
OP
T

Tony Hight

Community Member
View Badges
Joined
Jun 19, 2017
Messages
55
Reaction score
91
Rating - 0%
0   0   0
What a crazy couple of weeks working on this through the holidays. It seems like every step took me just a bit longer than anticipated, but I'm finally making progress. I haven't been posting along the way so the next few posts will be in the order of what I worked on.

Rock
I went with all Marco Reef Saver rock for this build. I've done Caribsea live rock before and even the Shapes Rock on my last tank. I had actually planned on going with Shapes again, ordered and had it delivered to the house where I sat on it for two months while constantly going back and forth in my mind.

I saw a video using the Marco Reef Saver shelf rock and fell in love. For this build I have a total of 190lbs of rock consisting of 120lbs of the premium shelf rock, 40 lbs of base rock (cut flat on the bottom) and another 30lbs of just the standard Reef Saver rock. My original plans were for a bare bottom set up (more on that in a minute) which is why I chose to use base rock. I'll tell you though, even with a sand setup, it was the best way to go and I would recommend it for any other setups out there.

I started by strategically placing the base pieces throughout the tank and then slowly positioned the other pieces on top to build my structures. I wanted two stacks with one being slightly taller (the right) and a space in the middle where there were ledges on both sides and nothing to the back of the tank so I can give the scape a sense of depth in that area. The left stack consists of base rock and shelf rock on top. On the right, I needed to get more height so I used the base rock with a several pieces of standard on top and then finished it off with shelf rock as well up to about the 2/3's mark on the tank to leave room for coral height.

To add stability, I used the BRS extra thick gel super glue. I used almost every drop of the 10oz bottle which worked perfectly. Instead of pulling the structures apart, I just had my wife help me aim the tip of the bottle and squeezed a generous amount on all the main areas where the rocks came together. After a full day of drying, I am incredibly happy with the result. No amount of moderate shaking will even budge one rock. That, coupled with the flat base rock makes this the most secure structure I've ever built with no drilling or rods necessary. In total it took us about four hours to get together plus a little more for gluing.

20191219_143601.jpg
20191219_143624.jpg
20191219_143636.jpg
20191219_143650.jpg
20191219_143654.jpg
20191219_143658.jpg
20191219_143704.jpg
20191219_143711.jpg
20191219_145312.jpg
 

TheOne

Well-Known Member
View Badges
Joined
Oct 1, 2019
Messages
792
Reaction score
1,554
Rating - 0%
0   0   0
Very nice so far. Who did you have make the wood wrap for your stand? Did they also make the canopy?
 
OP
OP
T

Tony Hight

Community Member
View Badges
Joined
Jun 19, 2017
Messages
55
Reaction score
91
Rating - 0%
0   0   0
Equipment Cabinet
Finally started working on the equipment cabinet which is something I’ve been dreading for quite some time after taking my last one offline. I had the cabinet built to match the stand with a false panel in the front at 4” deep (just deep enough for my Apex main unit). My goal is to house all Apex units and pump controllers on the front panel for easy access with all power strips, power blocks and excess cords in the back. There is a side access door for easy access to those areas and the back is open to allow for proper airflow.

I want the ability to move everything around if and when necessary, so I am securing everything (except the EB832’s) with the large 3m Velcro strips (pic below). I’m using two pairs for the smaller items and even more for the larger items to give them stability and so there is no chance they will fall off. Tip: don’t buy them from a store! I originally spend over $35 at Home Depot for what would end up being a quarter of the amount I would need. I found them in bulk packs on Amazon for a fraction of the cost. I’m not quite done yet, but I’ll end up using around 50 pairs in total. I also wasn’t about to use twist ties again, so I also picked up a package of 100 Velcro 8” cord wraps (same pic below) for fairly cheap as well and super happy with how they are working.

I first took the false panel out and started laying out the items I have while also planning for those I know I will get to ensure I had enough room. If I happen to eventually fill up the board, I can easily move some controllers to the inside of the door as well which will still give me a nice clean look with easy access. I spaced 10 1.5” grommets around the outside edge of the board which is the portion of the board that is partially hidden by the cabinet front. I’ll use these to pass all the wires through from the backside. As you can see from the pictures, the front is fairly clean, but the inside is organized chaos.

Components
For the actual setup, I have a PSU Plugged into one of my 20amp circuits with a power strip plugged into the back of it. That power strip does nothing but offer additional circuit protection. Plugged into that is one of my EB832’s which is also plugged into my Apex. My Apex unit is plugged directly into that circuit as well. On the second 20amp circuit, I have a power strip plugged in, with a DJ power strip attached. This will control cabinet lights, powerheads (the power blocks for those using the Apex 0-10v ports) and few other odds and ends that aren’t controlled by the Apex so I can turn them on and off easily. I have this mounted to the back of the cabinet so it’s easy to reach around the side and flip the switches. Also, on the second circuit, I have my second EB832. This setup is based around the ultimate Scenario pictured in the last picture. With this setup I can”
  • Get alerts when either of the EB832’s fail, the Apex loses power, know if the power loss is one circuit or the whole house as well as split the loads of my pumps, heaters, lights, etc.
  • Battery backup is on one EB832 mainly to keep my Apex head unit running for a bit so I can still get alerts (this also requires an additional PSU upstairs attached to my modem and router)
  • Also, on the EB832 is one of my return pumps. I have it coded so it will oscillate on for 10 minutes, off for 20 minutes if the power were to go out. This will conserve power but still allow me to get heated water from the sump to the tank for a short period of time. Previous estimates were about two to three hours in total
  • Lastly, two of my tank cameras will be on the PSU as well so I can get visuals of what may be going on as well when I’m away from the tank even if the power is out.
  • For longer term outages, I have an Ice Cap backup for one of my Gyres that will take over when I lose power. Eventually I will have another backup as well for one of the two mp40’s I have planned, but still need to get.
20191227_190846.jpg
20191227_222656.jpg
20191227_224214.jpg
20191227_224229.jpg
20200103_143754.jpg
20200103_143811.jpg
20200103_143823.jpg

20191230_130411.jpg

2020-01-03_1452.png
 
OP
OP
T

Tony Hight

Community Member
View Badges
Joined
Jun 19, 2017
Messages
55
Reaction score
91
Rating - 0%
0   0   0
Very nice so far. Who did you have make the wood wrap for your stand? Did they also make the canopy?
Local builder here in AZ. Yep, he picked up the metal stand from powder coat when it was finished and built the wrap and canopy around that then delivered all to me when finished. Turned out incredible.
 
OP
OP
T

Tony Hight

Community Member
View Badges
Joined
Jun 19, 2017
Messages
55
Reaction score
91
Rating - 0%
0   0   0
Temporary Water Production (with some additions)
My mixing station is in desperate need of being redone. It worked well for the old 120 I had, but just won’t do for this one. That will hopefully be worked on this month as I need to get my auto water change back up and running as well…and soon!

For now, it is all I have and will suffice with just a few modifications. Right now, it is just a 45-gallon Brute can for RODI production and one for salt mix. I made some upgrades to the RODI unit prior to making water, though. I installed an additional DI chamber, so I now run separate Cation, Anion and Mixed Bed resins. I also added an additional 100gpd membrane that is fed from the wastewater of the first membrane to help boost production and increase efficiency. Not knowing what the pressure would be like in the new house I found I was sitting around 45 to 50 psi right before the membranes and was only getting about 120 gallons per day of production. I added a booster pump which got me up to right at 65 psi and I am now making right at 210 gallons per day. Now that the tank is almost completely up, hopefully I’ll have some mixing station updates soon.

20191230_192548.jpg
20191230_192558.jpg
20191230_192606.jpg
 

Tentacled trailblazer in your tank: Have you ever kept a large starfish?

  • I currently have a starfish in my tank.

    Votes: 42 32.6%
  • Not currently, but I have kept a starfish in the past.

    Votes: 34 26.4%
  • I have never kept a starfish, but I hope to in the future.

    Votes: 27 20.9%
  • I have no plans to keep a starfish.

    Votes: 25 19.4%
  • Other.

    Votes: 1 0.8%
Back
Top