Really nice setup!Dosing Containers
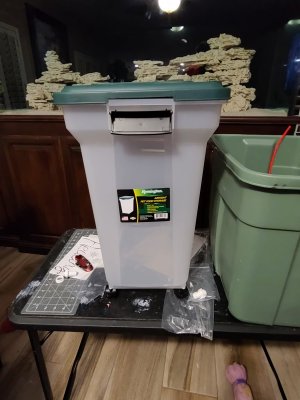
I will be dosing Calcium and Alkalinity to the tank to run elevated levels (12dkh Alk and 465 Mag). My goal for the dosing containers was to have something that I could put near the tank but hide in the back while also getting as large a container as possible. Since the components are stable once mixed, I wanted a set-it and forget-it method that I could fill and not have to worry for quite some time.
I ended up using airtight 55qt pet food storage containers which gives me right around 12-13 gallons of mixed Calcium and Alkalinity solution. They are on wheels which makes it easier to get them into place behind the side stands on the tank. These were the most durable I found and held water without any issue.
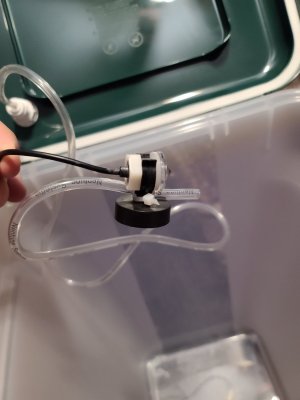
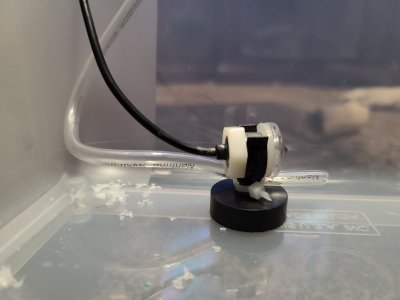
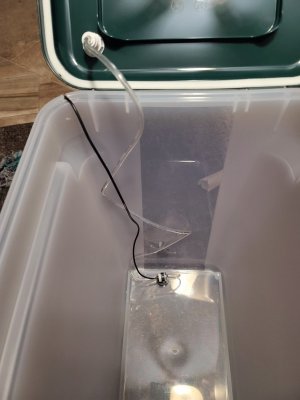
I started by drilling a whole in the lid to accommodate the ¼” bulkheads for the dosing tubing. I’ll be using my Apex to let me know when the mixture is too low and to shut down the DOS when it reaches that point. For this I used the optical sensor with magnet. I drilled out the lip just enough that the cable will past through and still allow the lid to close. From there, I have the magnet directly on the bottom of the container and zip tied the dose line just above the magnet to ensure it isn’t pulling directly from the bottom of the container as well as ensure it always stays below the cut off point of the optical sensor.
Since the containers are airtight, I drilled an additional small hole in the lid to allow air in as liquid is pulled out.
Navigation
Install the app
How to install the app on iOS
Follow along with the video below to see how to install our site as a web app on your home screen.
Note: This feature may not be available in some browsers.
More options
You are using an out of date browser. It may not display this or other websites correctly.
You should upgrade or use an alternative browser.
You should upgrade or use an alternative browser.
Tony's 250 Build thread
- Large Build
- Thread starter Tony Hight
- Start date
- Tagged users None
- Joined
- Jun 19, 2017
- Messages
- 55
- Reaction score
- 91
Thanks!Great start thread! Love your tech. Feels like beeing there unboxing
- Joined
- Jun 19, 2017
- Messages
- 55
- Reaction score
- 91
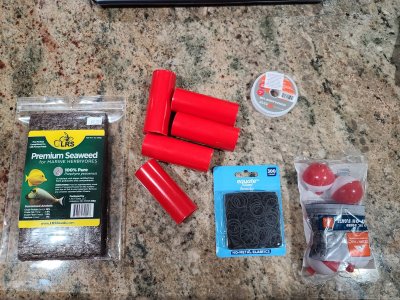
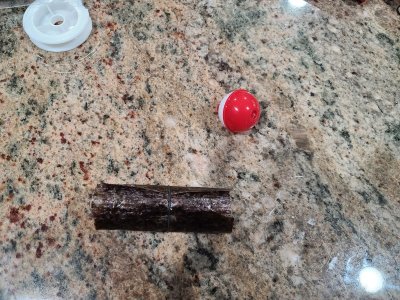
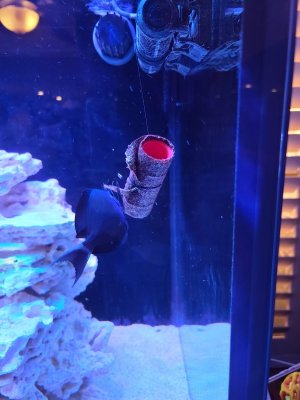
Nori Feeder
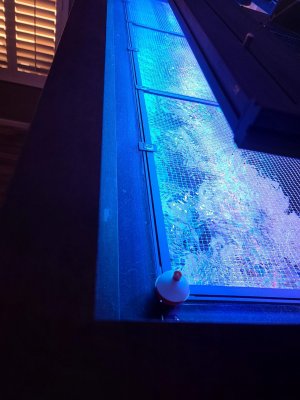
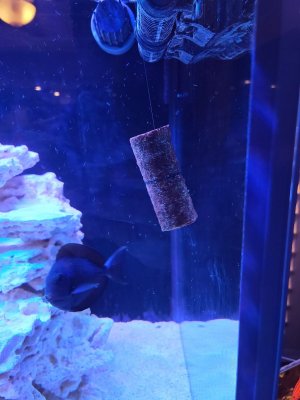
With the height of this tank, the screen top and the euro-bracing, I needed a better solution for Nori than the usual clips I used to use. Decided to give this a try. So far, seems to be going well once the fish got used to it.
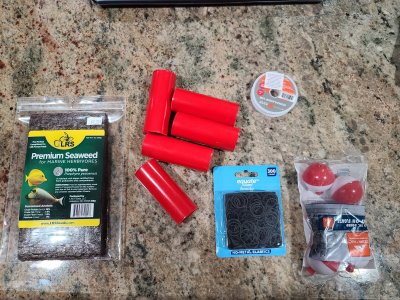
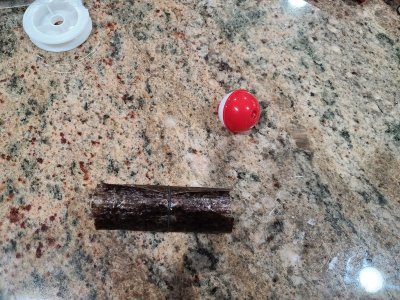
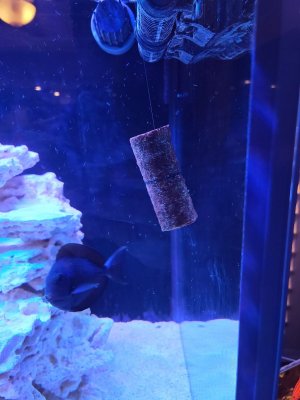
Used a 4” piece of ¾” PVC left over from plumbing and then tied 4lb fishing line around the PVC. I wrap the Nori and use rubber bands to secure to the PVC. The other issue I wanted to solve was how to keep it from going all the way into the tank, so I didn’t have to stick my arm in the water to get it out. Decided to use a regular fishing bobber on the top so the line stays outside the tank. Works great! When time to change it, I just lift the screen top slightly and pull the PVC out. I’ll make about 5 of these so once per week I can just wrap them all with Nori and set them aside. Then I just have to pull the old out and put the new one right back in each day.


- Joined
- Jun 19, 2017
- Messages
- 55
- Reaction score
- 91
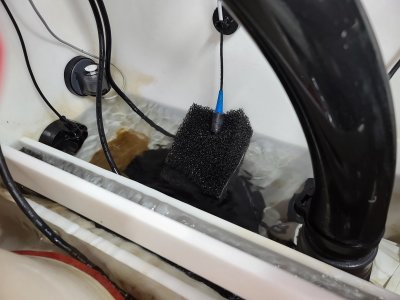
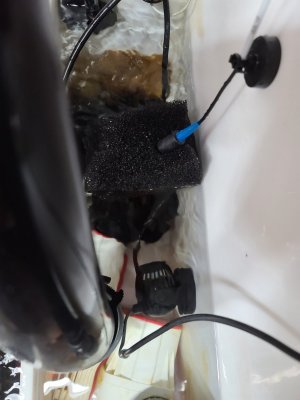
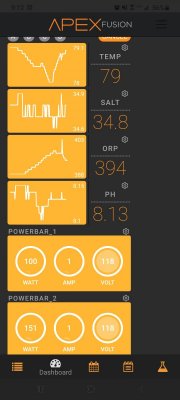
Stable Salinity Probe
I have finally been able to get a stable reading form my salinity probe by modifying it with some suggestions from Terrance with Neptune.
When I fee, my sump level in return section will go up and down. I also wanted to keep the probe at an angle with one of the air holes up, so I used a piece of filter foam and bore a hole at a 45-degree angle through the center.
I used a magnet holder to secure the cable to the wall, because I found when my water level went up when pumps were shot down the probe would float out and sometimes get caught on the return section wall when the level dropped again. Lastly, I added a Jebao RW4. This works out well as it blows right past the probe and is also where I’ll be dosing calcium and alkalinity which will help with my precipitation as well.


- Joined
- Jun 19, 2017
- Messages
- 55
- Reaction score
- 91
Quieting the Overflow
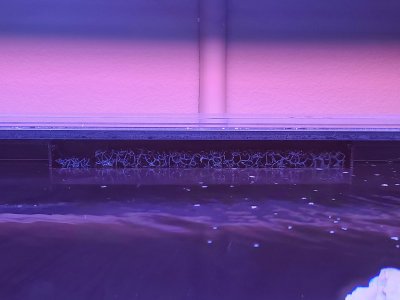
I have a Synergy Reef Shadow Overflow on the tank. One thing I noticed was that at higher flow rates, the overflow is fairly loud even being noticeably heard over the TV when we have it on. I spent a full day playing with different lengths of pipe and the best I could get it was when I ran the overflow almost to the top. Not only is this a bit scary, it still left much to be desired in terms of quietness.
What I found was that it isn’t the back of the overflow making the noise, it is the waterfall effect as water spills through the weir. After looking at several options, I decided to go with a coarse mesh material and put it directly in the overflow. This made a huge difference and the overflow is almost dead silent at this point in time.

- Joined
- Jun 19, 2017
- Messages
- 55
- Reaction score
- 91
Screen Top
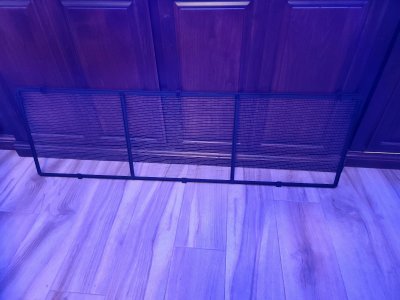
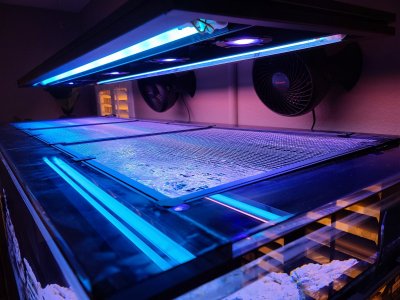
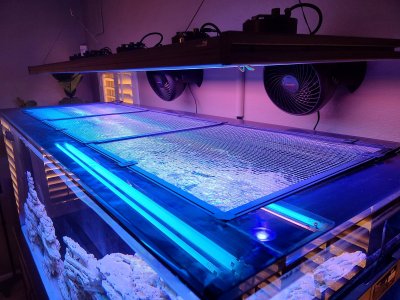
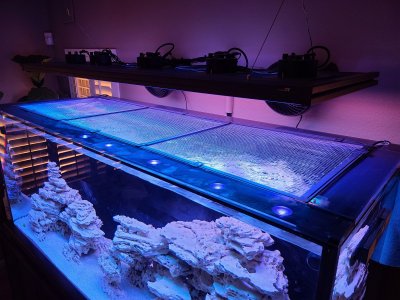
I have lost way too many fish in the past due to jumpers. I definitely wanted some type of protection on this tank. I had thought of trying to keep the top completely open and just add a screen to the back of the removeable canopy but decided to just put the canopy directly on the tank.
The tank is double Euro-braced so there is a half ¾” lip around the edge of the top brace. I used this to place the screen top on. I can still feed right through the top and it is easy enough to remove for maintenance while giving me much more security of not losing fish. This is just a standard Red Sea screen top kit that I was able to get free from a friend.


- Joined
- Jun 19, 2017
- Messages
- 55
- Reaction score
- 91
Time for a Cooling Solution
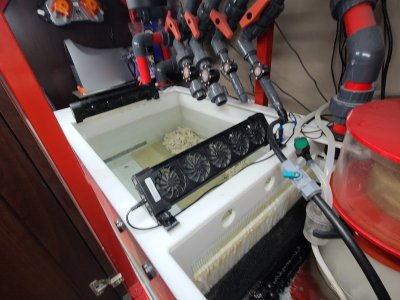
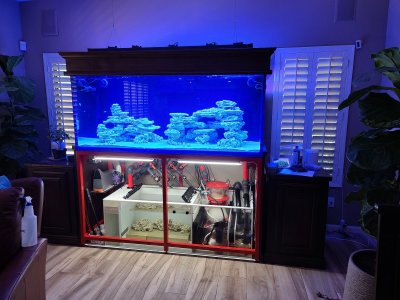
Living in AZ, heating during the winter isn’t all that big of a deal. However, cooling in the summer can definitely be an issue. The initial cost, operating cost and heat generation of a chiller ruled that out. My cooling has to be done strictly through evaporation, so I needed a decent way to get air blown across the tank to aid in evaporation. In addition, even though my canopy is completely open, it still traps a considerable amount of heat from the lighting right at the top of the tank.
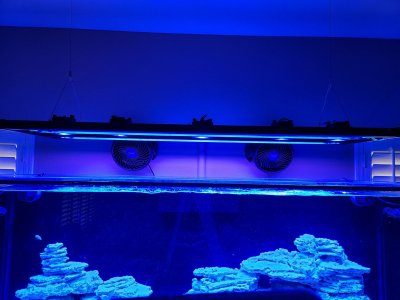
I decided to tackle this in two ways. First, I used two BOYU iPettie Aquarium Cooling System Fans that I had purchased for my last tank in the sump area. They aren’t incredibly powerful, but they do a good job pushing air across the refugium portion of my sump. I had these installed a few days prior to the fans for the top of the tank. They didn’t do a great job at cooling anything off, but they did seem to slow the temperature rise.
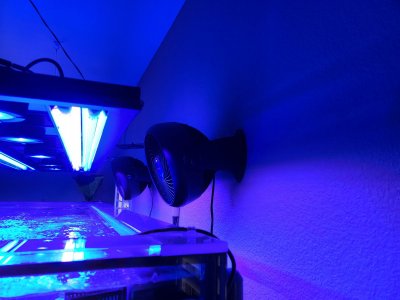
With the canopy, I went a different route for the top of the tank since I would be able to hide any fans I used. For the top of the tank I purchased two Honeywell HT-900 TurboForce Air Circulator Fans (available at Walmart, Amazon and I’m sure some others). I mounted these just slightly higher than the tank so they blow down and across the tank. An added benefit is they pull from the back and push the warm air that accumulates under the light fixture to the front of the canopy and up and out. It’s amazing how cool the air is behind the fixture and how warm it is as it leaves from the front of the canopy.
Running two of these on medium does a great job at cooling the tank. I have them set to turn on when the tank hits 78.3 and off when it gets back to 78.4. With this and my heater settings, my tank only fluctuates by about a half a degree in the winter between 77.5-78 and a half degree in the summer between 78-78.5.
I’m currently running them on medium. The sound isn’t bad as long as there is ambient sound in the room. I also happened to have an issue with a temp gauge that caused my heater to come on along with the fans and the fans were able to hold the temp steady right along with the heater so I am pretty happy with their cooling efficiency.


- Joined
- Jun 19, 2017
- Messages
- 55
- Reaction score
- 91
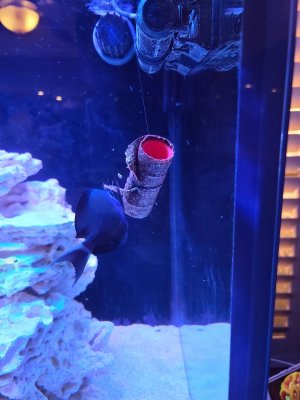
Algae Feeder
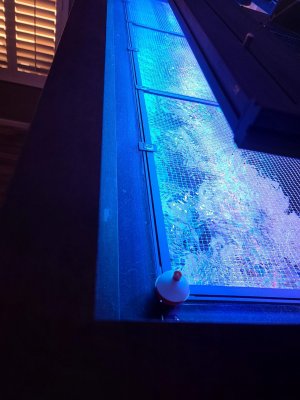
With the canopy coupled with the Euro-brace and overall height of the tank, I needed a better solution for feeding algae sheets than clips and magnets. I decided to use some 4” pieces of PVC pipe, some fishing line and a bobber for my solution.
The bobber is mainly so I can just drop the pvc in and use the bobber to keep the fishing line from going all the way in the tank. It is also fairly nice if I drop it in while putting it in the tank or removing as it will just float on top.
Now, I just rubber band the algae sheet around the pvc, lift my lid and set it in place. When done, I just pull it right out without having to stick my hands in the water. I have enough to make a few of these so I can load them up at the beginning of the week and just drop them in whenever I need to. Makes it easier for someone tank-sitting as well.


- Joined
- Jun 19, 2017
- Messages
- 55
- Reaction score
- 91
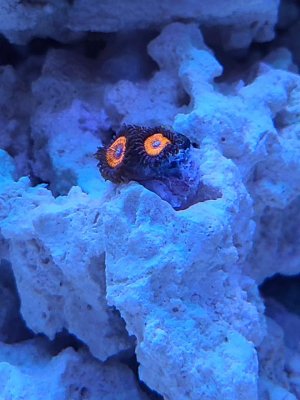
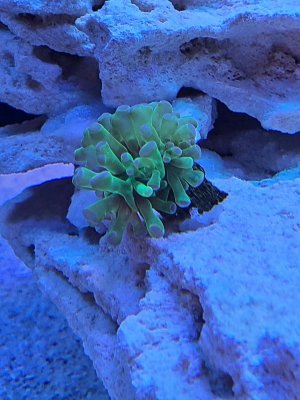
New Inhabitants
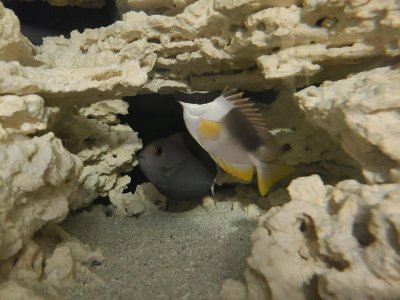
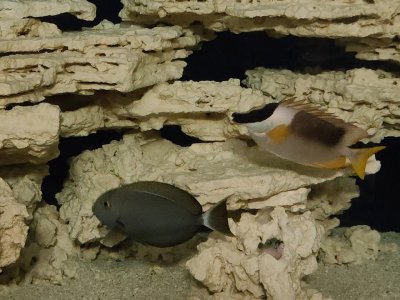
Finally, coral time!! Went to my LFS today and picked up a hammer coral and Ultra Gobstopper for my first two test corals in the tank. Also grabbed a Magnificent Fox and Mata Tang along with 25 or so Nassarius snails for the sand cleanup.
Feels good to finally get some livestock in the tank, but I still have a long way to go.


Wow...I am having the same issue as we speak...the WEIR is LOUD as heck...what material did you use to silence the noise? I might end up heading to my LFS to get some RIGHT NOWQuieting the Overflow
I have a Synergy Reef Shadow Overflow on the tank. One thing I noticed was that at higher flow rates, the overflow is fairly loud even being noticeably heard over the TV when we have it on. I spent a full day playing with different lengths of pipe and the best I could get it was when I ran the overflow almost to the top. Not only is this a bit scary, it still left much to be desired in terms of quietness.
What I found was that it isn’t the back of the overflow making the noise, it is the waterfall effect as water spills through the weir. After looking at several options, I decided to go with a coarse mesh material and put it directly in the overflow. This made a huge difference and the overflow is almost dead silent at this point in time.

- Joined
- Jun 19, 2017
- Messages
- 55
- Reaction score
- 91
Wow...I am having the same issue as we speak...the WEIR is LOUD as heck...what material did you use to silence the noise? I might end up heading to my LFS to get some RIGHT NOW
I used Lifegaurd Aquatics - Aquamesh, Black, Extra Course. Got it from BRS. I like the large openings so no chance of overflow clogging.
https://www.bulkreefsupply.com/black-1.html
Super nice Tony Hight. I enjoyed the pictures and steps on what you did. Awesome job.
Thx homie....I will be purchasing some myself...getting help from the Synergy folks in the mean time to remedy this situation...so far, so goodI used Lifegaurd Aquatics - Aquamesh, Black, Extra Course. Got it from BRS. I like the large openings so no chance of overflow clogging.
https://www.bulkreefsupply.com/black-1.html
Similar threads
- Replies
- 2
- Views
- 88
- Replies
- 3
- Views
- 106
- Replies
- 37
- Views
- 939
- Replies
- 18
- Views
- 300
New Posts
-
Just got my live rock! Should I keep these clams or..?
- Latest: BubblesandSqueak
-
-


