Navigation
Install the app
How to install the app on iOS
Follow along with the video below to see how to install our site as a web app on your home screen.
Note: This feature may not be available in some browsers.
More options
You are using an out of date browser. It may not display this or other websites correctly.
You should upgrade or use an alternative browser.
You should upgrade or use an alternative browser.
First build, some questions, and documenting my build
- Thread starter Glasswalker
- Start date
- Tagged users None
Super simple, like I said.  I'll be putting it in more permanently at some point but for now it works. There's a Rubbermaid plastic bin down below the picture doesn't show.


@lysaer
Awesome! We are looking for cheap small RODI to get started on with a setup likely similar to yours. Thanks for the suggestion!
If you wouldn't mind I would like to see a pic of this set up....thank you!
- Joined
- Mar 24, 2016
- Messages
- 232
- Reaction score
- 244
Ok another belated update.
So Sunday Night, I got a bunch of stuff done, but then I got busy with other stuff, and haven't gotten the next steps done. But it's coming together fast now.
So what I managed to do as of Sunday Night:
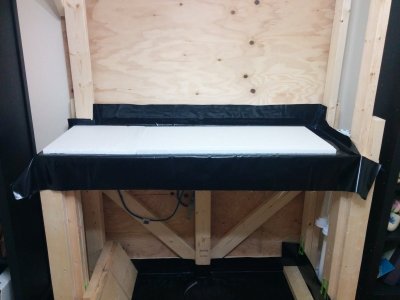
Attached the foam pad to the stand, using thin doublesided tape, to keep it from shifting around:
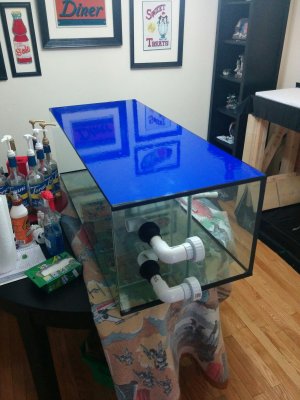
Applied the background to the tank. It's a double sided one (blue and black, I'm using the black side). I used a product called ClearView (which from my inspection is nothing more than mineral oil) to seal/adhere it to the tank glass. Then I taped the edges with a thin strip of clear packing tape to keep it sealed.
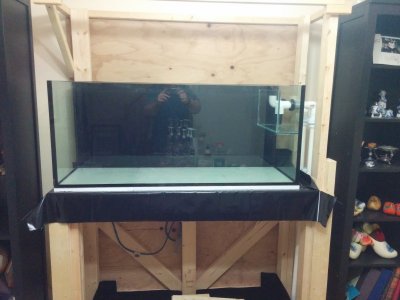
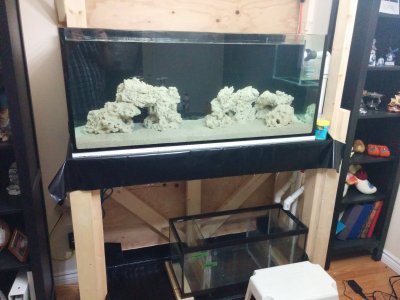
Got the stand up in it's new home for the final time (now with black background):
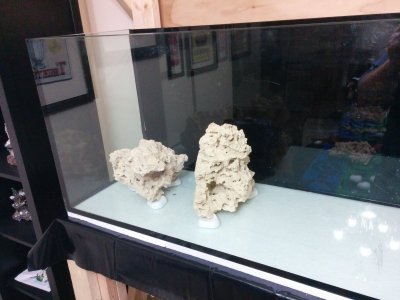
And began placing the rock-work in the tank (using the small plastic feet to keep it stable, and protect the glass):
First couple base rocks for the arch:
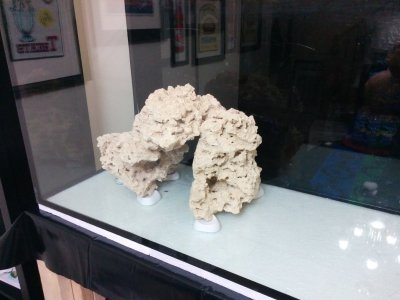
Top of the Arch:
Corner rock for the "cradle":
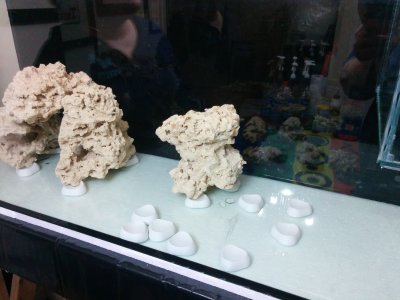
Building up the cave/tunnel for the left end of the cradle:
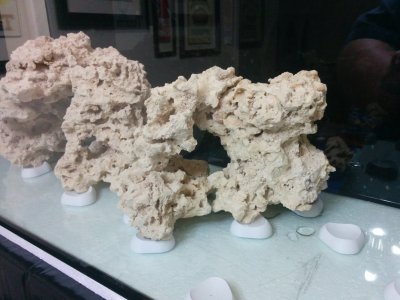
Remainder of the cradle coming together:
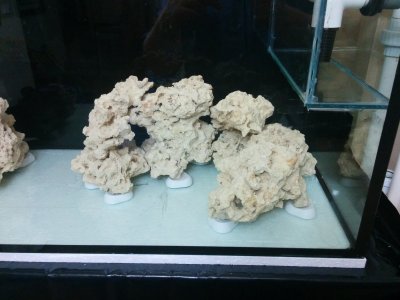
A close-up:
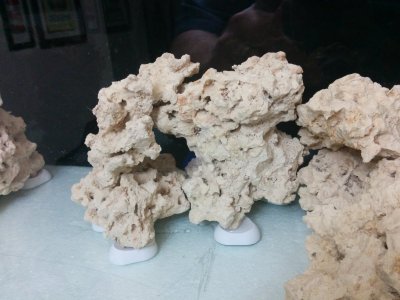
Another angle:
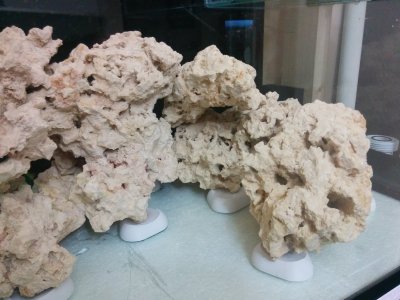
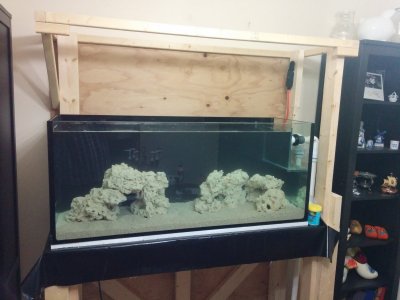
And the overall view of the tank:
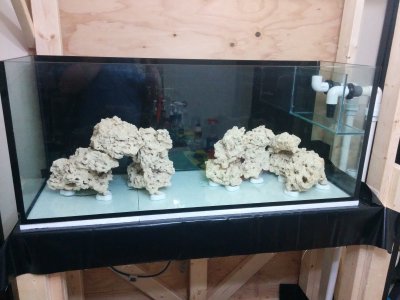
Sand was supposed to go in last-night but was too busy. It should be going in tonight though. As well as the first 50g of water!
It's coming together quick now!
So Sunday Night, I got a bunch of stuff done, but then I got busy with other stuff, and haven't gotten the next steps done. But it's coming together fast now.
So what I managed to do as of Sunday Night:
Attached the foam pad to the stand, using thin doublesided tape, to keep it from shifting around:

Applied the background to the tank. It's a double sided one (blue and black, I'm using the black side). I used a product called ClearView (which from my inspection is nothing more than mineral oil) to seal/adhere it to the tank glass. Then I taped the edges with a thin strip of clear packing tape to keep it sealed.

Got the stand up in it's new home for the final time (now with black background):

And began placing the rock-work in the tank (using the small plastic feet to keep it stable, and protect the glass):
First couple base rocks for the arch:

Top of the Arch:

Corner rock for the "cradle":

Building up the cave/tunnel for the left end of the cradle:

Remainder of the cradle coming together:

A close-up:

Another angle:

And the overall view of the tank:

Sand was supposed to go in last-night but was too busy. It should be going in tonight though. As well as the first 50g of water!
It's coming together quick now!
- Joined
- Mar 24, 2016
- Messages
- 232
- Reaction score
- 244
Thanks! Yeah I checked the stand for level when we put it in place, according to my bubble level it was dang-near perfect. But you're right I should re-check the tank now that it's up.Looking GREAT!! Might be a good time to check for level before you put water in.
Either way it's a lot easier to check level with 1" of water in it, as you can use the water line as a far more accurate level check than a bubble level. And 1" of water doesn't weigh enough to make it difficult to adjust the stand with shims if need be. Anyway, hoping it's good and level and I won't have to do that lol
One other update, that's about 50-60lb of rock in the tank. I have another 10-15lb of small rocks and rubble that resulted from my sculpting of the rocks. That will all be going in the fuge.
- Joined
- Mar 24, 2016
- Messages
- 232
- Reaction score
- 244
Alrighty, here is a big update. Got busy earlier this week, and was unable to get past the rock work I posted up recently... But last night I went crazy and got a bunch of stuff done!
Warning: IMAGE HEAVY POST
So last night I:
I don't believe this is a big problem, but I'd love to get your feedback on it, and suggestions. I could siphon water back out, and correct it (just a silicone seam leaking), but if it's not a major concern I'll likely just leave it for now. It shouldn't affect the function of the overflow, the leak rate is extremely slow compared to the flow from the main pump, so the overflow should still function 100% as expected.
The only real risk with it I could see is in an extended power outage (ie: 24h or more) enough water could slowly trickle down to my sump to cause a flood... That said, I have enough backup (the membrane and sump headroom for example) to avoid this, and on top of that if the power is out for 24-48h, I've got bigger issues, and will likely already be taking measures to protect the critters, so this wouldn't be a big issue (And a cap over the bulkheads would solve that as a stop-gap anyway).
So anyone have any other feedback/concerns on that trickle?
Anyway, on with the pictures (there is a lot of them):
So I started putting the sand in the tank (thought this made a great pic, with the "highly professional sand tool" I was using lol)
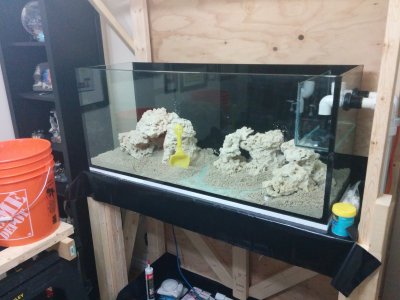
Finished off the sand:
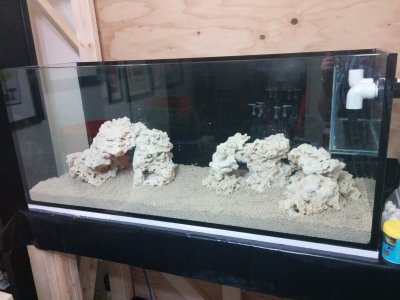
Close up of the sand/rock:
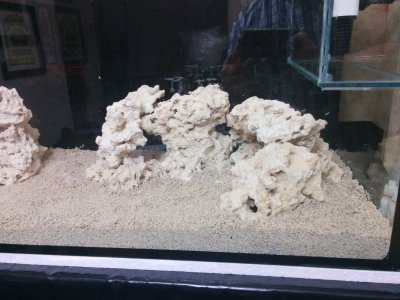
Another close-up:
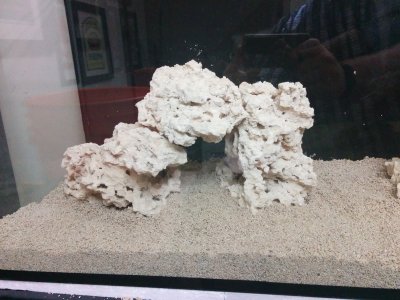
And another:
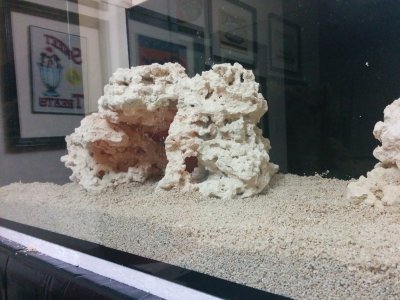
Getting the tank setup to fill:
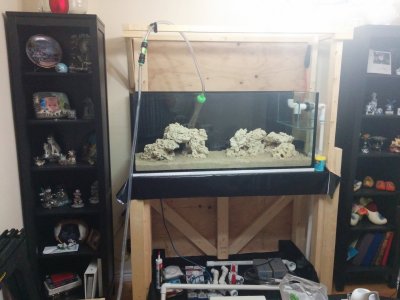
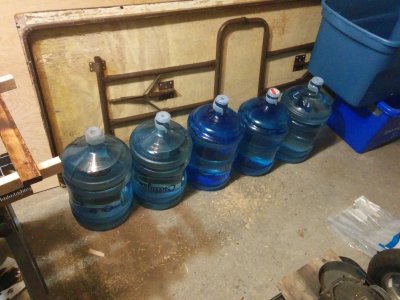
The 25G water bin in my garage I'm pumping the fresh RODI water from:
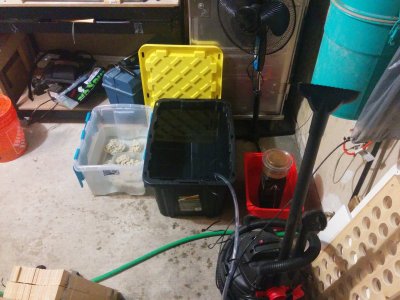
And 25G more RODI water in jugs, to keep topping the bin up as I fill:
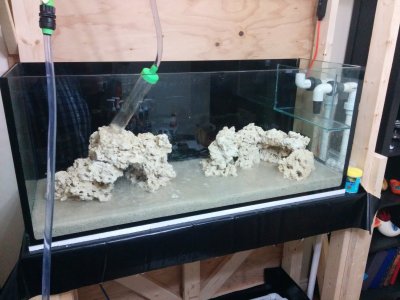
Starting to fill (paused here to check level, it's within 1/16" both left to right and front to back, so very nice and level, hows that for level from straight build, without ANY shimming or adjusting) lol
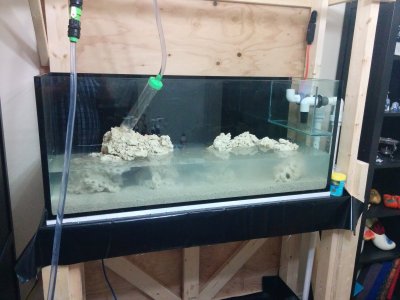
More water...
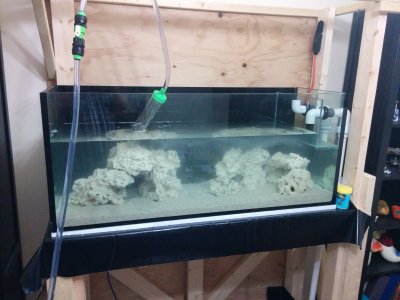
And nearly done:
And done (for now):
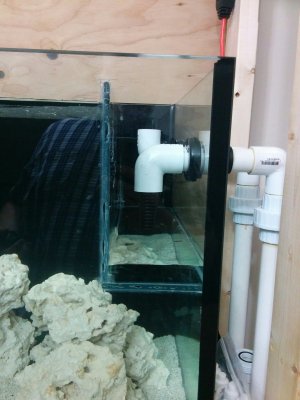
This is when I realized that the overflow was leaking, and as a result my drain pipe would get some use tonight lol, so I installed the sump and more plumbing:
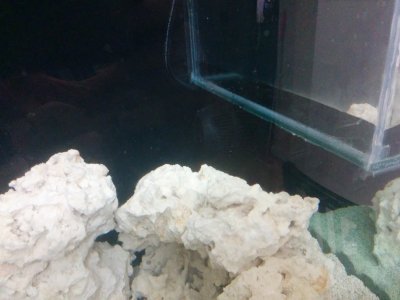
About 2 hours of leaking into the overflow results in (the leak appears to be in the silicone joint along the back wall, not sure where though):
Now so that I can start the cycle, I want some circulation, and heating, So the first power-head (I love how with the black background they really blend in nicely, nearly invisible):
Second Power-Head:
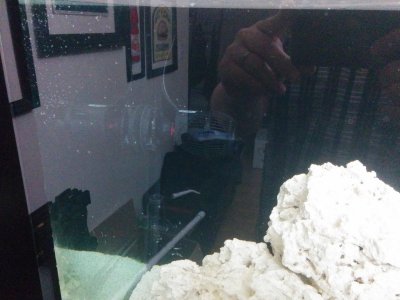
And heaters, on rough electrical for now (2x 150watt). These will be moved to the sump later on when there is water in it:
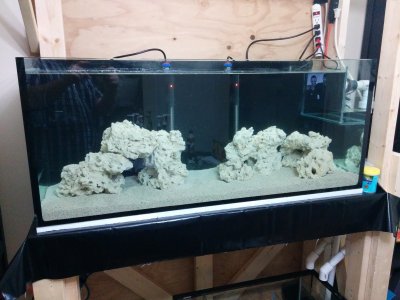
Installed more of the plumbing:
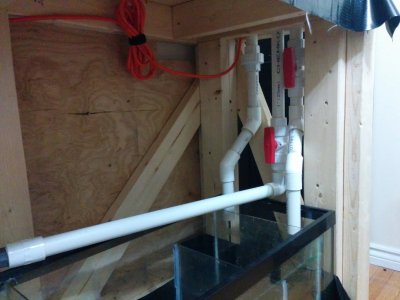
Close-up of the plumbing in the sump. The return line for the motor is slightly too long (the flex wants to kink) so I'll shorten that length by about 5" tonight to compensate, then install the motor and skimmer in the sump tonight likely, so it's ready for water. Ball valves on both the main siphon, and the return. No valve on the emergency to keep it clear from obstruction.
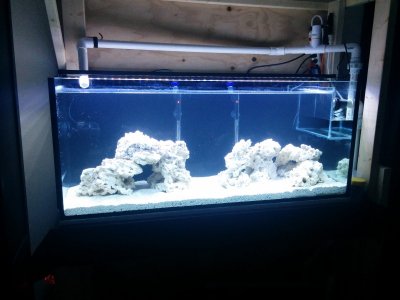
And playing with the lighting lol, just for fun (yes I'll be cycling it dark to control algae). Here is all 3 channels on:
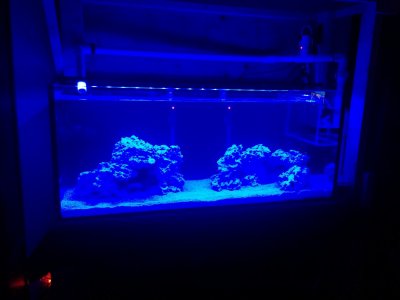
And here is only the blue actinic channel:
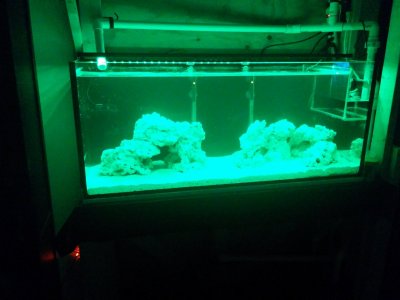
And now just playing around with the RGB channels for the hell of it lol:
And more playing lol:
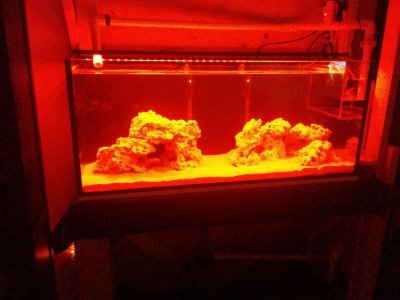
The light is quite powerful. The RGB channel alone is quite bright, and can make a nice white, or a really solid blue. And it has seperate blue actinic channels, and bright (I believe 10K) white channels. So it seems like a nice flexible white (all with nice timers, slow fade modes between time settings, and remote control of each channel).
Anyway, so it came up to temp overnight. So today I hope to add salt to this batch of water, add a seed live rock, and shorten that run for the return, and finish installing the remaining plumbing... Then it can sit for a few days (I'll be leaving town for the weekend, my friend will be watching it). When I get back I'll add the remaining water and get the whole system flowing!
I'm SUPER excited to have water finally in the tank lol...
Warning: IMAGE HEAVY POST
So last night I:
- Added the sand
- Finished Silicone sealing the sump membrane
- Added first 50G of water
- Finished installing 90% of the plumbing
- Installed the Sump
- Installed rough electrical (to be done right shortly)
- Hooked up power heads and heaters to get the DT up to temp so I could start the cycle hopefully tonight.
- Installed the light (I'll be cycling it dark, but I wanted to see how it looked lit lol)
I don't believe this is a big problem, but I'd love to get your feedback on it, and suggestions. I could siphon water back out, and correct it (just a silicone seam leaking), but if it's not a major concern I'll likely just leave it for now. It shouldn't affect the function of the overflow, the leak rate is extremely slow compared to the flow from the main pump, so the overflow should still function 100% as expected.
The only real risk with it I could see is in an extended power outage (ie: 24h or more) enough water could slowly trickle down to my sump to cause a flood... That said, I have enough backup (the membrane and sump headroom for example) to avoid this, and on top of that if the power is out for 24-48h, I've got bigger issues, and will likely already be taking measures to protect the critters, so this wouldn't be a big issue (And a cap over the bulkheads would solve that as a stop-gap anyway).
So anyone have any other feedback/concerns on that trickle?
Anyway, on with the pictures (there is a lot of them):
So I started putting the sand in the tank (thought this made a great pic, with the "highly professional sand tool" I was using lol)

Finished off the sand:

Close up of the sand/rock:

Another close-up:

And another:

Getting the tank setup to fill:

The 25G water bin in my garage I'm pumping the fresh RODI water from:

And 25G more RODI water in jugs, to keep topping the bin up as I fill:

Starting to fill (paused here to check level, it's within 1/16" both left to right and front to back, so very nice and level, hows that for level from straight build, without ANY shimming or adjusting) lol

More water...

And nearly done:

And done (for now):

This is when I realized that the overflow was leaking, and as a result my drain pipe would get some use tonight lol, so I installed the sump and more plumbing:

About 2 hours of leaking into the overflow results in (the leak appears to be in the silicone joint along the back wall, not sure where though):

Now so that I can start the cycle, I want some circulation, and heating, So the first power-head (I love how with the black background they really blend in nicely, nearly invisible):

Second Power-Head:

And heaters, on rough electrical for now (2x 150watt). These will be moved to the sump later on when there is water in it:

Installed more of the plumbing:

Close-up of the plumbing in the sump. The return line for the motor is slightly too long (the flex wants to kink) so I'll shorten that length by about 5" tonight to compensate, then install the motor and skimmer in the sump tonight likely, so it's ready for water. Ball valves on both the main siphon, and the return. No valve on the emergency to keep it clear from obstruction.

And playing with the lighting lol, just for fun (yes I'll be cycling it dark to control algae). Here is all 3 channels on:

And here is only the blue actinic channel:

And now just playing around with the RGB channels for the hell of it lol:

And more playing lol:

The light is quite powerful. The RGB channel alone is quite bright, and can make a nice white, or a really solid blue. And it has seperate blue actinic channels, and bright (I believe 10K) white channels. So it seems like a nice flexible white (all with nice timers, slow fade modes between time settings, and remote control of each channel).
Anyway, so it came up to temp overnight. So today I hope to add salt to this batch of water, add a seed live rock, and shorten that run for the return, and finish installing the remaining plumbing... Then it can sit for a few days (I'll be leaving town for the weekend, my friend will be watching it). When I get back I'll add the remaining water and get the whole system flowing!
I'm SUPER excited to have water finally in the tank lol...
Looks awesome! How are you going to cycle it?
- Joined
- Mar 24, 2016
- Messages
- 232
- Reaction score
- 244
Thanks!I like the rock work. great build thread, I love it.
Thanks! I've now added a piece of seed live rock my friend had cycled and cured for me in his setup. The system is now up to temperature, salinity is good, and powerheads are circulating, I've added an air stone to aerate the water while I wait for the last of the water and get the sump going. So to cycle it, I've added the seed rock, and added a bunch of food to kick off the cycle. I'll monitor from there and react as things come up. I expect it to be a long cycle since the vast majority is dry rock. But that's fineLooks awesome! How are you going to cycle it?
Thanks!Looking great!!
Great build! Looks like it's all coming together now.
- Joined
- Mar 24, 2016
- Messages
- 232
- Reaction score
- 244
Ok, sorry for the long delay between posts. Work got a bit crazy, and I had an unexpected business trip, so things have been busy.
Tank going along nicely, I now have ammonia growing from the feeding, no nitrites or nitrates yet that I can detect...
Have the cycle running through the sump now, plumbing working perfectly. Pump is a bit noisy, will be trying to mitigate that (may replace it with an eheim, hear they are quieter than the Mag7 that I have).
Also water flow has been wreaking havoc with my substrate... Seems the return line is a bit powerful, blows big craters in the sand wherever I aim it. Have it aimed at the rockwork now, but now the center point between the 2 power heads is causing a big crater (substrate cleared down to the glass in a 2" radius, with big hill around it). Will be adjusting that this weekend, and playing with pointing the power heads, and fixing the substrate to keep that under control. May dial back the return flow some to compensate.
Will be adding the skimmer this weekend, and cleaning up all my electrical. Also starting to setup my ATO...
I have pics that I can upload, perhaps after this weekend, I'll post a bunch more pics.
Had a bubbler in the tank for aeration until I got the overflow running, and it kicked up a LOT of salt creep on everything lol... Had to take the light down and clean it.
Anyway, all is good, tank is looking great overall, just starting to develop a little slime on surfaces now.
Will post more, with pics shortly!
- Joined
- Mar 24, 2016
- Messages
- 232
- Reaction score
- 244
Just a quick pic post.
Skimmer is in, ATO is there, but not plumbed yet.
Now have about equal ammonia and nitrites, no nitrates yet and now drop off in ammonia yet.
Ammonia went up to just over 0.25 ppm, then this weekend on Saturday I found nitrites up to 0.25 but ammonia still the same. So the cycle is coming along.
Anyway, tonight hoping to get ATO plumbed, and setup for manual control.
In the meantime I'm working on my controller design now using a raspberry pi, and arduino. For now focusing on ATO and temp control. But will phase in other things over time.
Oh and moved heaters down to the sump... also adjusted the return and power heads as they were causing havoc on my substrate... now they are fine, substrate not being disturbed. And I am getting more surface activity, and nice shimmer/rippling in the lights.
Now the pics:
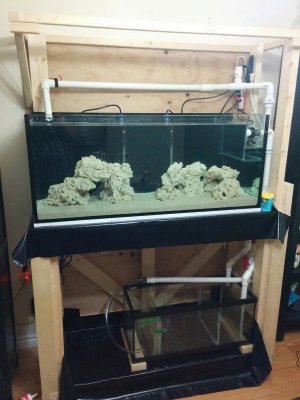
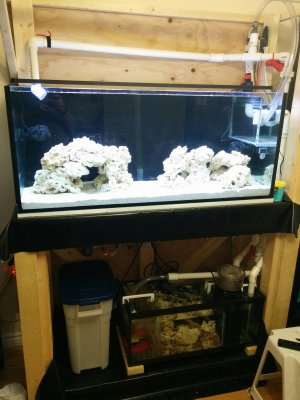
Whole setup as it is today:
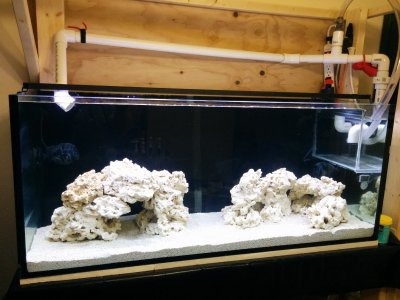
Close up of DT:
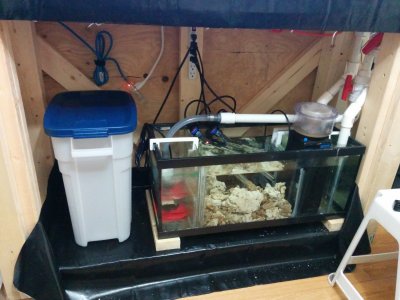
And close up of sump:
Still lots of work to do, and lots of cleanup and tidying. Not to mention finishing the panelling and prettying it up.
More to come!
Skimmer is in, ATO is there, but not plumbed yet.
Now have about equal ammonia and nitrites, no nitrates yet and now drop off in ammonia yet.
Ammonia went up to just over 0.25 ppm, then this weekend on Saturday I found nitrites up to 0.25 but ammonia still the same. So the cycle is coming along.
Anyway, tonight hoping to get ATO plumbed, and setup for manual control.
In the meantime I'm working on my controller design now using a raspberry pi, and arduino. For now focusing on ATO and temp control. But will phase in other things over time.
Oh and moved heaters down to the sump... also adjusted the return and power heads as they were causing havoc on my substrate... now they are fine, substrate not being disturbed. And I am getting more surface activity, and nice shimmer/rippling in the lights.
Now the pics:
Whole setup as it is today:

Close up of DT:

And close up of sump:

Still lots of work to do, and lots of cleanup and tidying. Not to mention finishing the panelling and prettying it up.
More to come!
Any updates? How's your cycle coming along?
- Joined
- Mar 24, 2016
- Messages
- 232
- Reaction score
- 244
Hey! Thanks for the gentle reminder on this 
I'd gotten quite busy, and so the "build" portion was progressing slowly. Mainly just waiting on the cycle, testing water, and such...
But...
Cycle completed last week. We've been consistantly at 0 Ammonia, 0 Nitrite, and 0 Nitrate. We've increased ammonia sources, to test it, and it's been able to maintain it well at 0.
We did end up dosing some bottled bacteria, we went with the "Seed" product from Seachem's Aquavitro line. And I can say we had great results from it. Not only did it boost the cycle, but my water is now prestine... (testing 0 Nitrate, and 0 Phosphates as well)
Anyway, we've let that sit for a bit to be sure...
In the meantime, I've been working on designing my own Controller. Which I intend to fully Open Source. It's coming along nicely, but isn't quite ready for even rudimentary testing yet. Once I can fire it up in my tank I'll post more details, likely it will get it's own thread. At which point I'll release the source to the community. It's based on a Raspberry Pi, and Arduino, and very inexpensive sensors/relay controllers.
Anyway, so that's where much of my time has been lately. Either due to scheduling issues with work, weather, or conflicting weekend plans, I've only had small bursts of time to work on the tank. So unfortunately the remaining woodworking/cabinetry has had to wait. But the controller development was something that aligns with my core skills well, and I can do in small bites...
In addition I've done minor tweaks/adjustments:
Just yesterday I introduced the inverts to the DT. They are now doing fine.
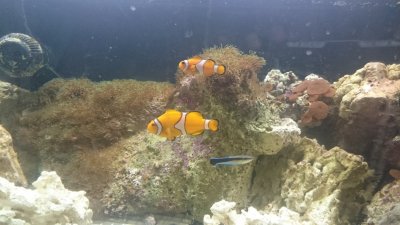
We also bought a bonded pair of Percula Clowns. They are in my friends QT tank now.
So I'm letting things settle with the inverts I added, and in a little bit when the QT process is done I'll add the clowns to the tank.
So far water continues to test perfect. Parameters are stable at:
Ammonia - 0 (none detectable)
Nitrite - 0 (none detectable)
Nitrate - 0 (none detectable)
Phosphate - 0 (none detectable)
PH - 8.0 - 8.1 (hard to tell exactly)
Have yet to test alkalinity, and Calcium/magnesium. Will buy some more test kits next.
Will try to get some good pics of the new critters and post them here, as well as an updated overall pic of the setup (not that much has changed since before).
Sorry for the silence! Will update again soon!
I'd gotten quite busy, and so the "build" portion was progressing slowly. Mainly just waiting on the cycle, testing water, and such...
But...
Cycle completed last week. We've been consistantly at 0 Ammonia, 0 Nitrite, and 0 Nitrate. We've increased ammonia sources, to test it, and it's been able to maintain it well at 0.
We did end up dosing some bottled bacteria, we went with the "Seed" product from Seachem's Aquavitro line. And I can say we had great results from it. Not only did it boost the cycle, but my water is now prestine... (testing 0 Nitrate, and 0 Phosphates as well)
Anyway, we've let that sit for a bit to be sure...
In the meantime, I've been working on designing my own Controller. Which I intend to fully Open Source. It's coming along nicely, but isn't quite ready for even rudimentary testing yet. Once I can fire it up in my tank I'll post more details, likely it will get it's own thread. At which point I'll release the source to the community. It's based on a Raspberry Pi, and Arduino, and very inexpensive sensors/relay controllers.
Anyway, so that's where much of my time has been lately. Either due to scheduling issues with work, weather, or conflicting weekend plans, I've only had small bursts of time to work on the tank. So unfortunately the remaining woodworking/cabinetry has had to wait. But the controller development was something that aligns with my core skills well, and I can do in small bites...
In addition I've done minor tweaks/adjustments:
- Added ATO and got it setup. It's actually an MTO right now (manual top off) because the ATO basin is full, and has a pump which tops off the sump, but it's controlled manually (waiting on my controller to be ready).
- Added Fuge lighting (cool white LED bar fixture)
- Had to replace my main return pump. Very happy with the one I got (Lifegard Aquatics 4000lph). It's dang-near silent, and has worked great since.
- The second day of zero Ammonia. I found a large amount of Copepods crawling all over the glass, both in Fuge,and DT.
- I got from my friend some Chaeto for the Fuge, light seems to be growing it.
- Along with the Chaeto, got some hitch-hikers. Namely:
- 3 small brittle stars (which I was able to catch and get up into the DT)
- a couple Asterina Stars
- A couple snails (still in the fuge)
- He also grabbed a small piece of GSP which had broken off, and he was going to get rid of. So I am trying to nurse it to health, and attach it to a stand-alone rock in the DT so it won't over-grow everything. So far it's doing quite well, last couple days it's seeming to get healthier. (polyps extending further, getting more "plump" and greener, they were a light brown when I got it).
- A few tiny blue legged hermits
- Some Nassarius Snails (didn't get any pure algae snails, as I have no algae yet)
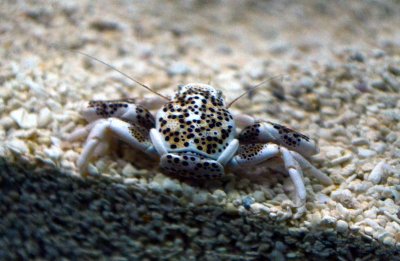
- A Porcelain Crab (he was just too neat lol)
Just yesterday I introduced the inverts to the DT. They are now doing fine.
We also bought a bonded pair of Percula Clowns. They are in my friends QT tank now.
So I'm letting things settle with the inverts I added, and in a little bit when the QT process is done I'll add the clowns to the tank.
So far water continues to test perfect. Parameters are stable at:
Ammonia - 0 (none detectable)
Nitrite - 0 (none detectable)
Nitrate - 0 (none detectable)
Phosphate - 0 (none detectable)
PH - 8.0 - 8.1 (hard to tell exactly)
Have yet to test alkalinity, and Calcium/magnesium. Will buy some more test kits next.
Will try to get some good pics of the new critters and post them here, as well as an updated overall pic of the setup (not that much has changed since before).
Sorry for the silence! Will update again soon!
Awesome glad to hear it's coming along. Sounds like you'll have some good update pics soon
- Joined
- Mar 24, 2016
- Messages
- 232
- Reaction score
- 244
Similar threads
- Replies
- 9
- Views
- 202
- Replies
- 6
- Views
- 225
- Replies
- 12
- Views
- 240
- Replies
- 4
- Views
- 180


