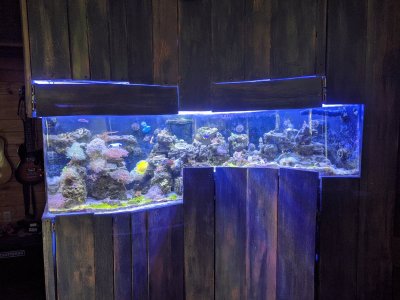
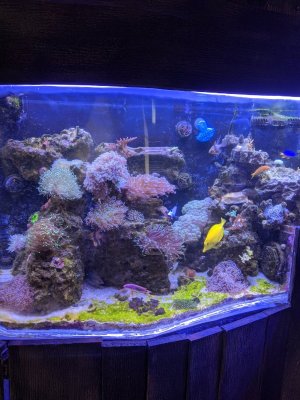
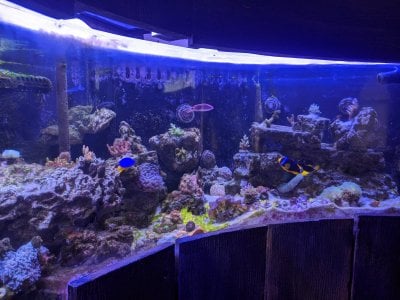
Lol can't help but help others push the diy boundaries. I love those odd shape tanks <3I had a feeling you'd find this thread...
Navigation
Install the app
How to install the app on iOS
Follow along with the video below to see how to install our site as a web app on your home screen.
Note: This feature may not be available in some browsers.
More options
You are using an out of date browser. It may not display this or other websites correctly.
You should upgrade or use an alternative browser.
You should upgrade or use an alternative browser.
DIY Fish Tank Via Epoxy?
- Thread starter dimik
- Start date
- Tagged users None
Yer it's very interesting. I don't think this is impossible, but will require a good skill set to get it looking proper. I hope it works, as it would be the first 1 piece tank I've seen.Lol can't help but help others push the diy boundaries. I love those odd shape tanks <3
Certainly beyond my skill set... it took me a month to get my crapy cabinet done... lol
Hows your pico?
Any ideas as how to pour it as 1 piece?Lol can't help but help others push the diy boundaries. I love those odd shape tanks <3
It's pretty unchanged, lol. trying to get in coral maximini nems etc and hold them in the sump to be added a little at a time as I watch to ensure everything is doing ok. I could probably add everything in one go but feel like if one frag is sick or got fragged poor and not healed it could crash the entire delicate system, so there's alot of stock hanging in the frag tank in anticipation right now and no real change in the pico. I guess that's good tho or better than it crashing.Yer it's very interesting. I don't think this is impossible, but will require a good skill set to get it looking proper. I hope it works, as it would be the first 1 piece tank I've seen.
Certainly beyond my skill set... it took me a month to get my crapy cabinet done... lol
Hows your pico?
Following along. Wondering if it will work.
It would be interesting to see result of the attempt.
It would be interesting to see result of the attempt.
Not really I've never got heavy into epoxy work. If this was my build I'd probably try for three pieces; bottom front and back. Then you could form in a way that allows air bubbles to be released with heat, form easy pours, and hide the seams In the corner(s). My limited experience is perfect seams isn't as important as perfect seam placementAny ideas as how to pour it as 1 piece?
But my main concern is that the epoxy may not truly be waterproof and you'd end up with a tank that would look like it was sweating out your water long term.
Gorgeous and so different! I will PM you if I do end up going acrylic. Thanks a ton for these photos and I appreciate you reaching out to help!
LOl then I'll have to build a sweat catch systemNot really I've never got heavy into epoxy work. If this was my build I'd probably try for three pieces; bottom front and back. Then you could form in a way that allows air bubbles to be released with heat, form easy pours, and hide the seams In the corner(s). My limited experience is perfect seams isn't as important as perfect seam placement
But my main concern is that the epoxy may not truly be waterproof and you'd end up with a tank that would look like it was sweating out your water long term.
I think the glass type resins will holdNot really I've never got heavy into epoxy work. If this was my build I'd probably try for three pieces; bottom front and back. Then you could form in a way that allows air bubbles to be released with heat, form easy pours, and hide the seams In the corner(s). My limited experience is perfect seams isn't as important as perfect seam placement
But my main concern is that the epoxy may not truly be waterproof and you'd end up with a tank that would look like it was sweating out your water long term.
Not sure if the manufacturer would have any test data for holding water as the product was not intended for that purpose. But that doesn't necessarily mean it wont hold water without looking like its sweating.Wow that must be a nice looking tank!
Your thinking is correct which is why this project may not happen. I've asked the company for the science behind holding water & also how strong their epoxy is at .5" thick in terms of compression, flexibility and tensile strength. Depending on their answer I'll see how to proceed.
If they don't know I'll have to build a 10G tank and run it for a year before taking on a large tank project. Again, if people are making huge tanks from plywood I don't see why epoxy wouldn't hold up 100x better.
- Joined
- Apr 2, 2019
- Messages
- 4,654
- Reaction score
- 6,040
I'm curious how many of the naysayers here have actually ever done any epoxy resin projects where you actualy build something out of it (not just coat something). My wife has been doing thjs for a while and it's plenty strong (if thick enough of course) and I can't think of any reason why it wouldnt work (although keeping the bubbles out would be tough). The only real argument I see here is if it's truly waterproof. I imagine it is but let's see a small test!
Don’t know if it would be worth the price, but have you looked at a vacuum degassing chamber? You mix up the epoxy and put it in the vacuum before casting. It pulls all the micro bubbles from mixing out. I know lots of silicon casters and other mixed resin casters love them for helping with bubbles.
Yepp I'm waiting impatiently for the test run. I honestly hope it does work just have reservations on making a huge tank without a test etc.I'm curious how many of the naysayers here have actually ever done any epoxy resin projects where you actualy build something out of it (not just coat something). My wife has been doing thjs for a while and it's plenty strong (if thick enough of course) and I can't think of any reason why it wouldnt work (although keeping the bubbles out would be tough). The only real argument I see here is if it's truly waterproof. I imagine it is but let's see a small test!
FWIW. A 4X8 sheet of 3/4 plexiglass G is around $500 from a wholesaler. 1/2" is around 350. 3/4 with top brace 24" high will result in zero bowing.
Never buy acrylic on the internet...or from tapp plastics. It is soooooooooo expensive online.
Never buy acrylic on the internet...or from tapp plastics. It is soooooooooo expensive online.
If i go the panel route I can also add a 1/4" notch along the each edge and inset it into the next panel pour. This way it doesn't only get a flat surface bond.
You should go the panel route...just build the forms using melamine boards and put down an oily spread so that you can remove the finished panel easier after it's cured..after you pour, just use a blow torch to remove all the bubbles and your in business...I would probably create a brace for the bottom and top though. This can certainly be done and it wouldn't cost an arm and leg in epoxy.
I use epoxy to build my fishing rods and the key to getting no air bubbles is mixing it slowly and applying some sort of heat to it. I usually use a lighter or a heat gun. I don’t know how you would do that on this scale though. I would suggest making like a 5 gallon test tank to test it and see how many bubbles are in the finished product. If you casted each wall separately you could probably just run a heat gun across it and pour it slowly.
Blow torch works great...much better than a heating gun but even that would work... melamine boards are perfect to crate the mold.
Omg I LOVE it!!!!
Similar threads
- Replies
- 1
- Views
- 186


